|
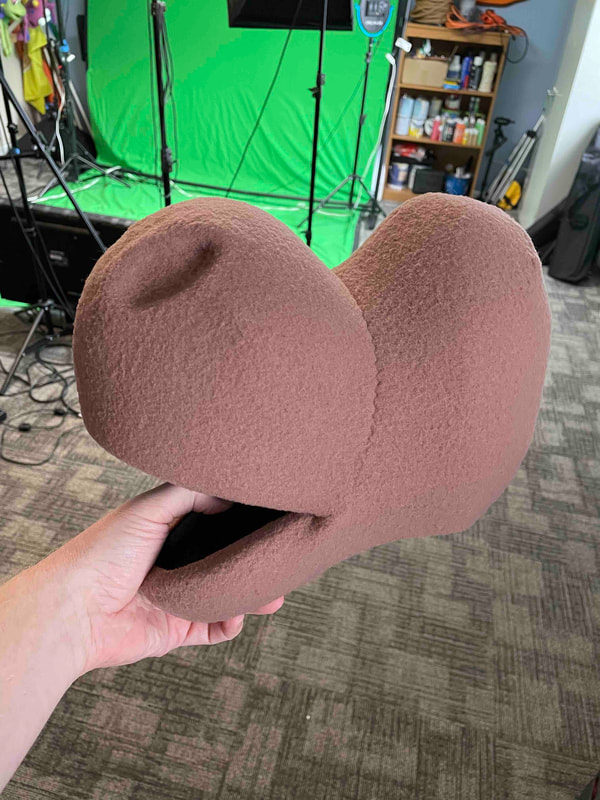
This is being posted 2 years late! I actually built Mr. Foot in May of 2022! Whoops! In any case, here are some process photos!
0 Comments
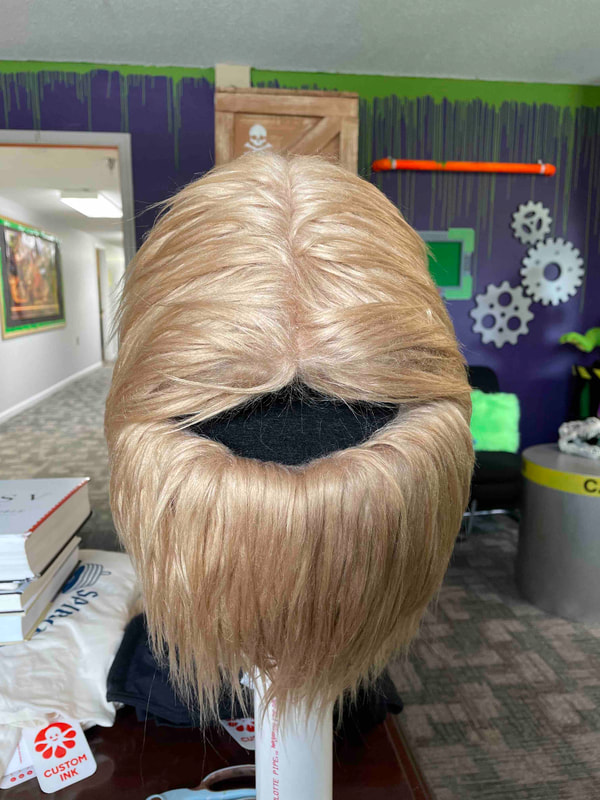
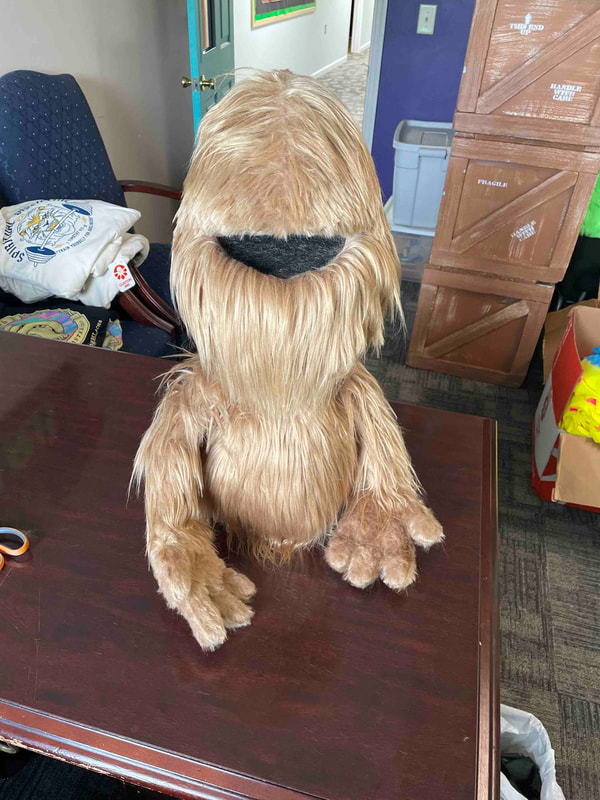
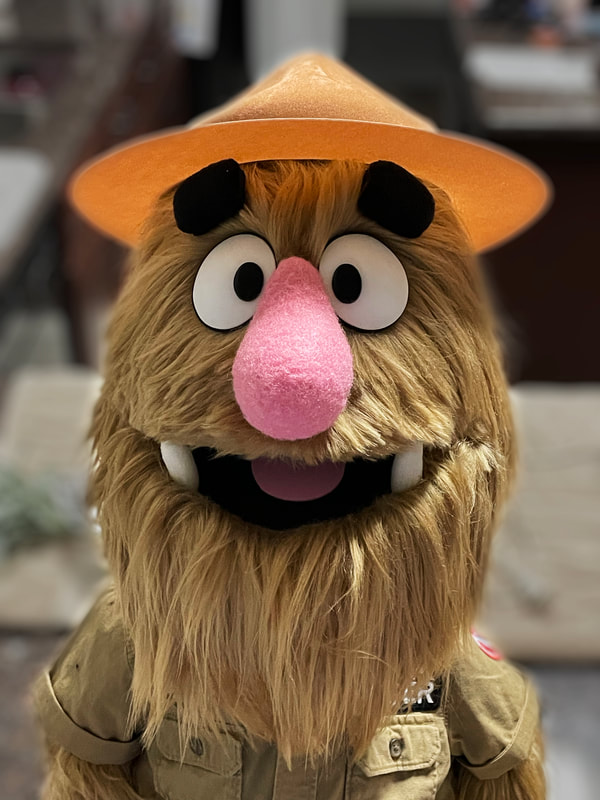
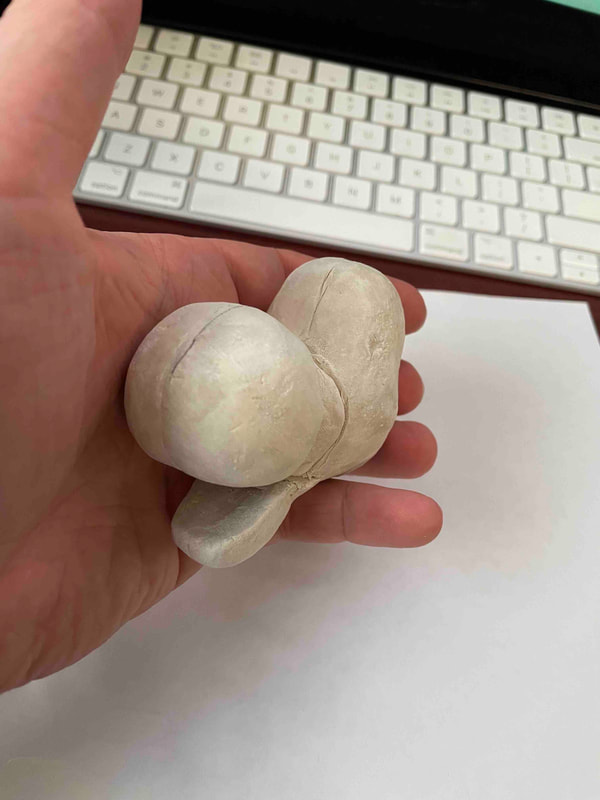
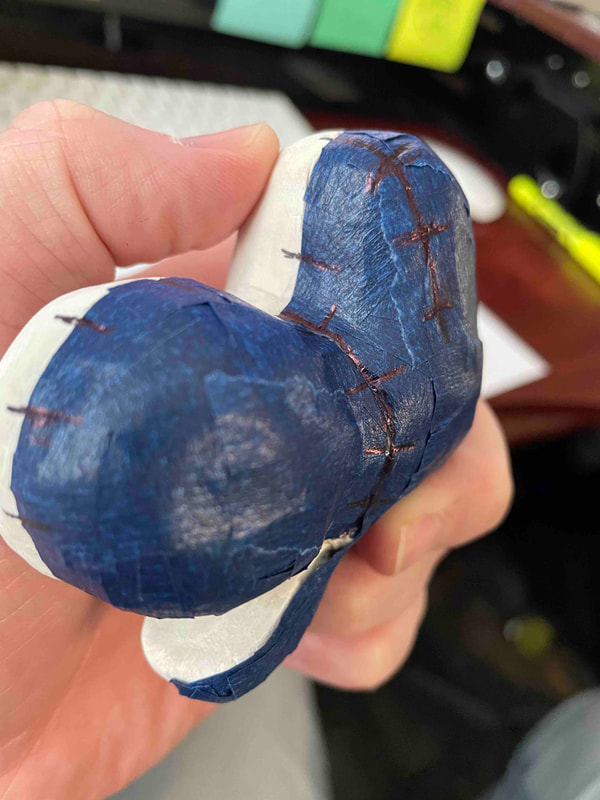
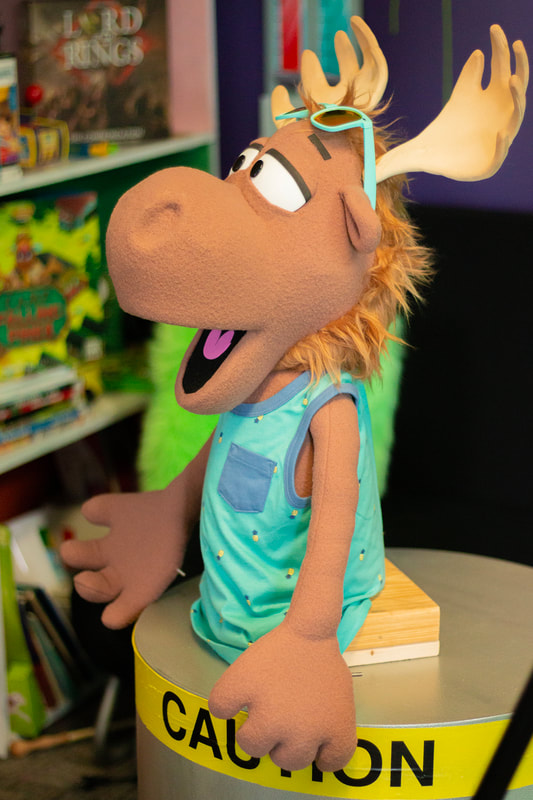
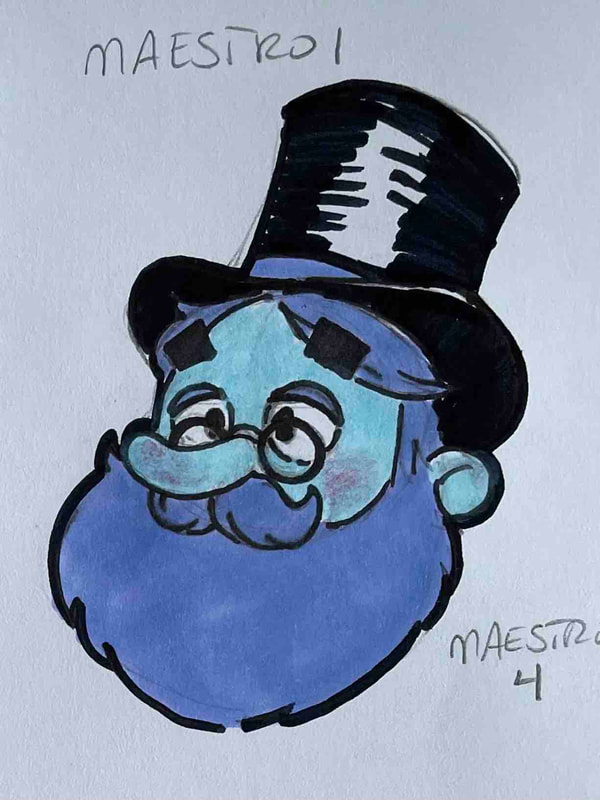
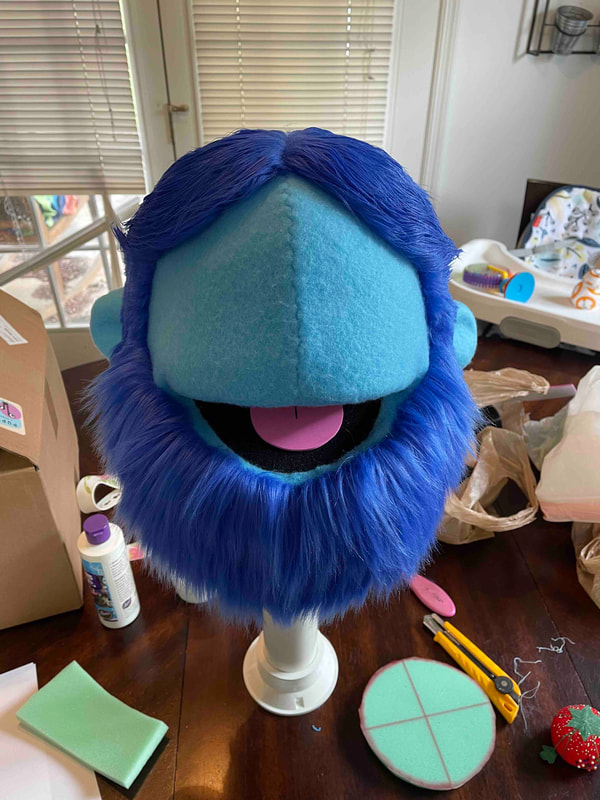
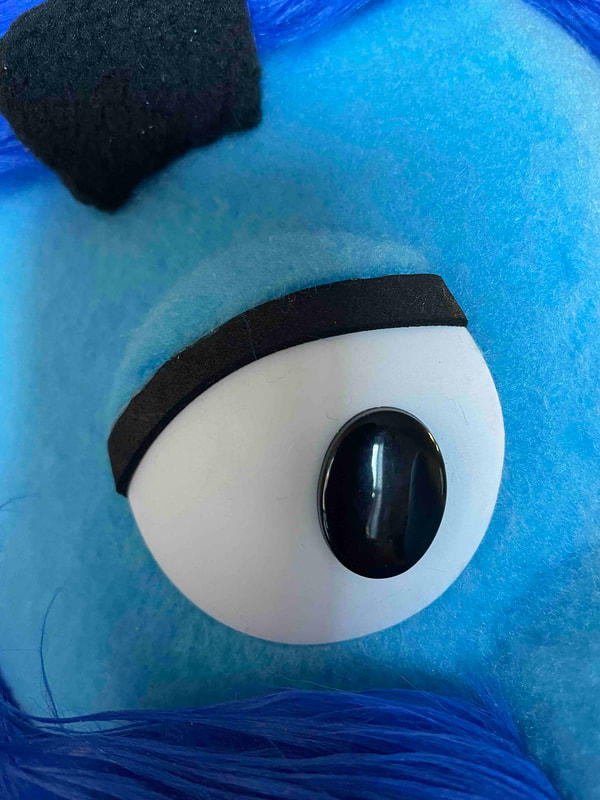
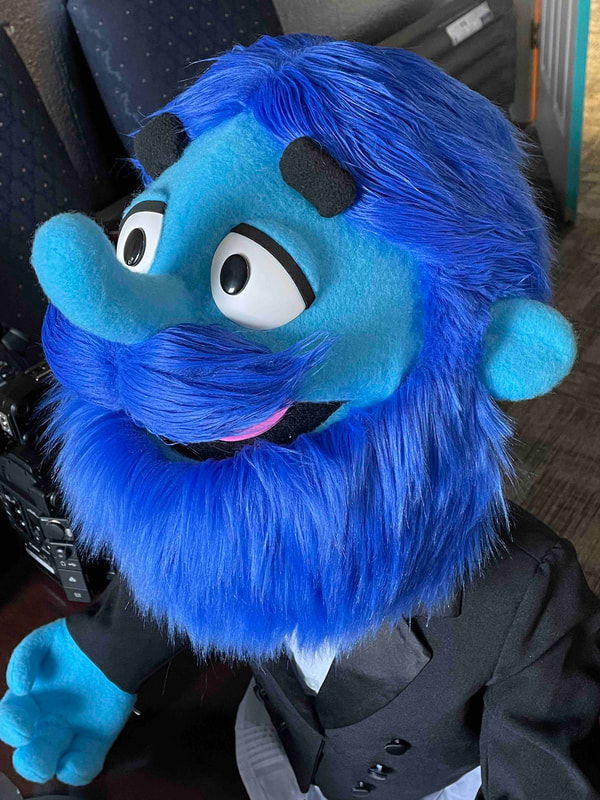
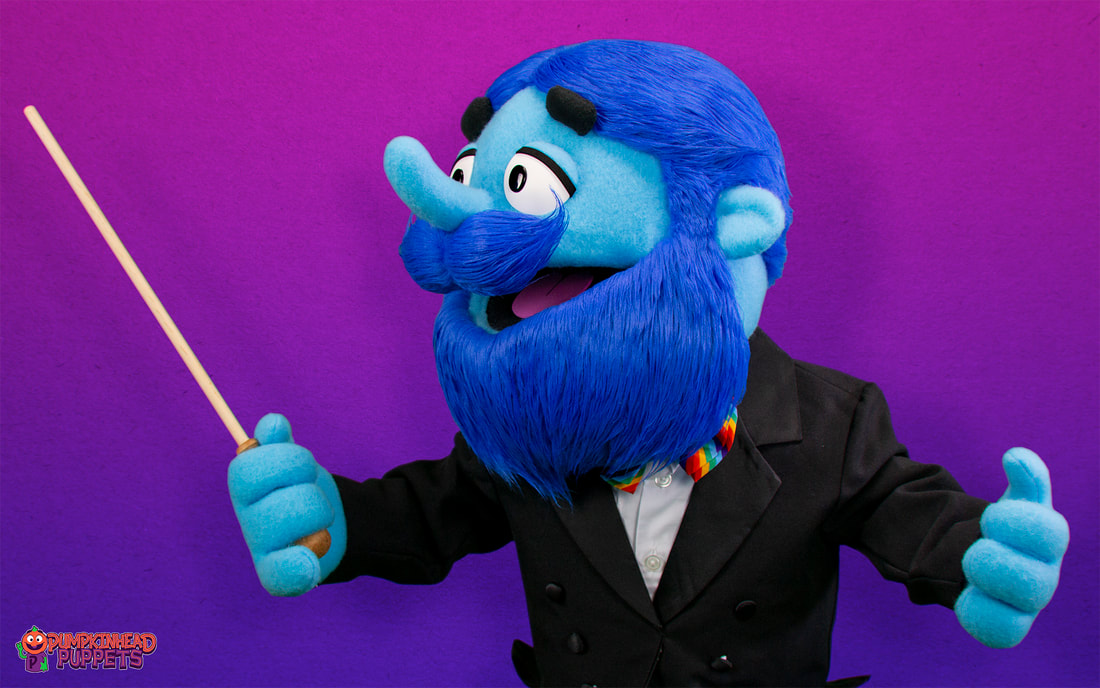
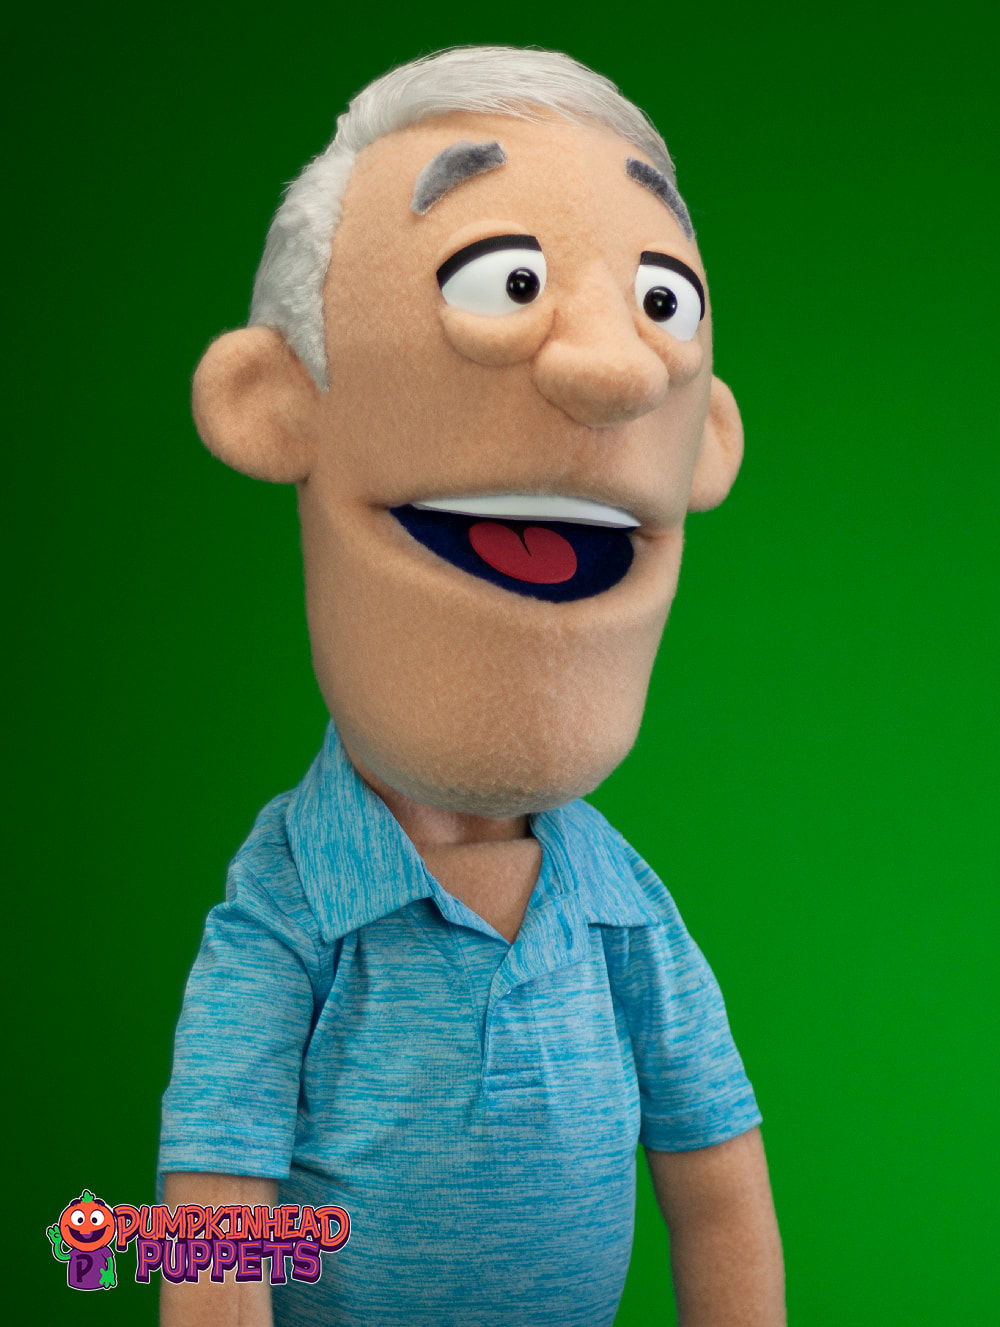
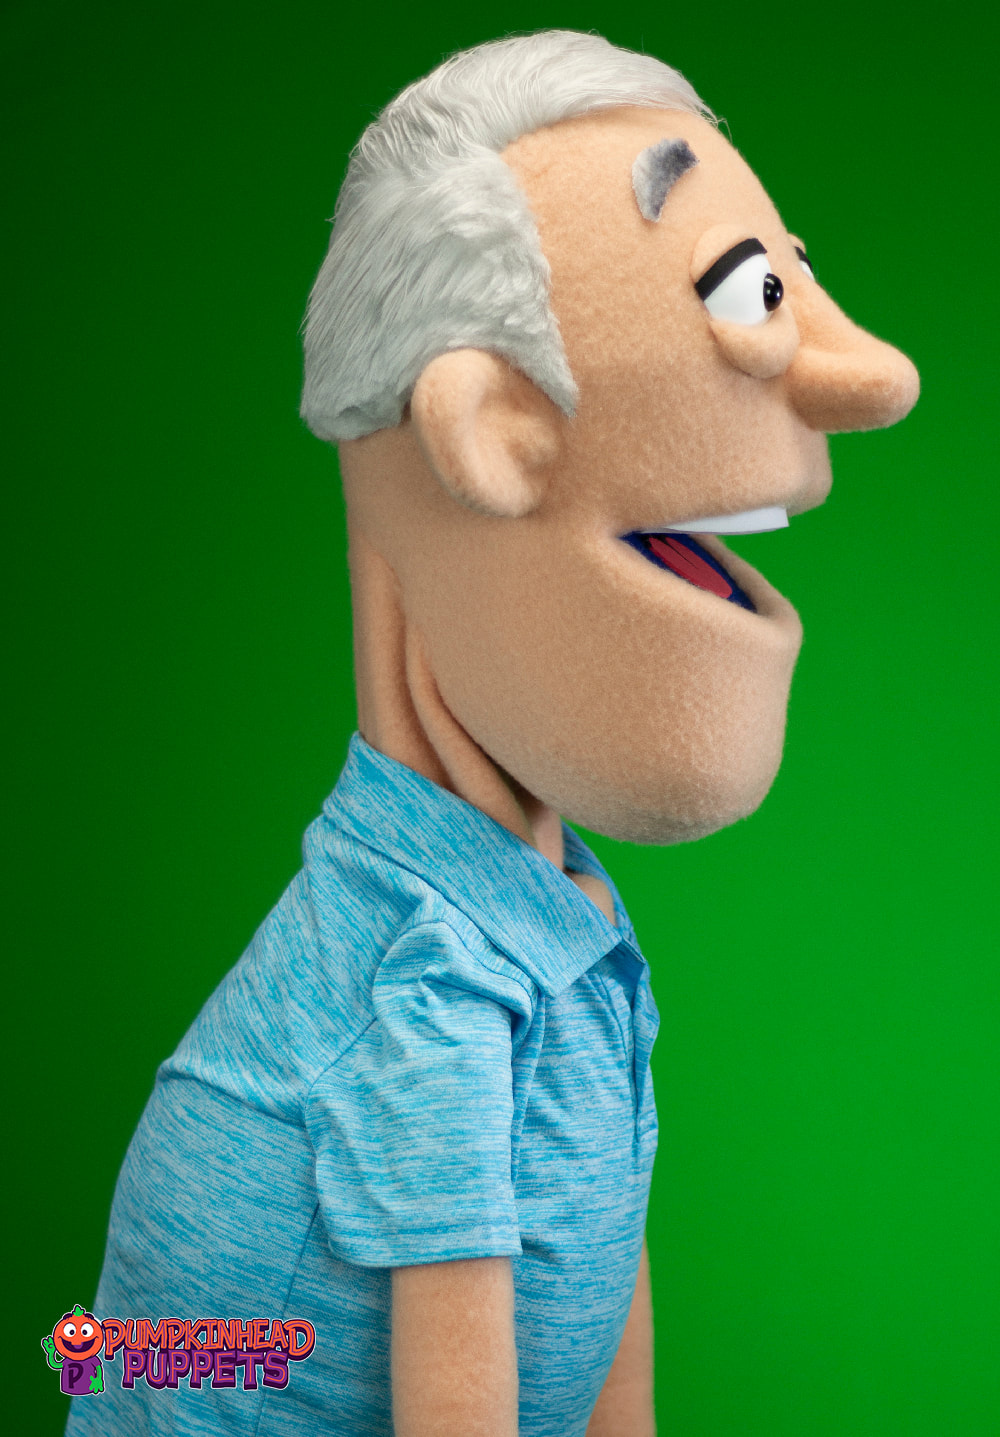
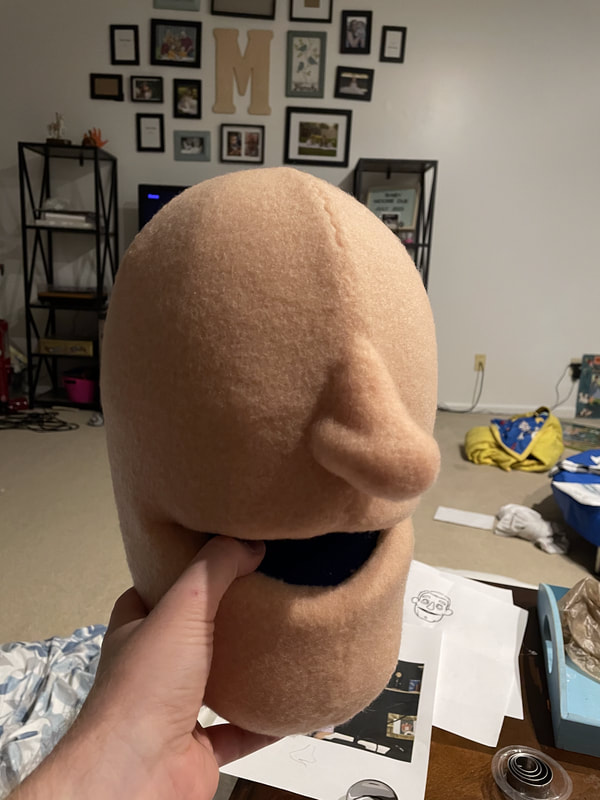
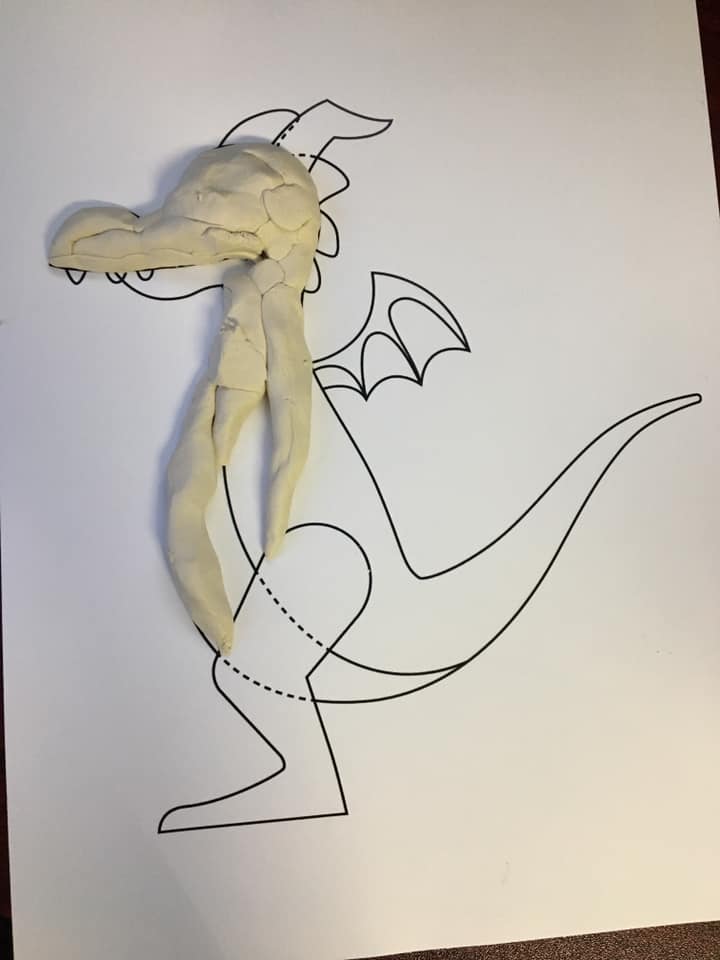
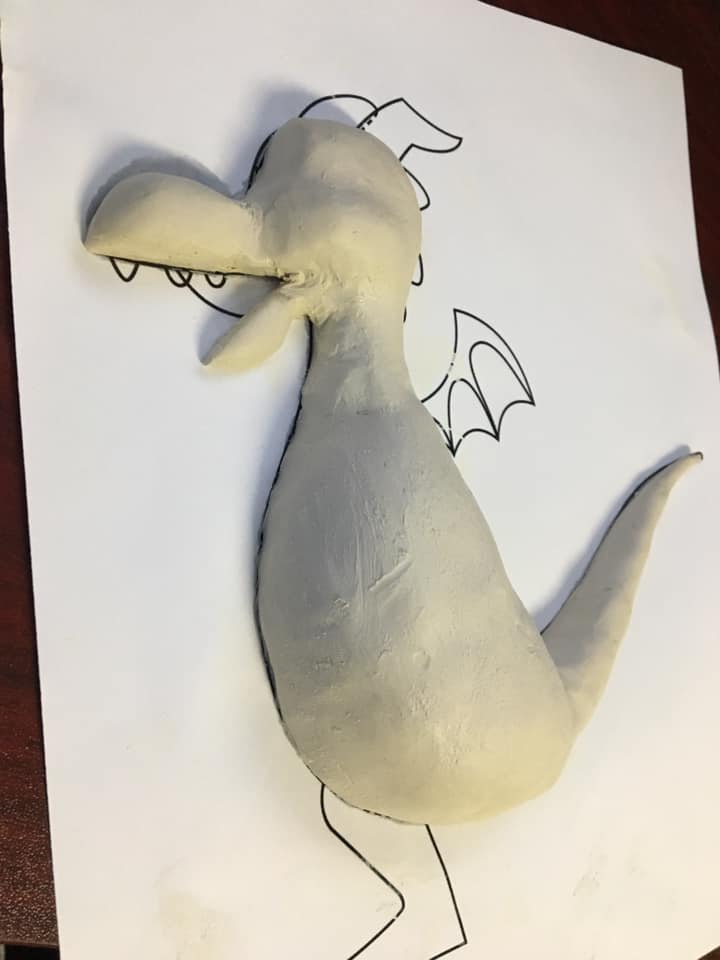
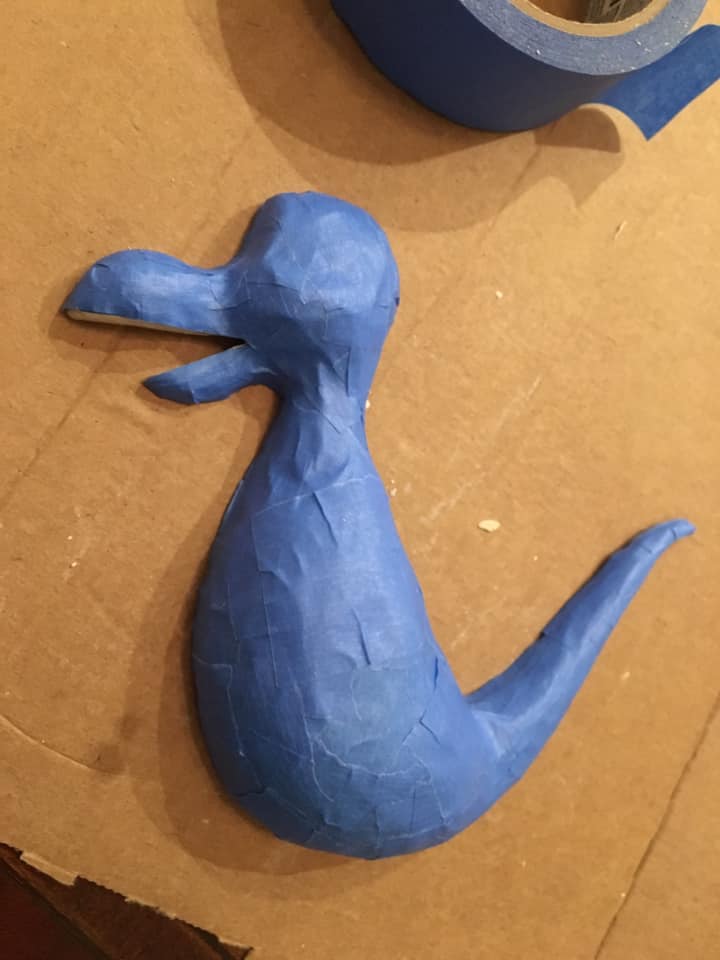
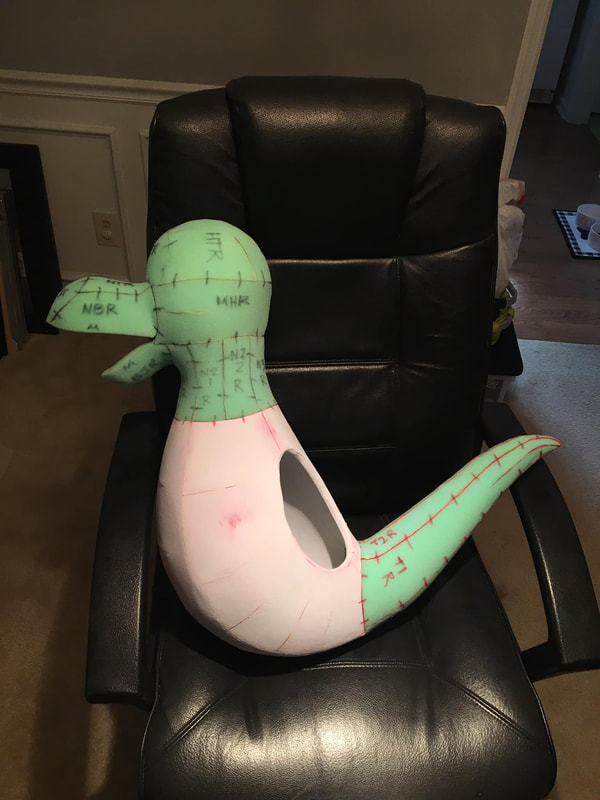
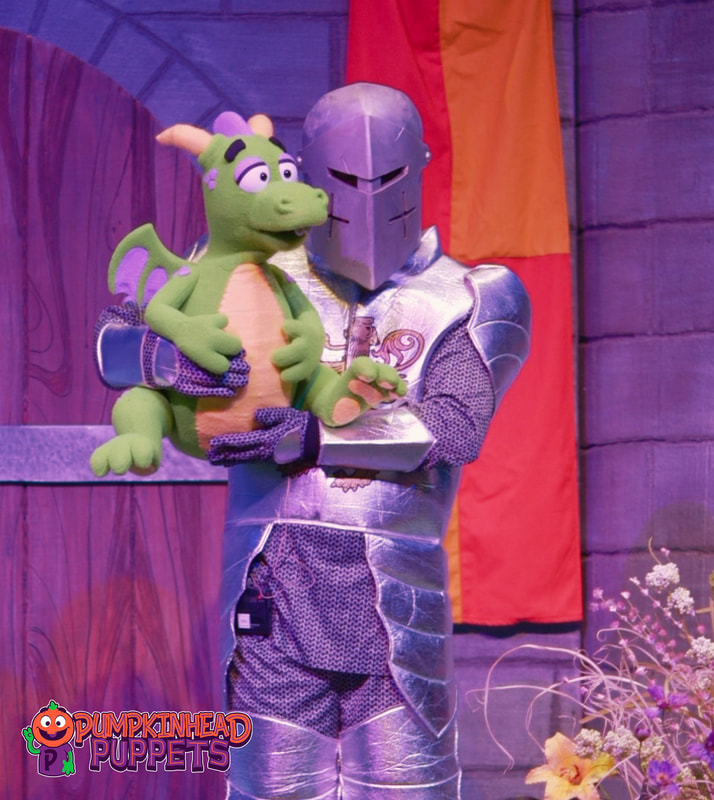
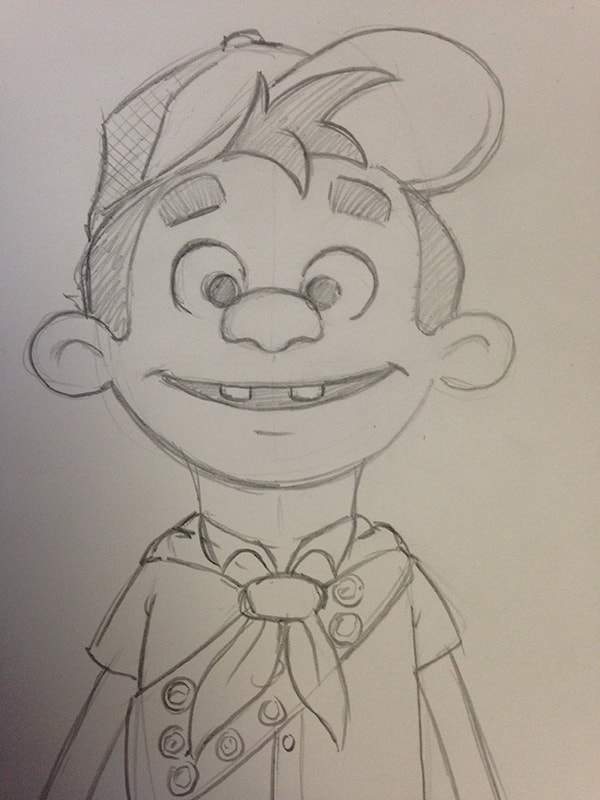
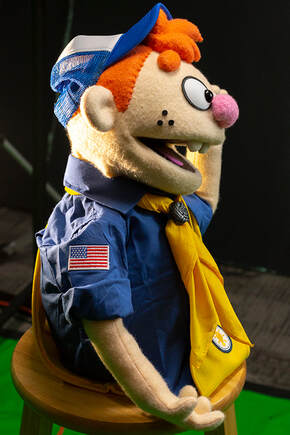
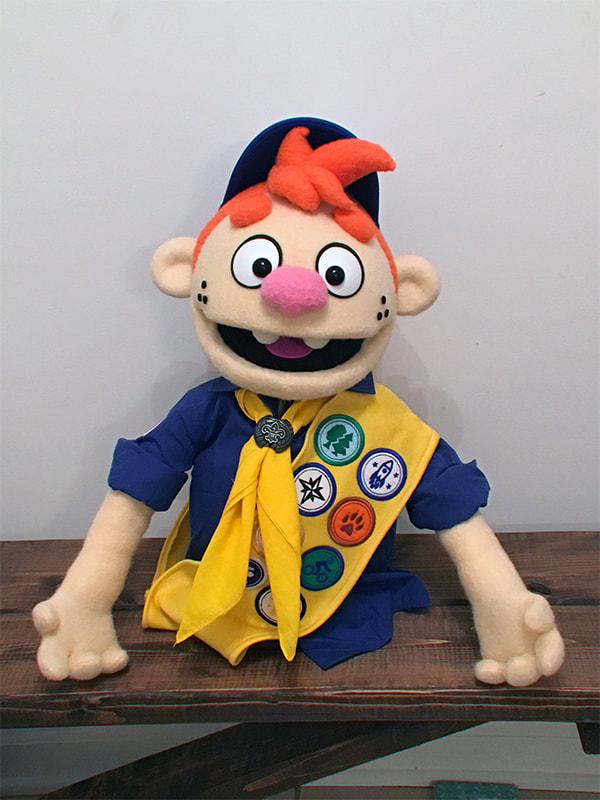
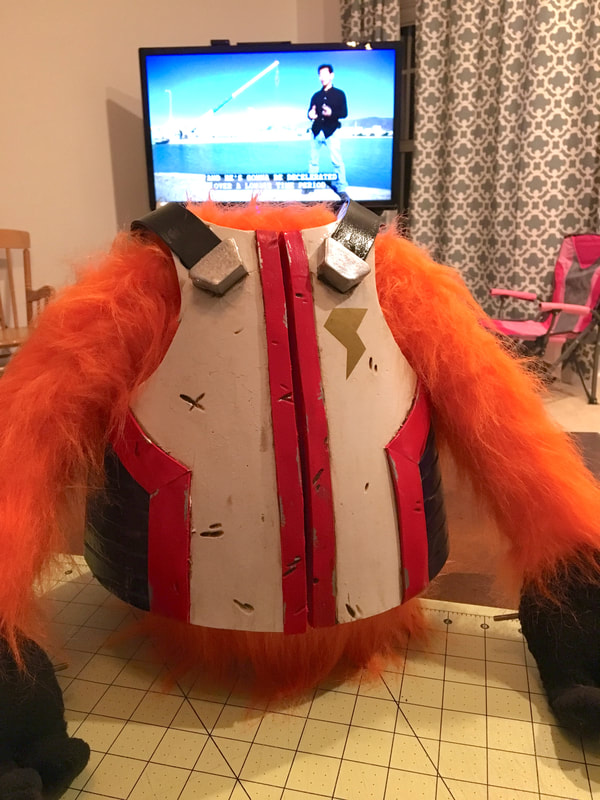
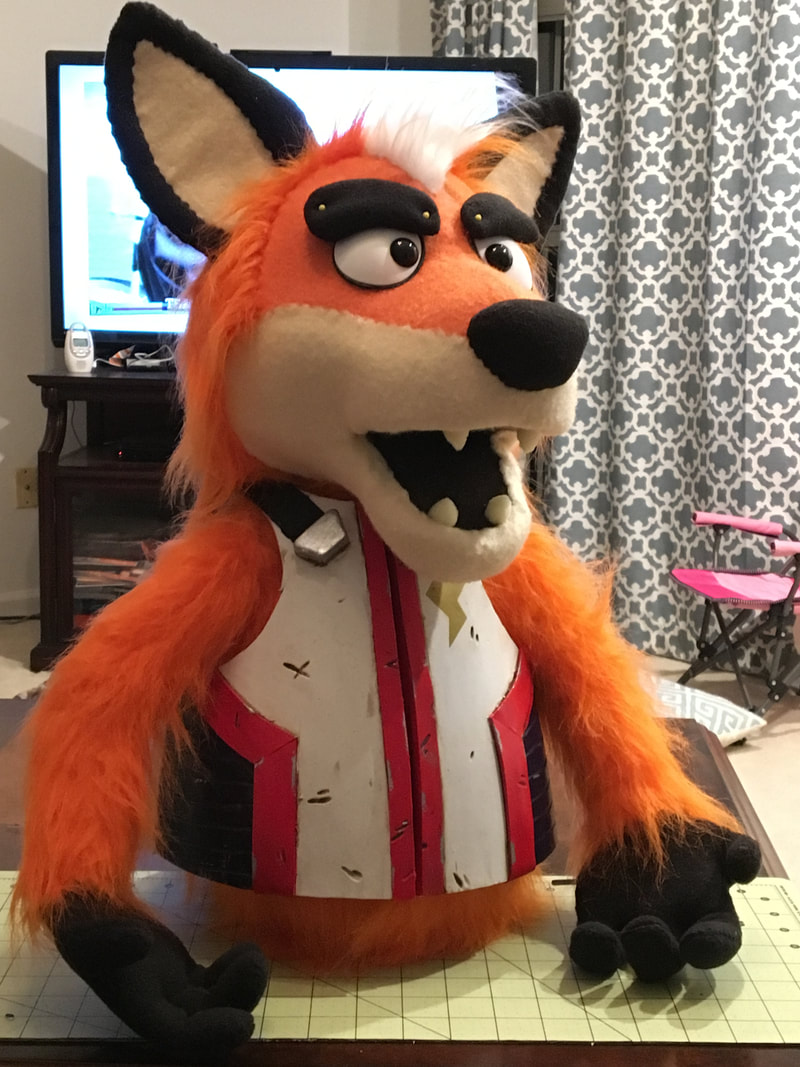
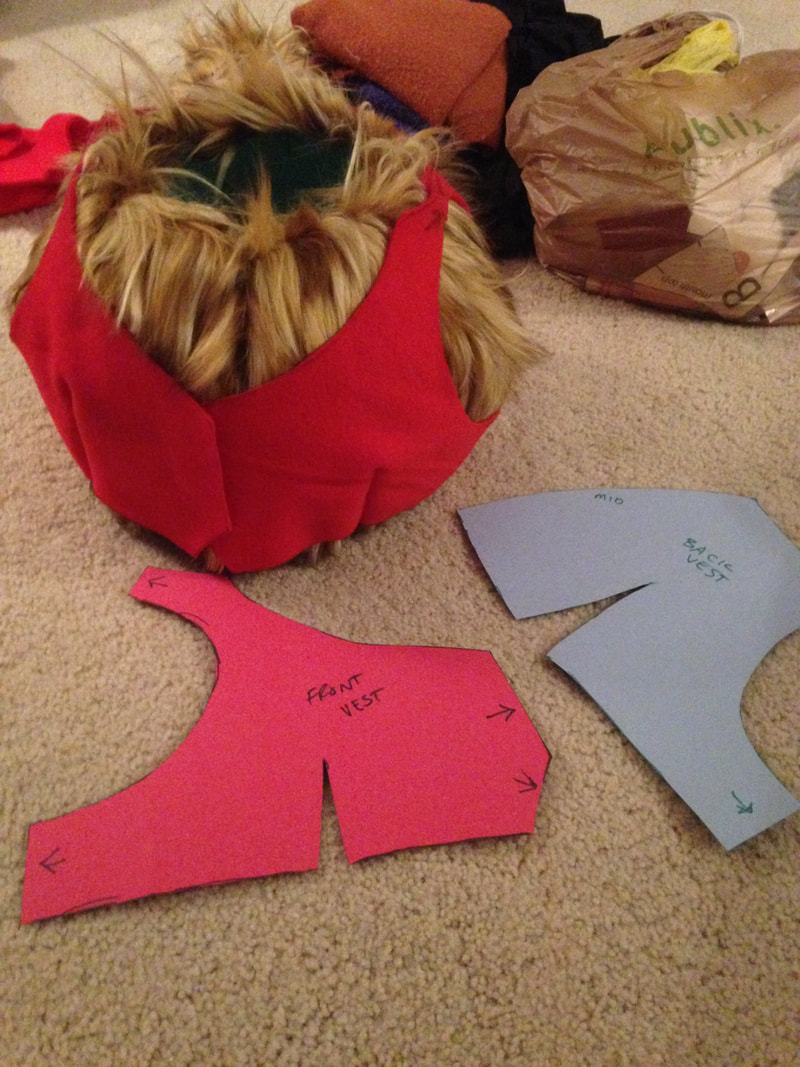
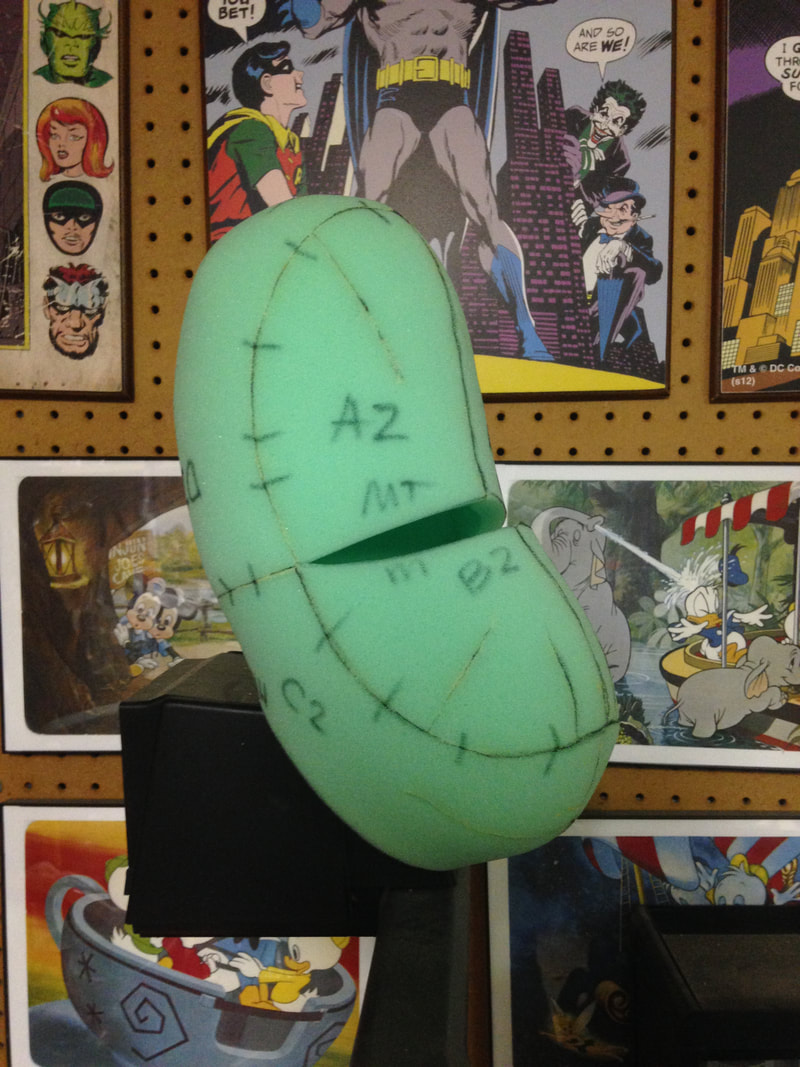
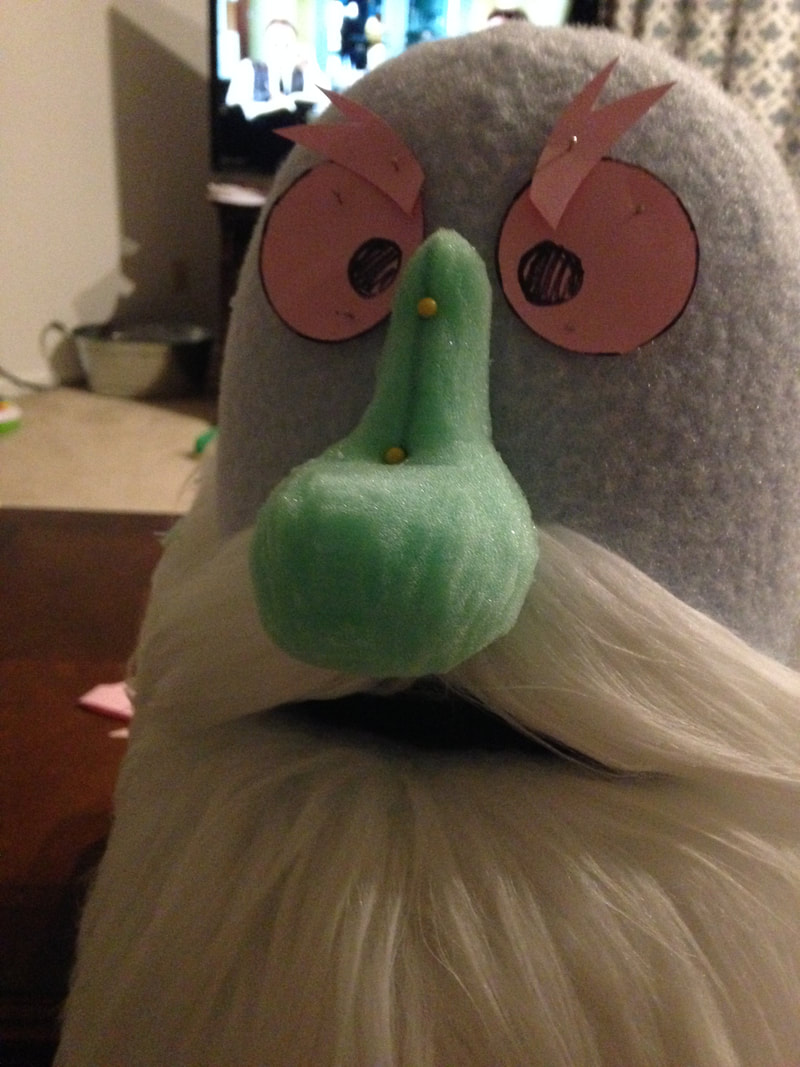
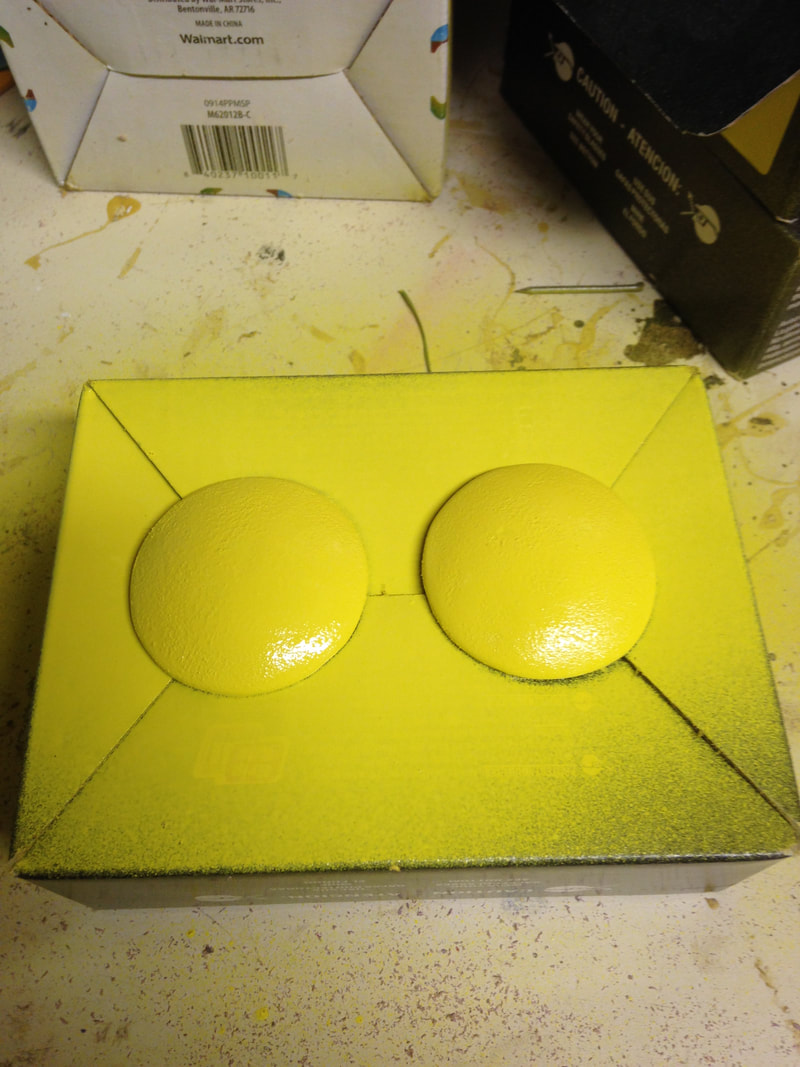
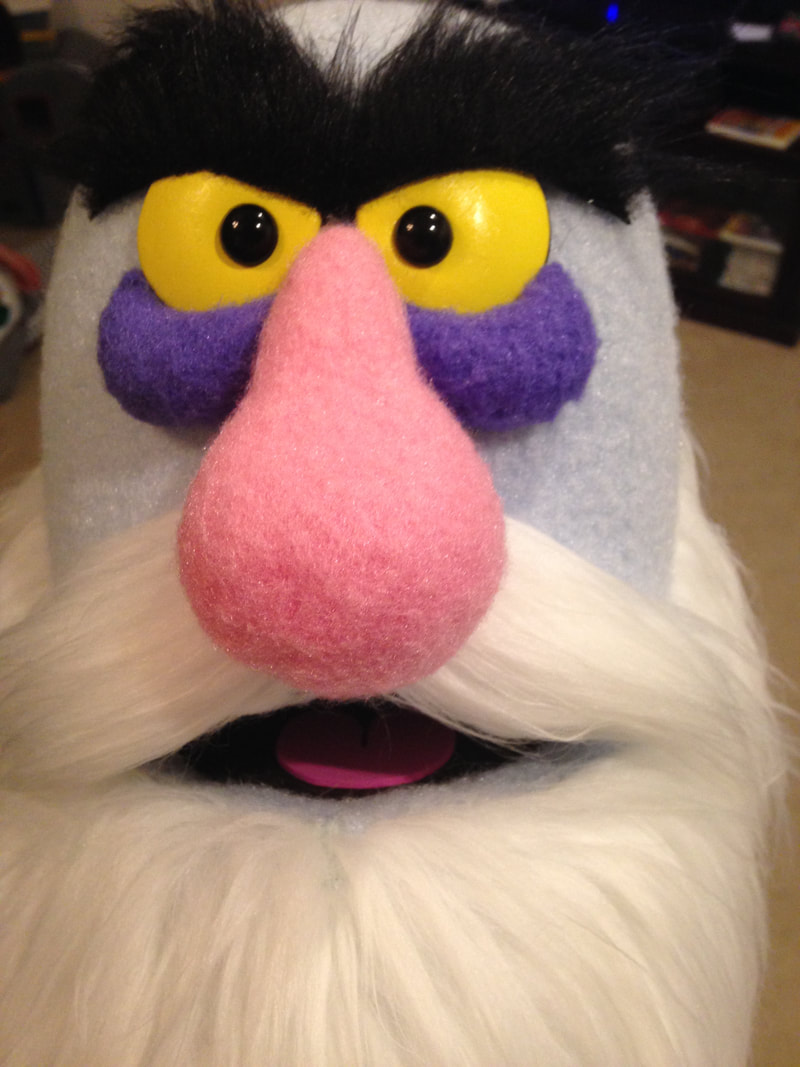
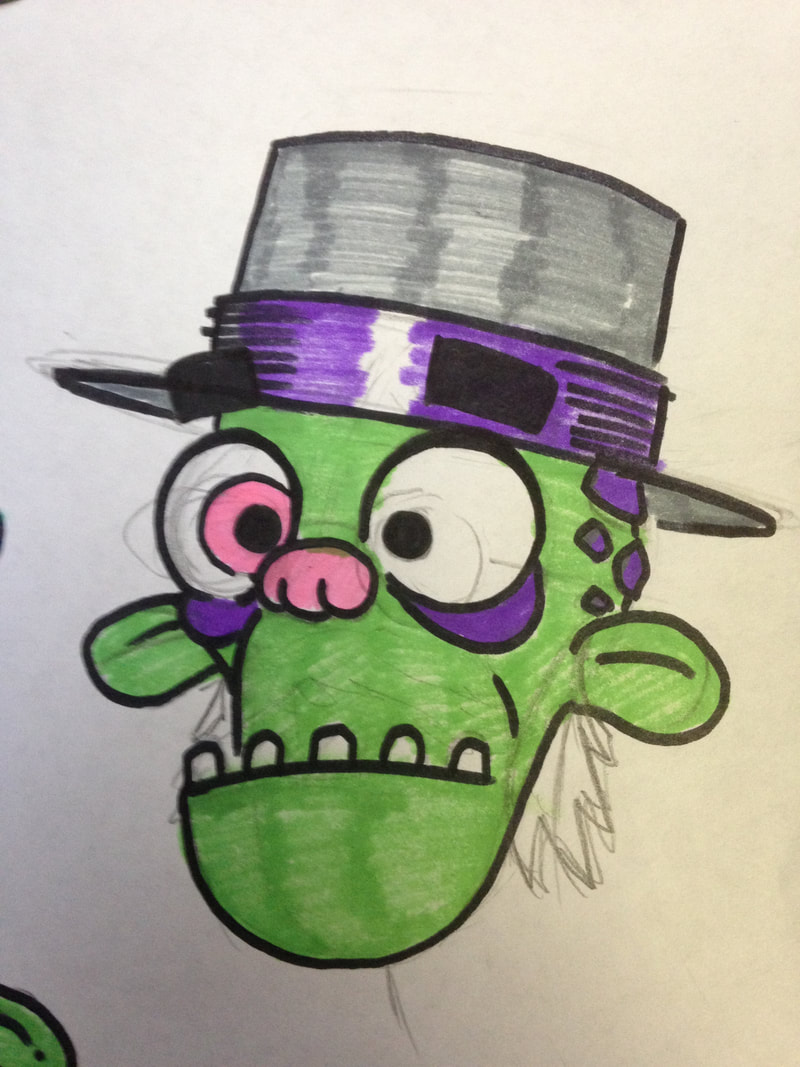
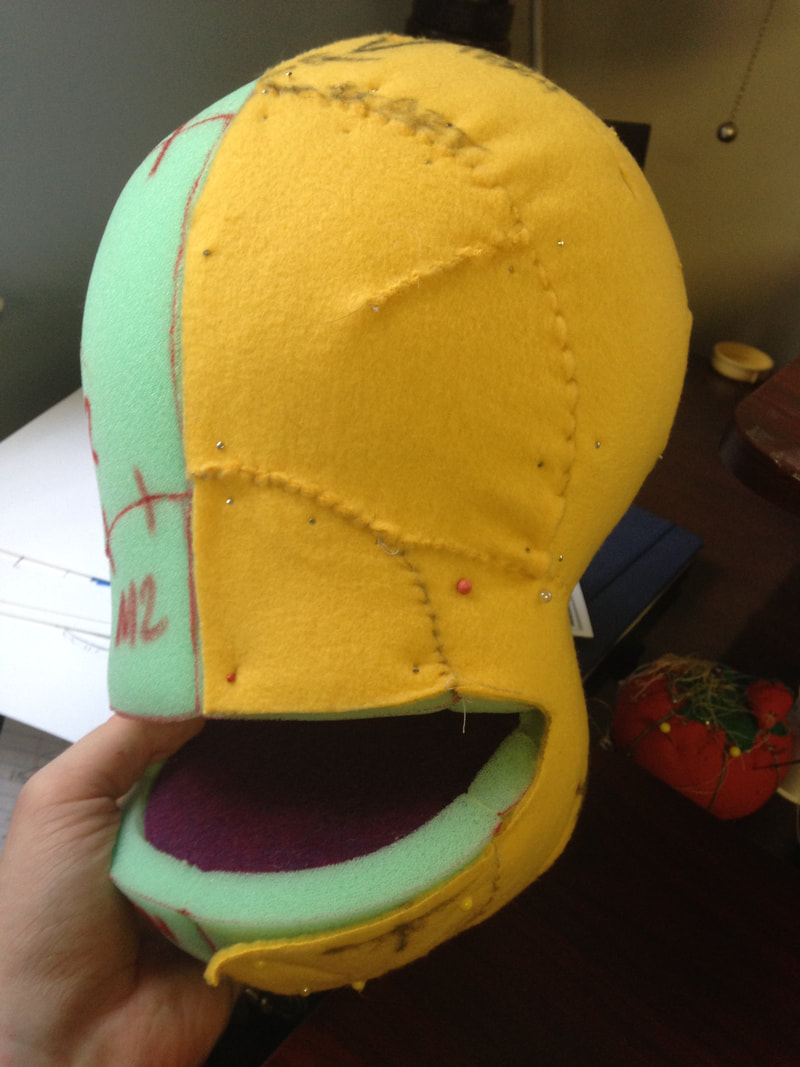
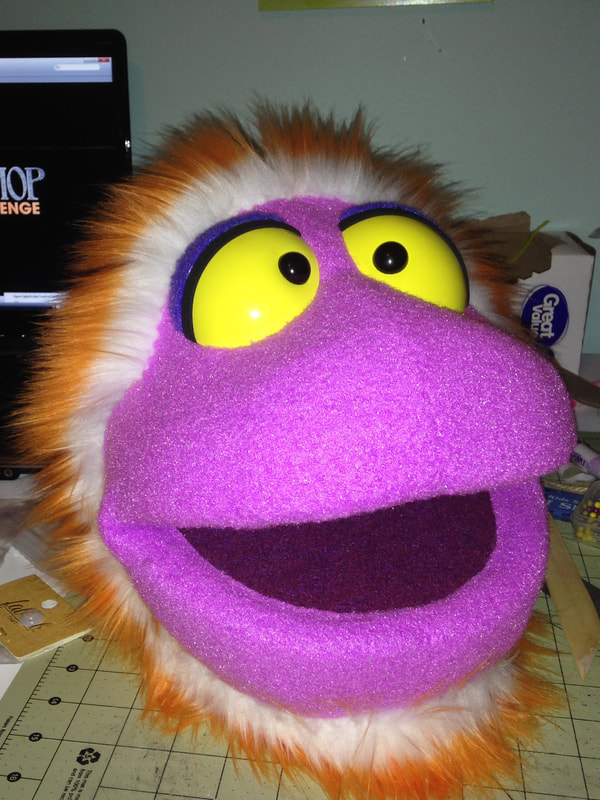
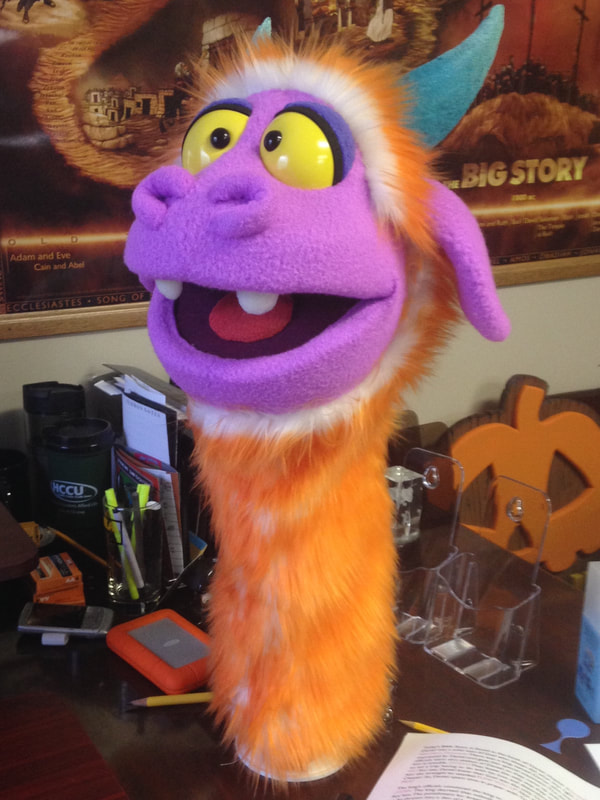
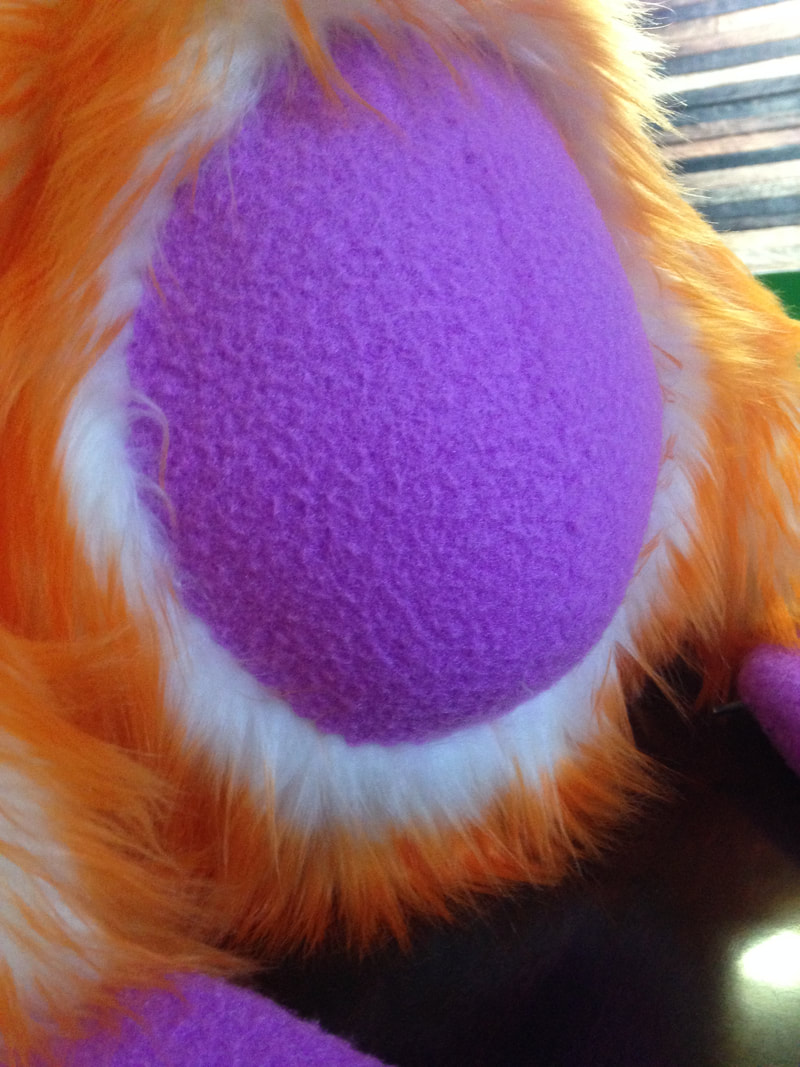
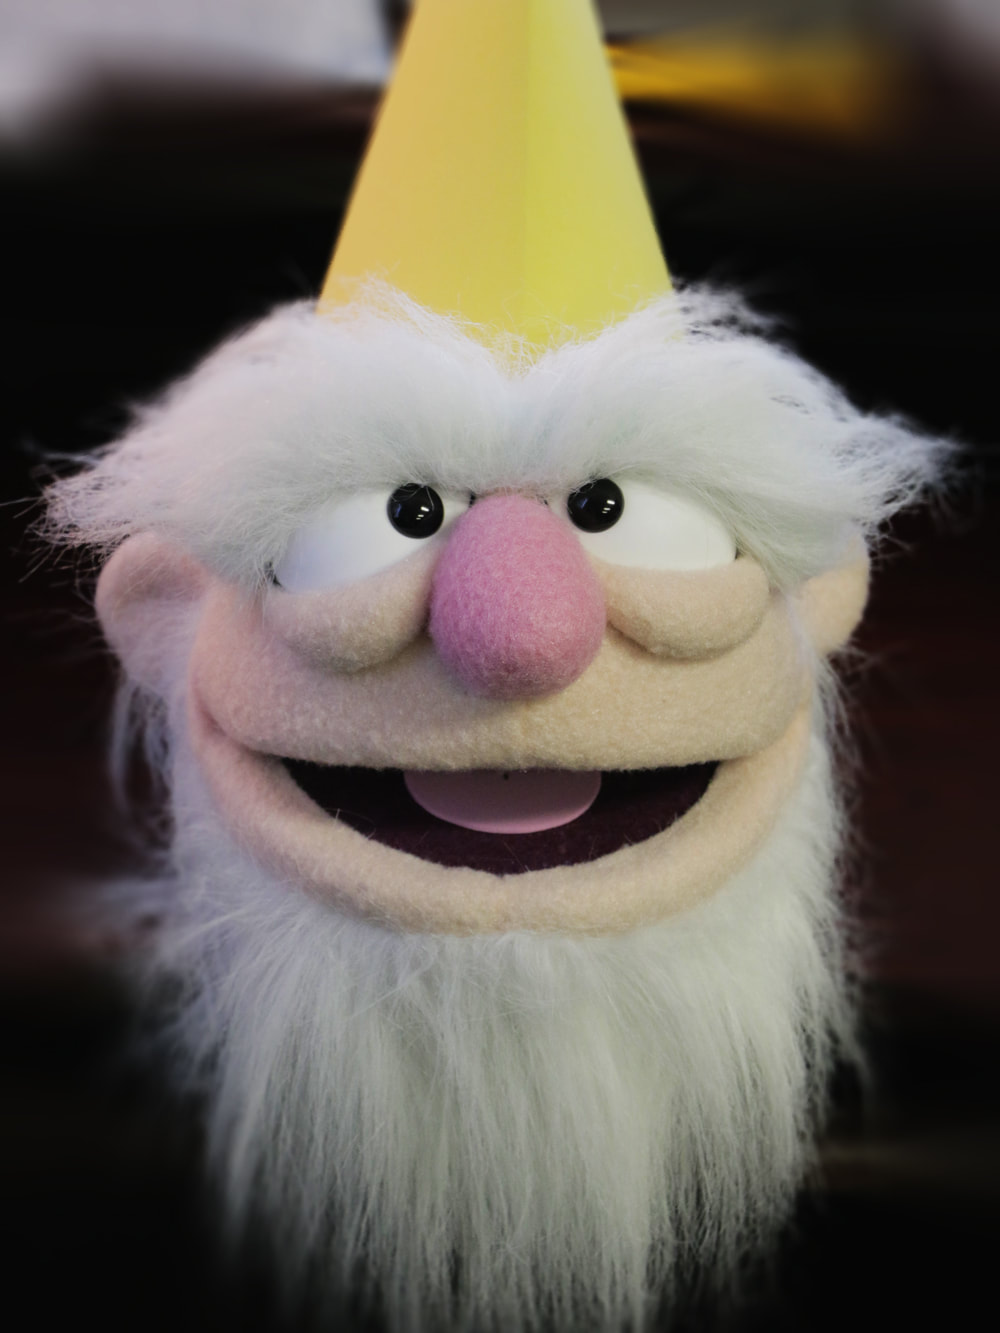
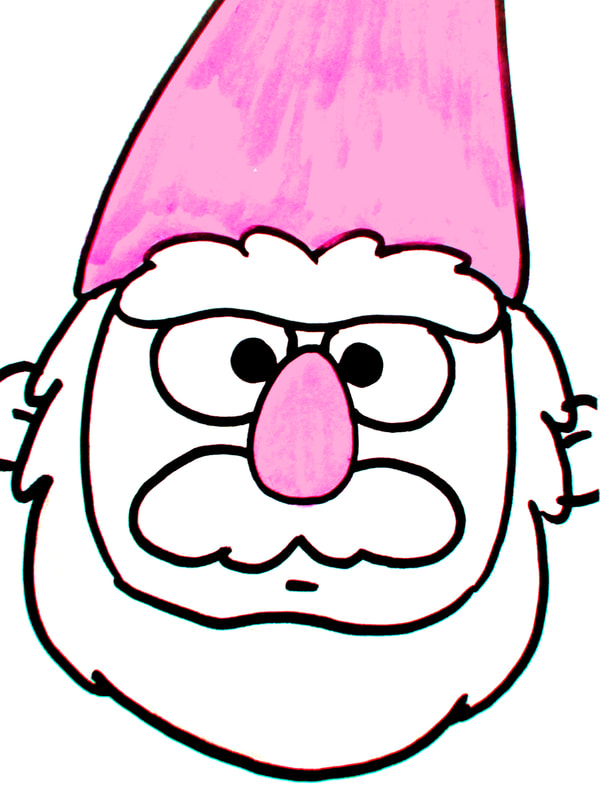
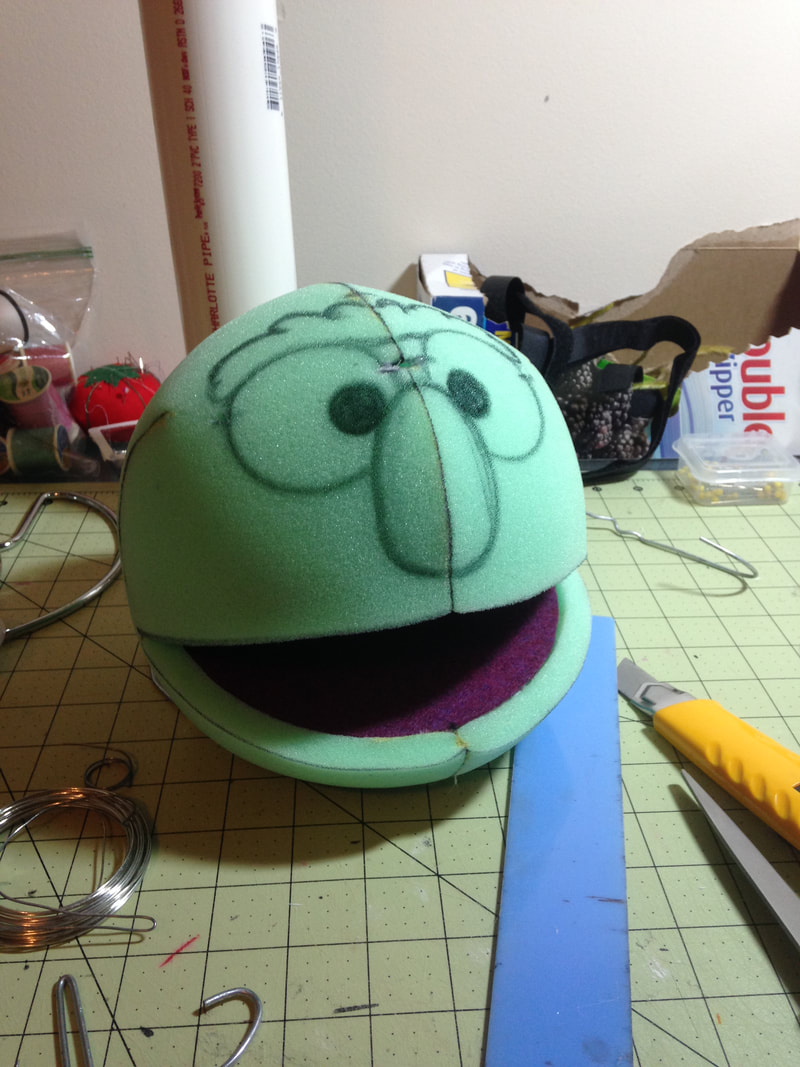
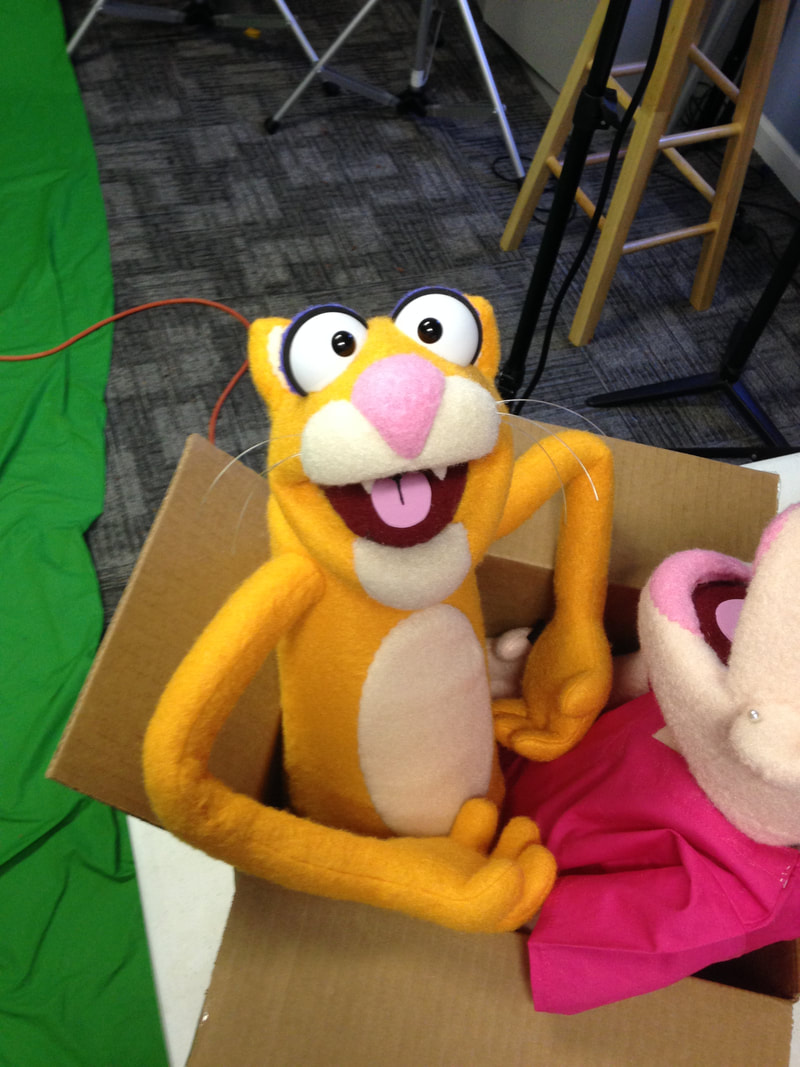
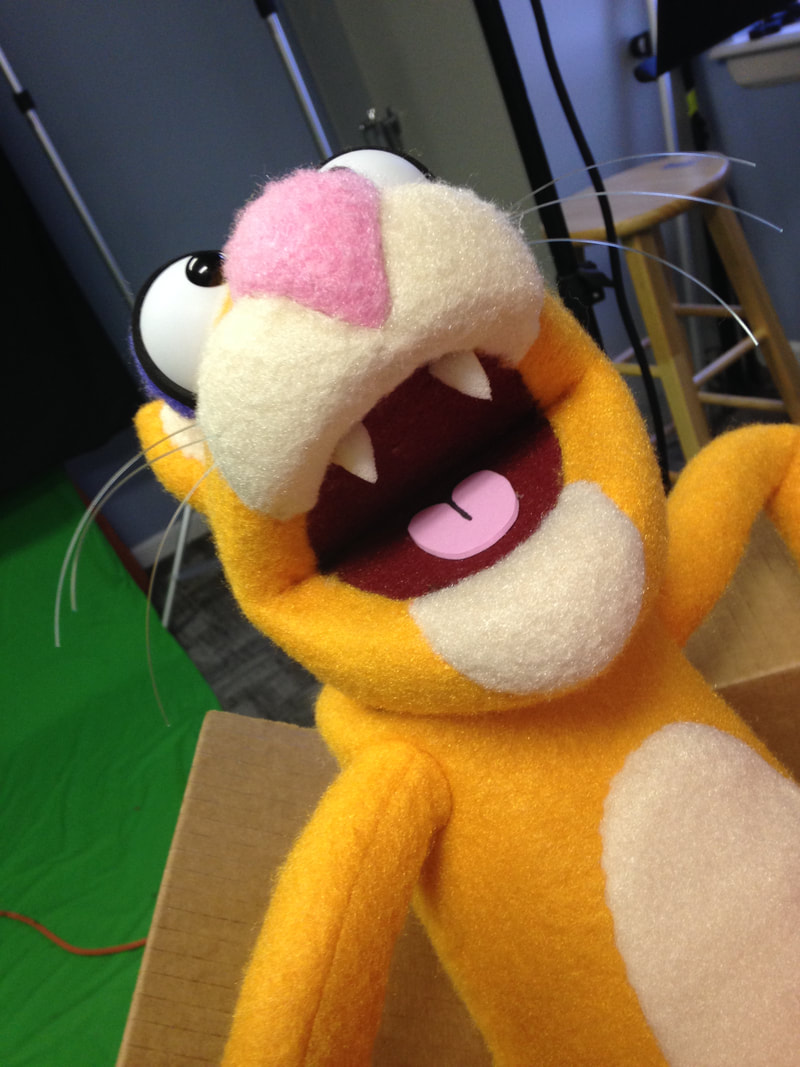
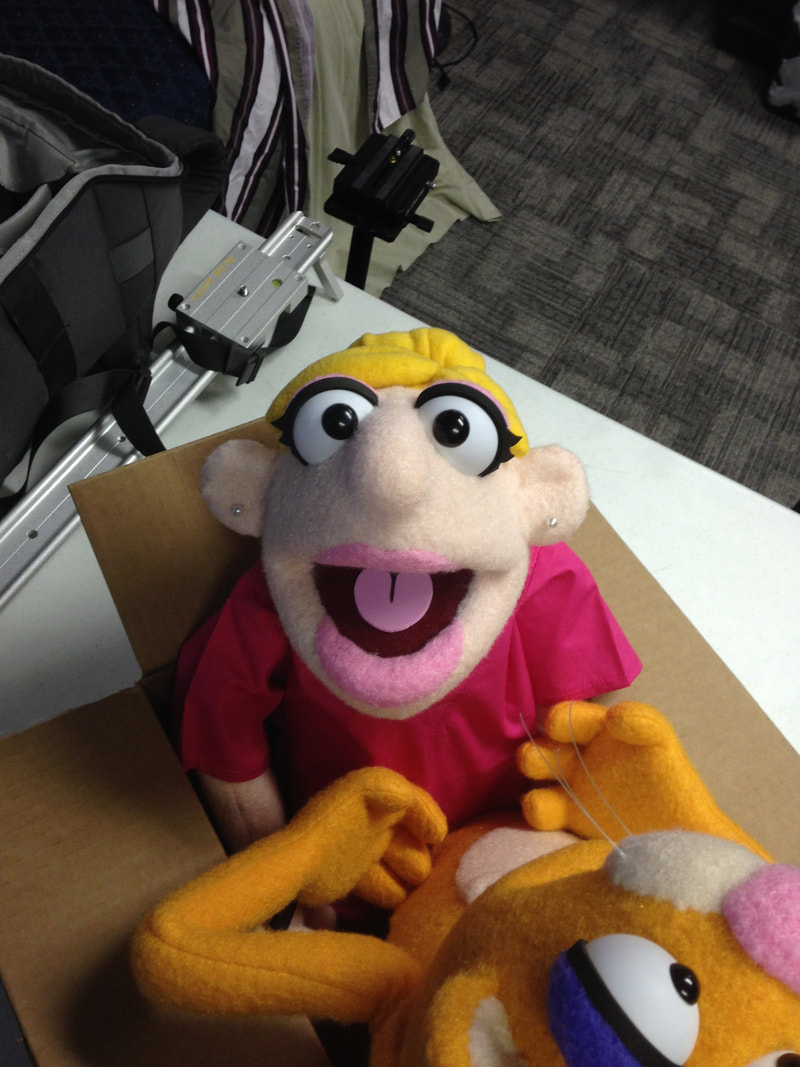
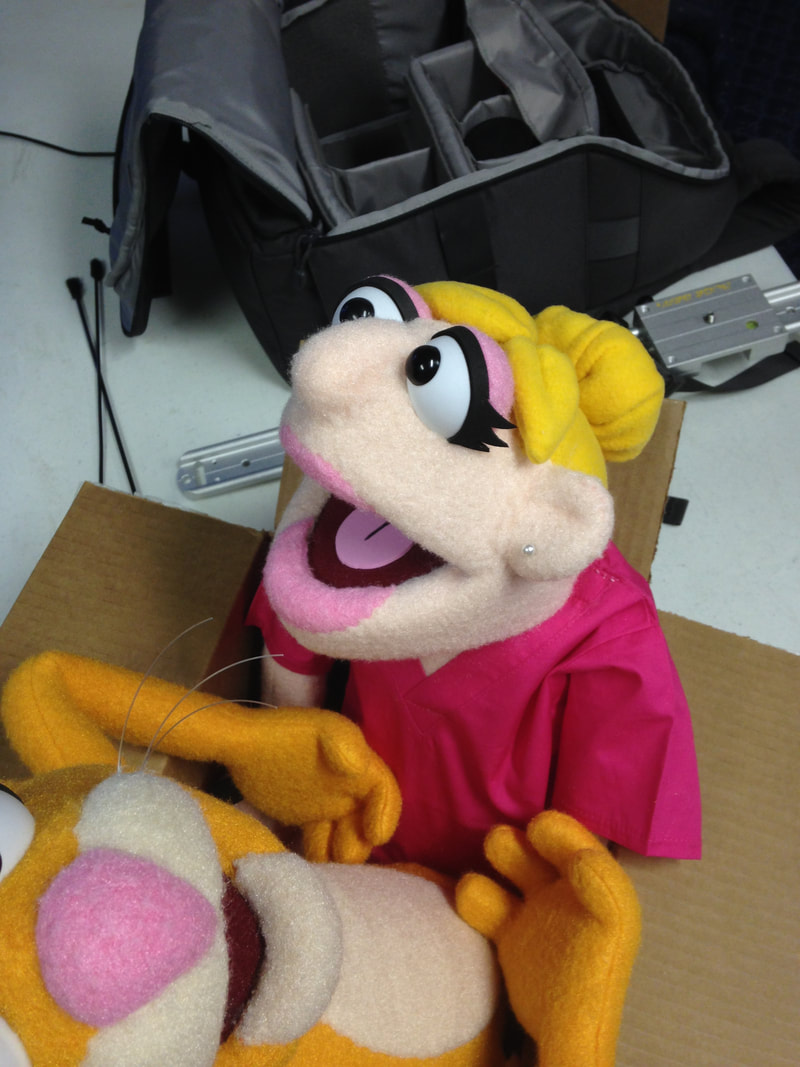
This year's VBS theme is a beach in the Northwest, which adds a little more interest than just a regular beach theme (which has been done to death...). Because of the theme's locale, I decided to do a surfer (beach) Moose (Northwest) named Max. Interestingly enough, when researching surf lingo, we discovered that a surfer who is constantly looking for great spots to surf is called a "Moose on the Loose." Looks like it was meant to be! Click on the gallery below to expand the process photos! It's VBS (Vacation Bible School) time again! A few years ago I started creating a custom puppet for my church's VBS every year. This year the theme was not as straight forward as before. In 2019, with the video game theme, I created a retro video game character, Bolt McThunder. In 2021 (R.I.P. 2020) I created Gilbert Firesnout the dragon for the Medieval/Knights theme. This year's theme is a little more nebulous: creativity. It's technically called "Spark Studios" and the theme focuses on "artistry and innovation." Not the easiest theme to create an interesting puppet around! After a few scrapped ideas, I came up with a musical character whose personality would fit in during the Golden Age of cinema: the Maestro. I wanted the Maestro to mainly consist of shades of 1 color (sort of reminiscent of vintage cartoon color palettes). Blue just turned out to look the best. I also decided to lean in to the vintage feel and give him a "Jughead" type nose. As always, I created a sketch to base the build off of. Since I wanted the Maestro to have a large, full beard, I knew I needed to build that beard shape directly into the head (instead of adding extra foam to build up layers afterwards) in order to keep the head as light as possible. That's why the uncovered foam head looks like a bloated frog! With such a full beard, a flat mustache just did not fit well. So, i carved a 2" thick piece of foam into the desired shape and then covered it with the blue fur. It gives the mustache a nice dimensional look and I've taken to calling it a "Pringles Man" mustache! I also decided to try some new pupils with this build. I usually use all sizes of circular doll eyes for the pupils. However, I felt compelled (as I've said before) to lean into the cartoony aspect of this design and ended up using oblong doll eyes. These pupils ended up adding just an extra "something" to this character. Overall it was a fun, quick-ish build. Nothing too complicated (I'm looking at you, dragon). But I think in it's simplicity a successfully quirky character was created! Pastor Larry Harmon has been at West Acres Baptist Church for 35 years, quite a feat in the church world. He has been my pastor since I was in elementary school. Recently he announced his retirement from the position of Senior Pastor at WABC. Pastor Larry has had quite an impact on me both spiritually and creatively, so I decided to build him a Portrait Puppet as a retirement gift. He is an outstanding man of God and will be greatly missed! WHEW! What else is there to say, really? Well, I guess it would be informative to catch you guys up... So, my last few puppet builds were the last-minute Glowbat puppet for Thistle's Treehouse and small creature/monster puppet for my girls (which they call "Taffy"). Suffice to say, they were not complex or even that thought out. They were, if I am admitting anything, rather thrown together... And then 2020 wreaked havoc on my puppet building endeavors. I had another puppet slated to be built for my church's VBS that year: a dragon coinciding with the medieval theme. However, with COVID grinding everything to a halt, soon the church felt the effects and we had to cancel everything. No dragon puppet... Fast forward to today, April 21st, 2021. We are BACK! West Acres VBS for 2021 is doing the same medieval theme (since we didn't get to use it last year) and with that comes the long awaited dragon puppet! This dragon will be my most in depth build yet, being a full-body puppet held by a fake arm (while I wear a knight costume). The general idea is that I will be a knight holding a small(ish) dragon that talks. Enjoy the process pictures below, and be on the look out for a picture/video of the finished character! And, as always, if you have any questions, please feel free to contact me! *side note: I don't think I've ever had so many seams to pick and hide... It's going to be so much fun doing that part of the process... Unfortunately, I did not take any real process pictures of this puppet build. However, I figured I could still dump a few pics here, including the initial concept sketch. This "Wilderness Scout" character was made for a church's Children's Ministry.
For Vacation Bible School (Xtreme) this year, we are using a retro video game theme. So, I got to create a very 80s inspired video game character named Bolt McThunder. Below are a few pictures of the process along with a video detailing the process. 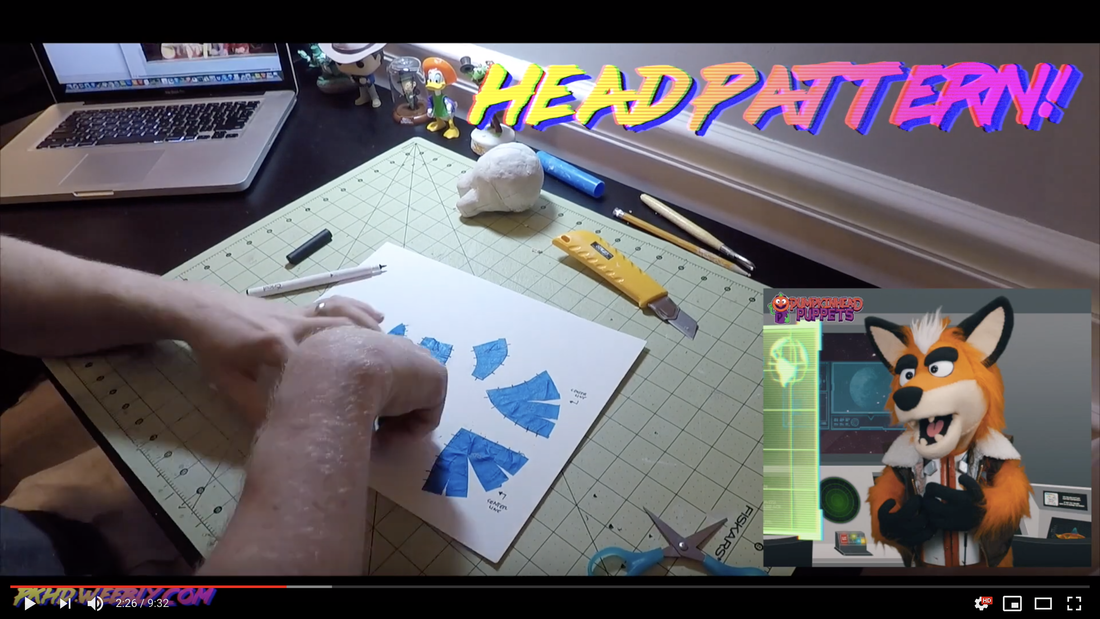
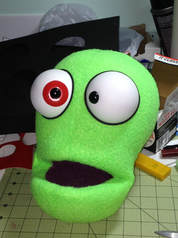
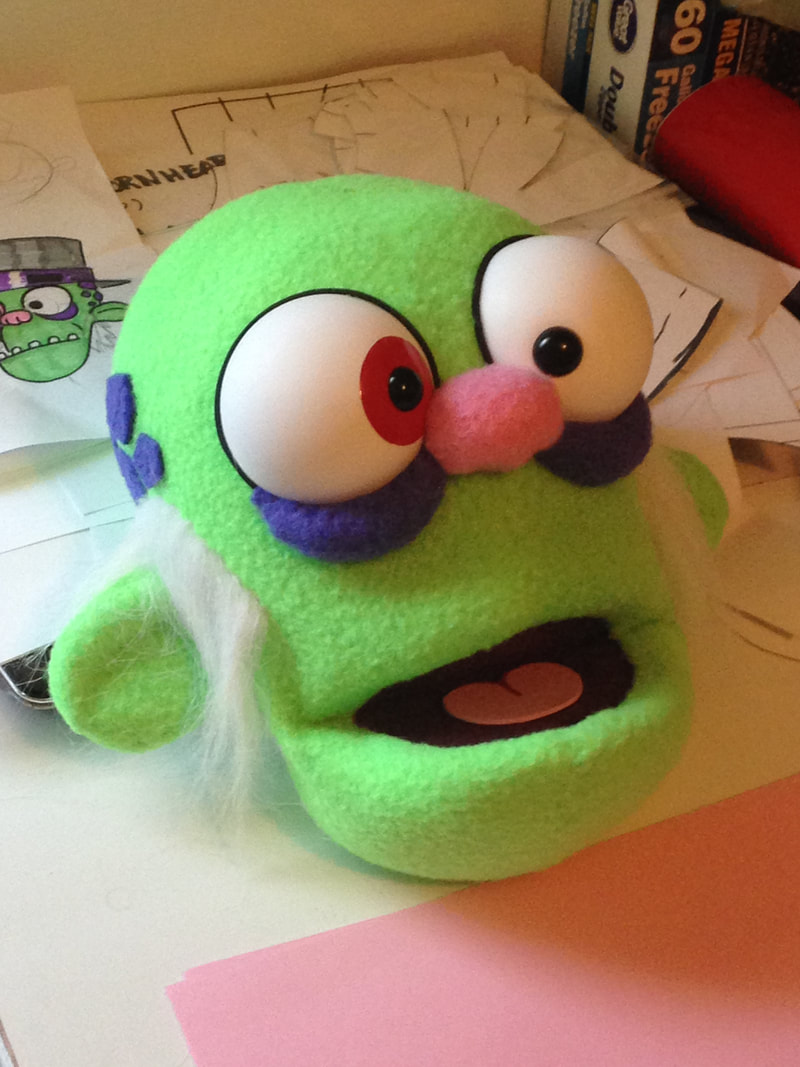
I have never created a "bad guy" before; all of my characters have been nice, goofy, etc. But on this occasion I needed to create the antagonist for Thistle's Treehouse. I had to make some choices to help show his attitude through his physical appearance. That is why I made his eyes yellow with large under-eye bags and, of course, the shaggy black, downward pointing eyebrows. This character is the last in the bunch for "Thistle," so next I will be working on the set!
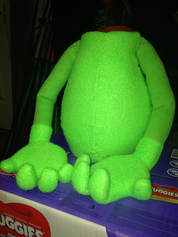
Here are the last few process pictures of the eccentric store owner: Phineas. I wanted to show my arm attachment method. Using cheap doll eyes, I cut a plastic circle the size of the arm diameter and poke the doll eye through the center. Then I use the doll eye clip to secure the arm to the body. This not only creates a stable hold from arm to body, but also allows for great arm rotation at the shoulder.
There are only 2 more characters to create for the show: Phineas (a troll-like shopkeeper) and Grim Thornheart (a malevolent wizard). I decided to start on Phineas first. The goal with this character is to make his appearance slightly eccentric to match his personality.
Gnash is complete! He will be the goofball henchman of the main antagonist in "Thistle's Treehouse." He's not necessarily a bad monster, so I wanted to still give hime a softer, goofier look (which is also why I gave him an exposed pot-belly) that kids would like to see. This is the first time I have made a puppet with a different eye color; and I think it gives Gnash just that little bit more of personality. On to the next character!
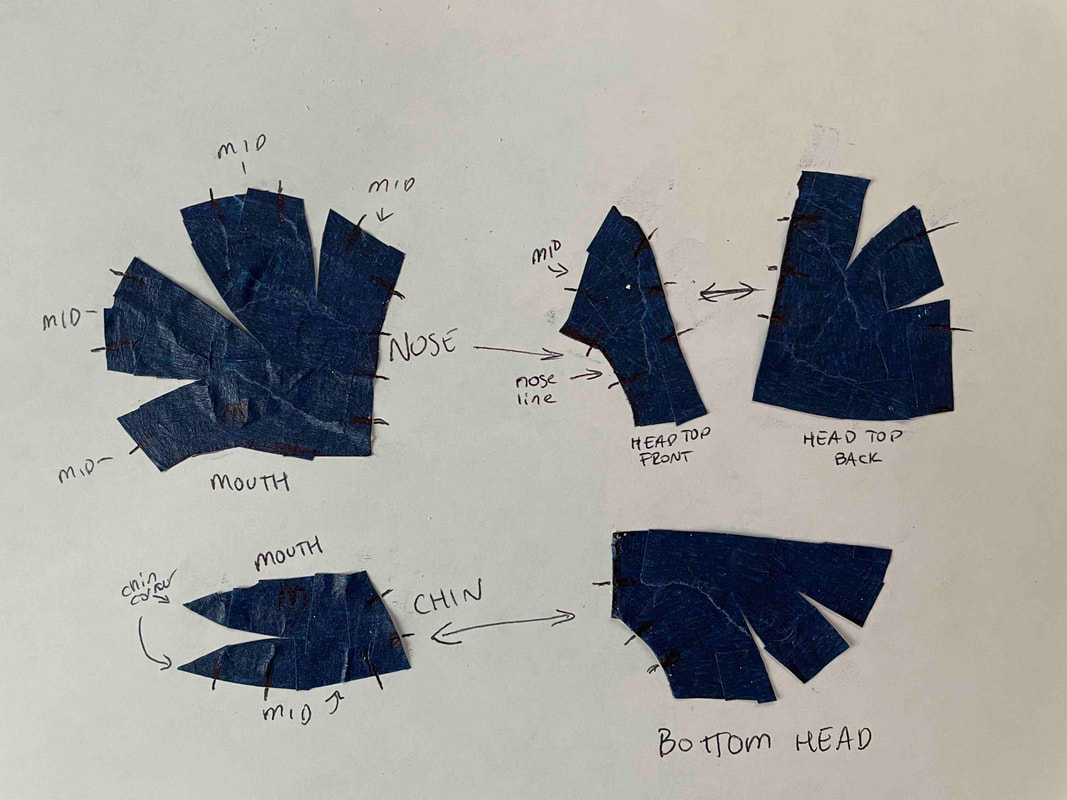
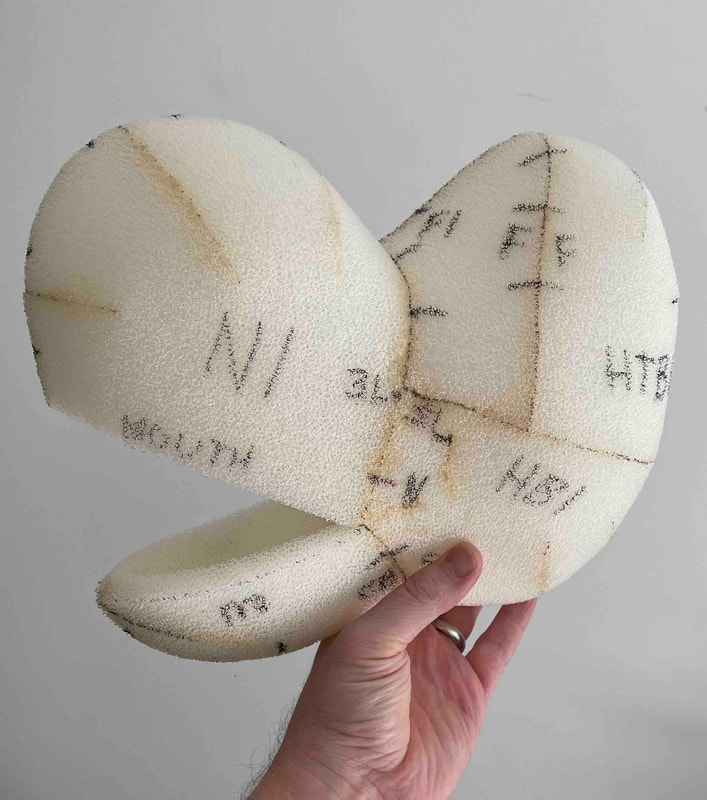
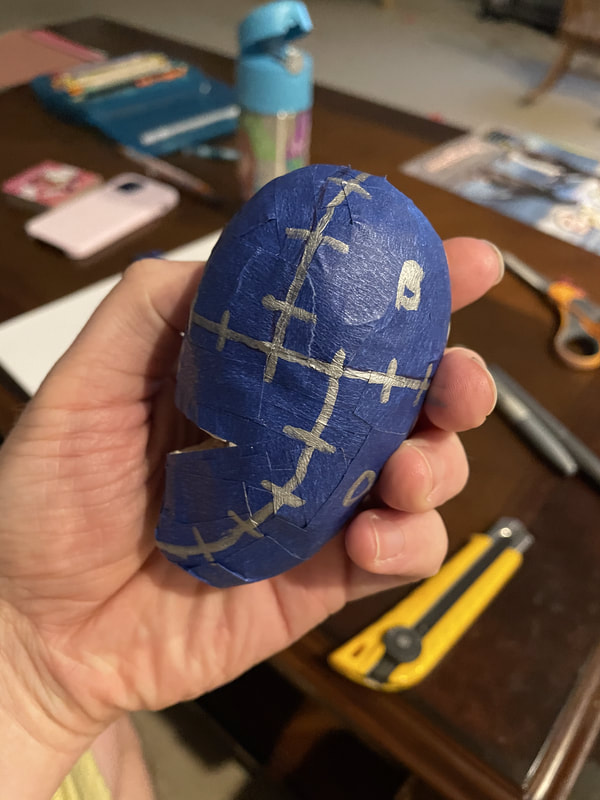
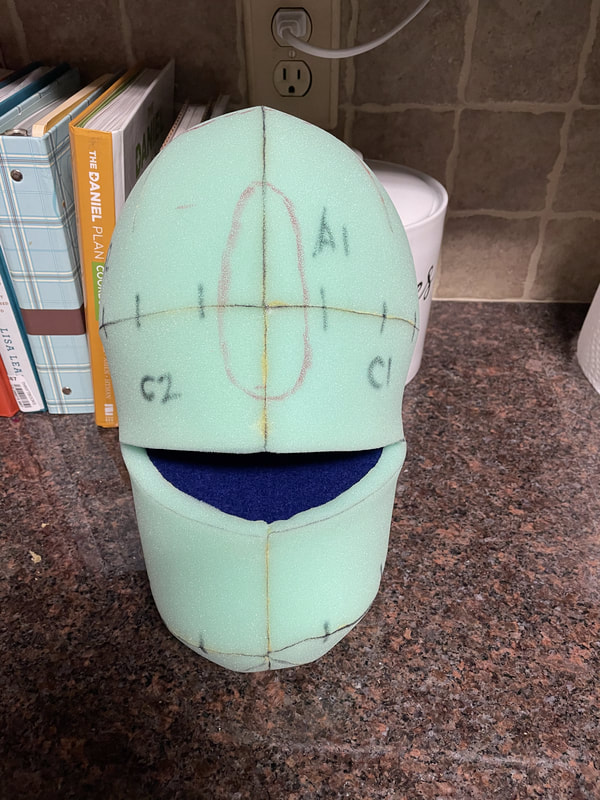
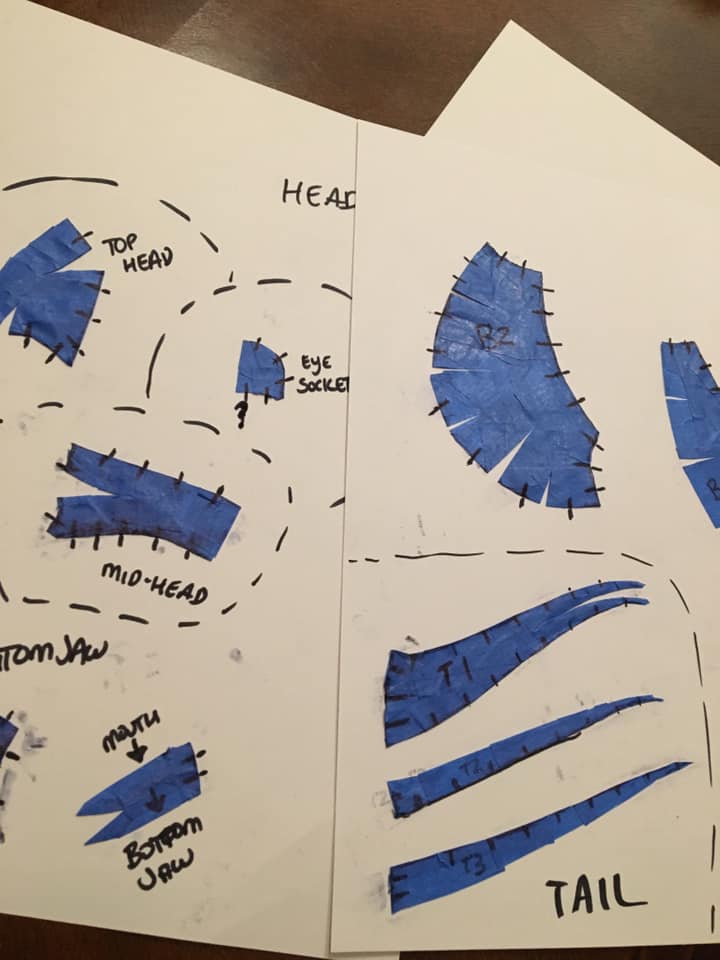
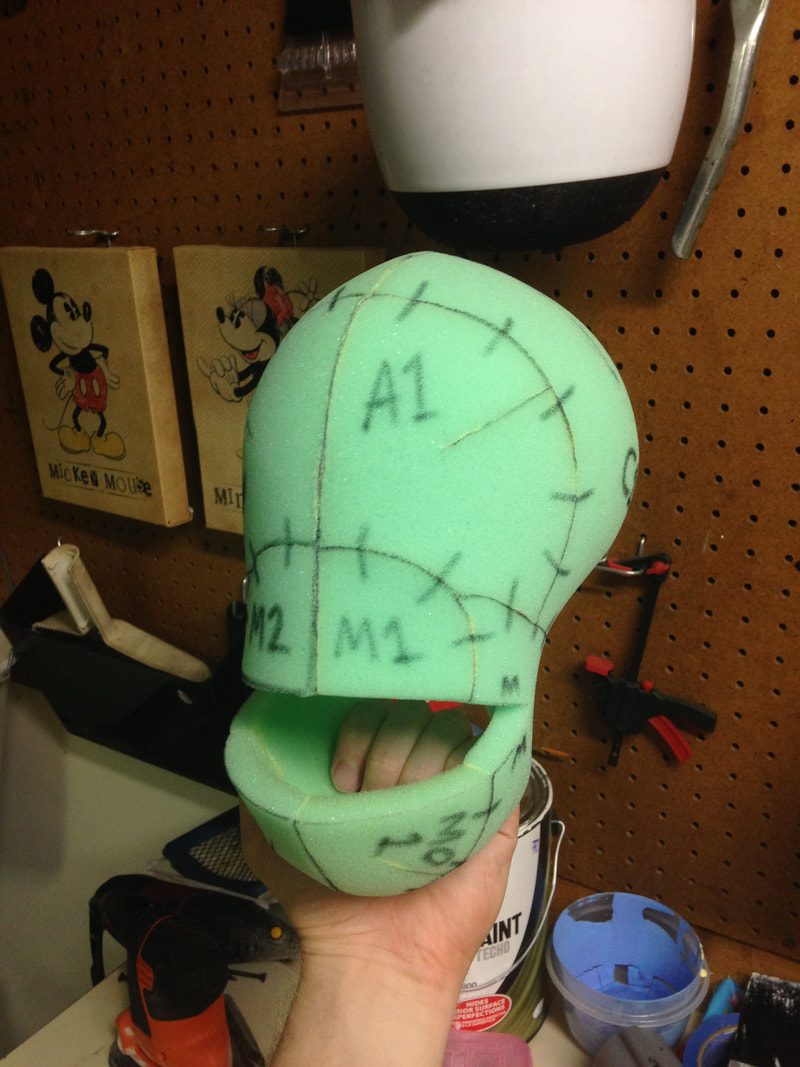
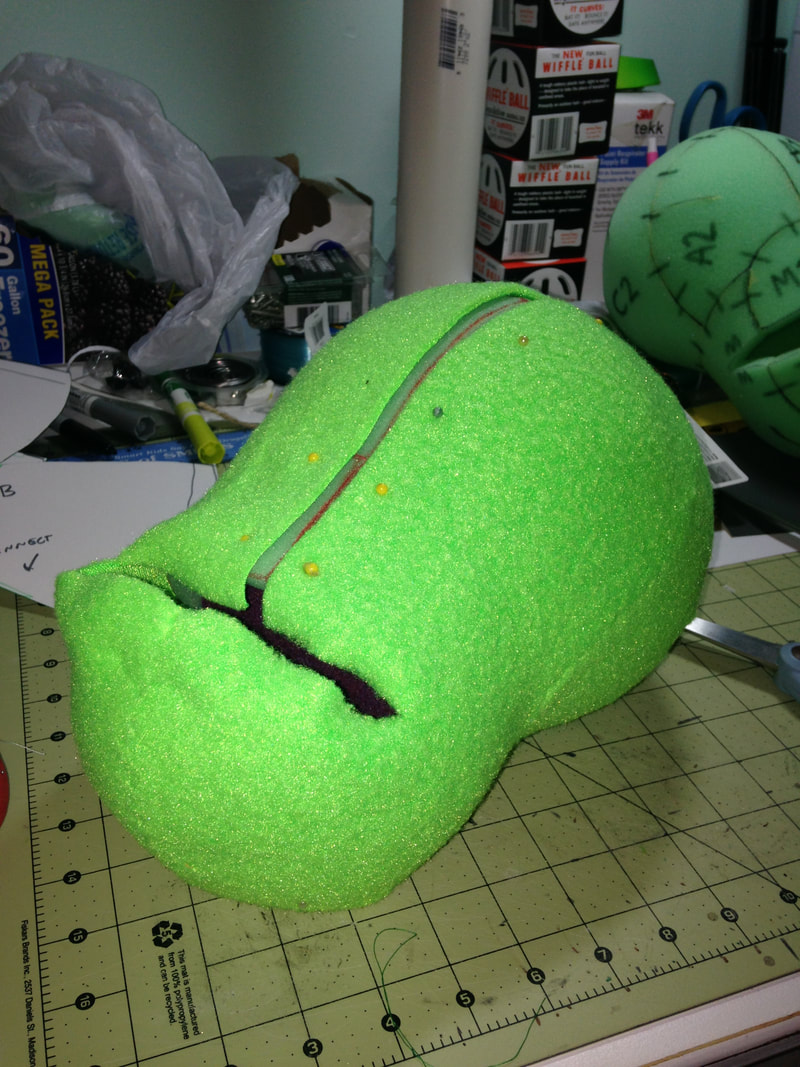
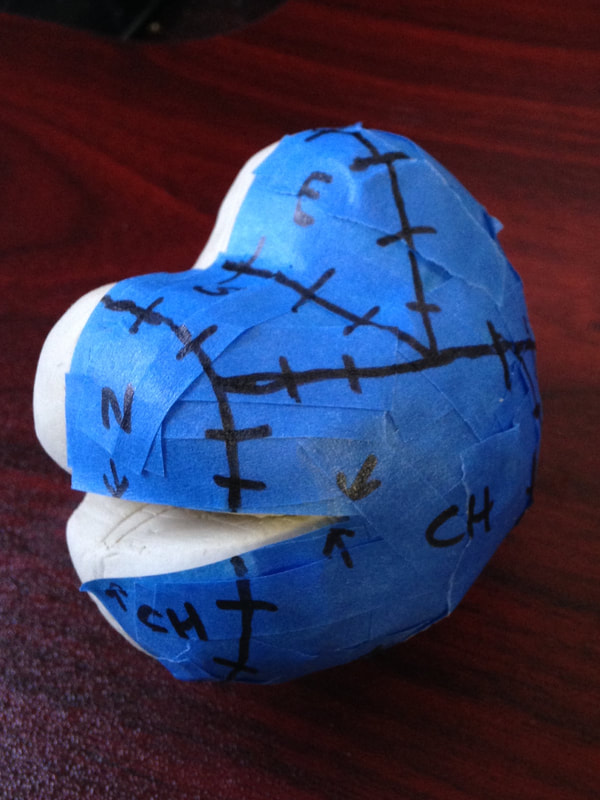
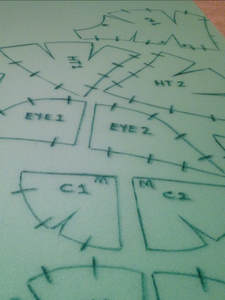
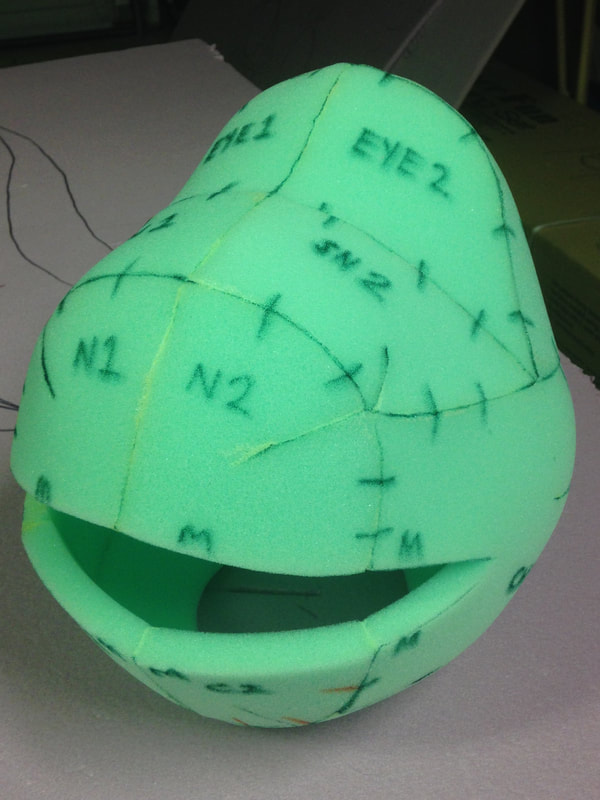
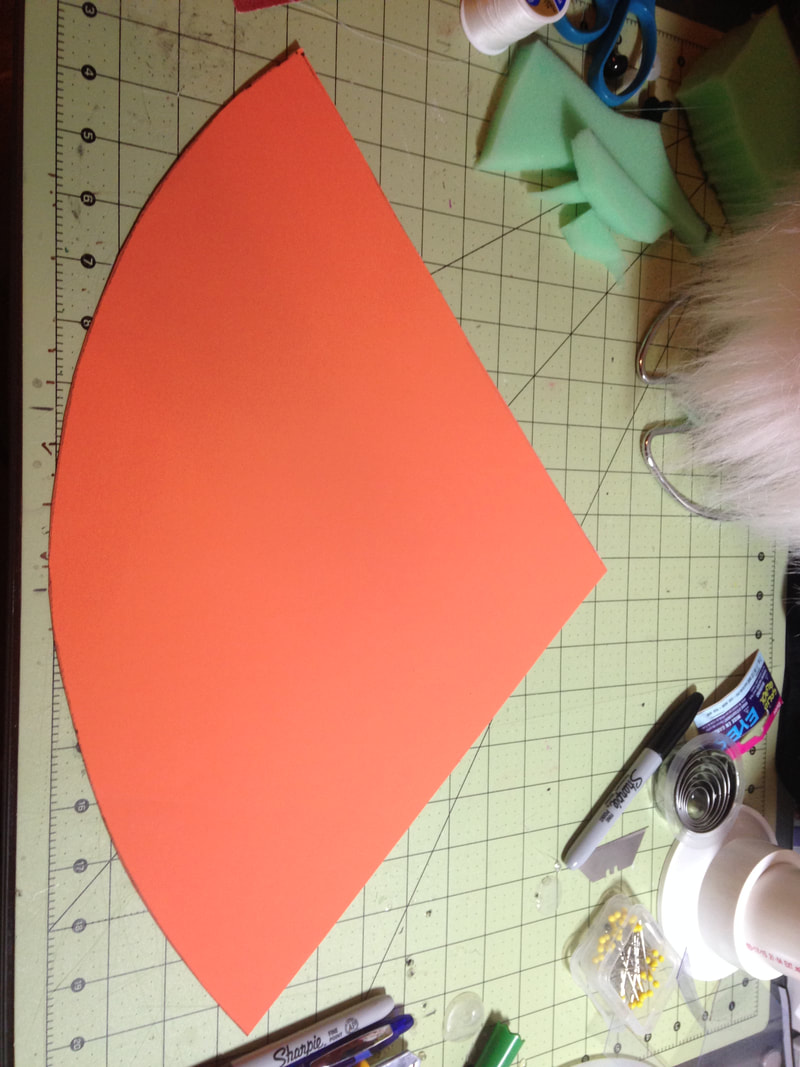
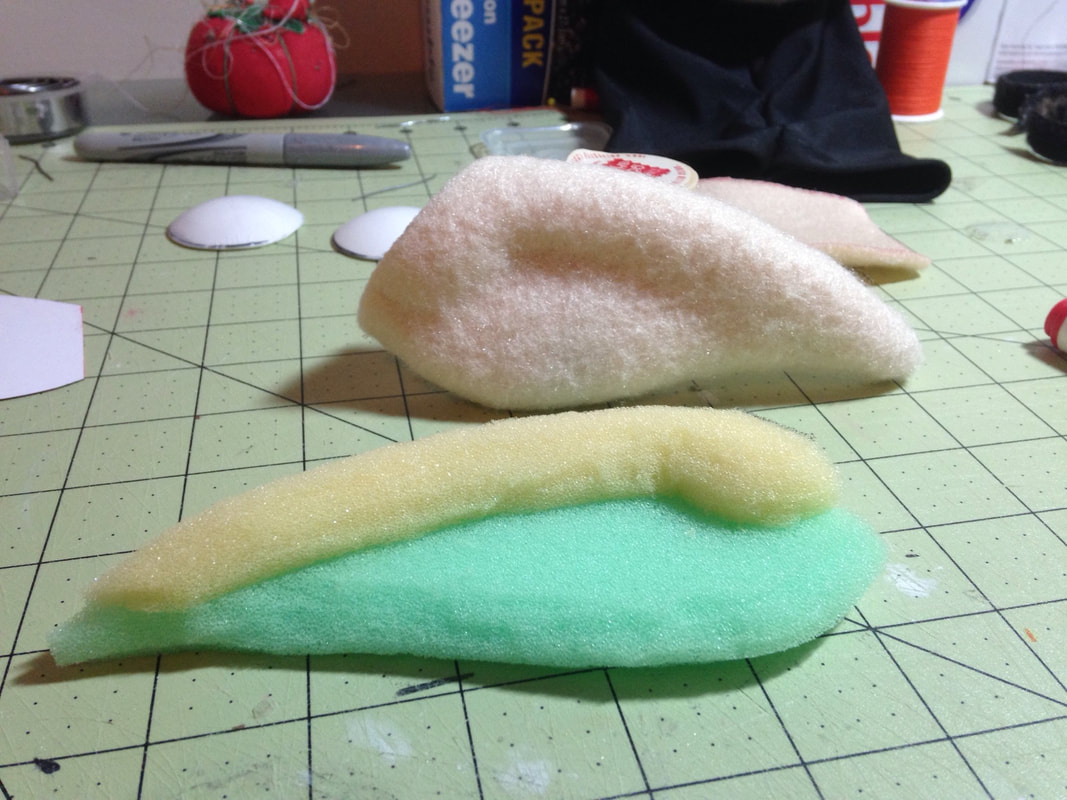
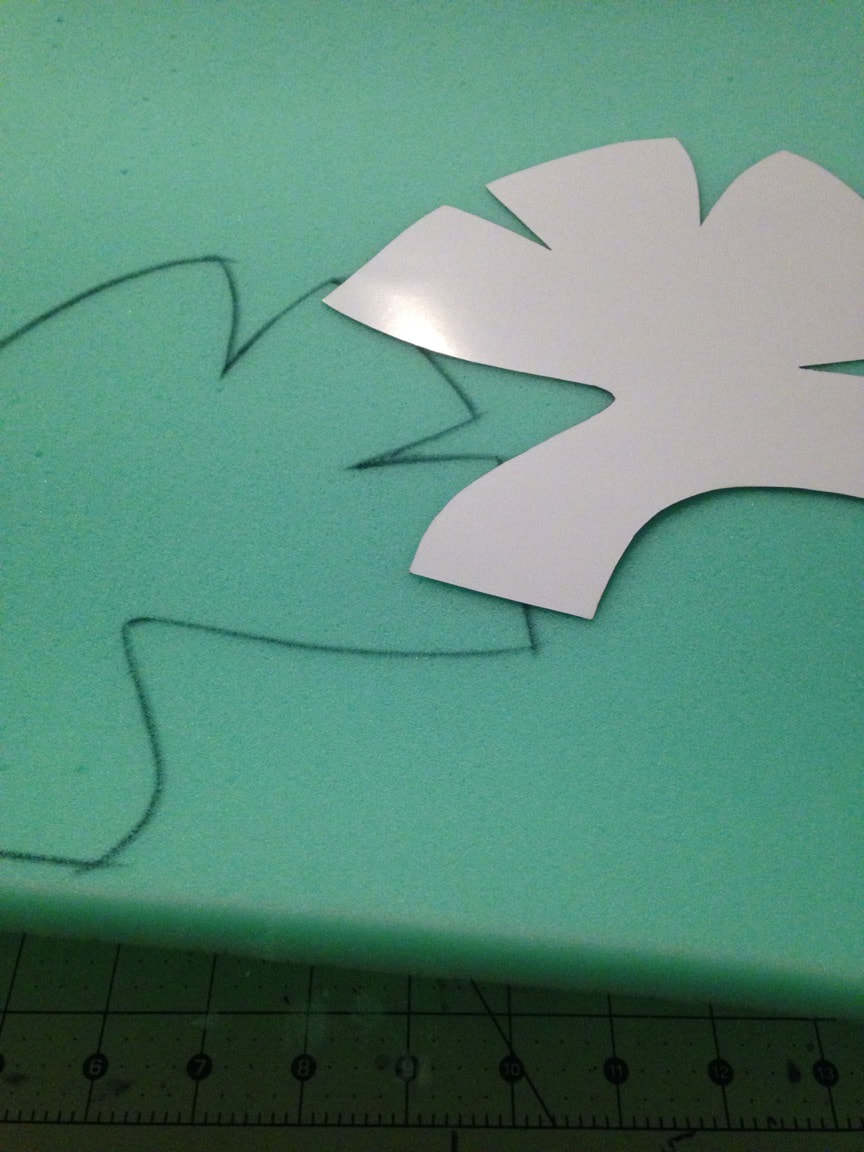
I wanted to post a few picture of the steps I take when making a head shape that is a bit more complicated than a simple round head or cone/oval head. First, I sculpt a general shape out of clay. Once I have a shape that I am pleased with, I tape off one half of the clay and divide the tape up into different pieces. I then cut out those pieces, lay them flat, blow them up to the desired size, and trace those shapes (now a pattern) onto my foam.
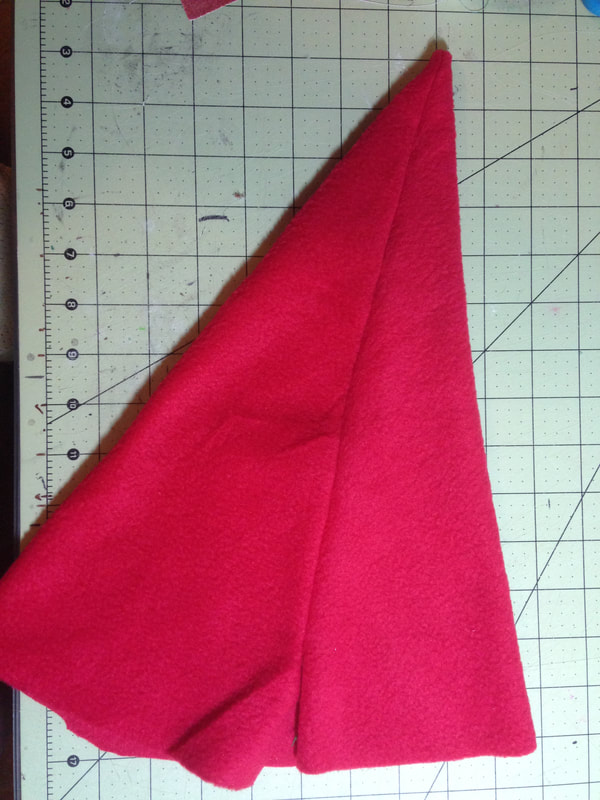
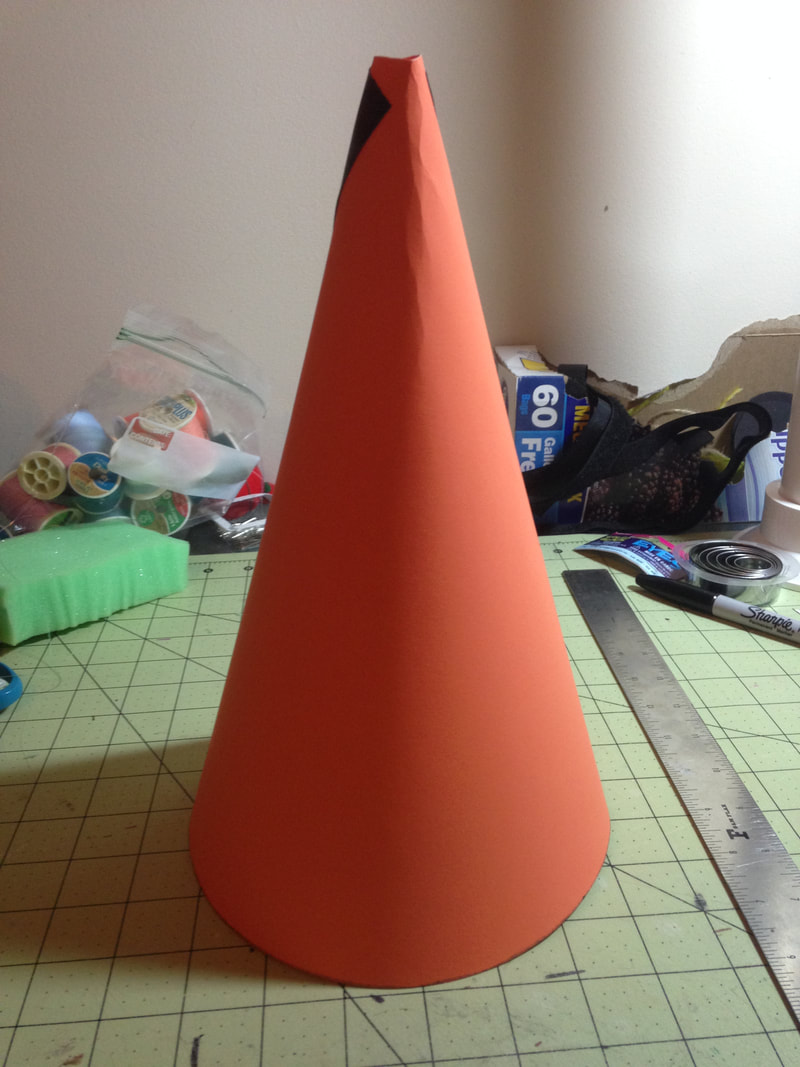
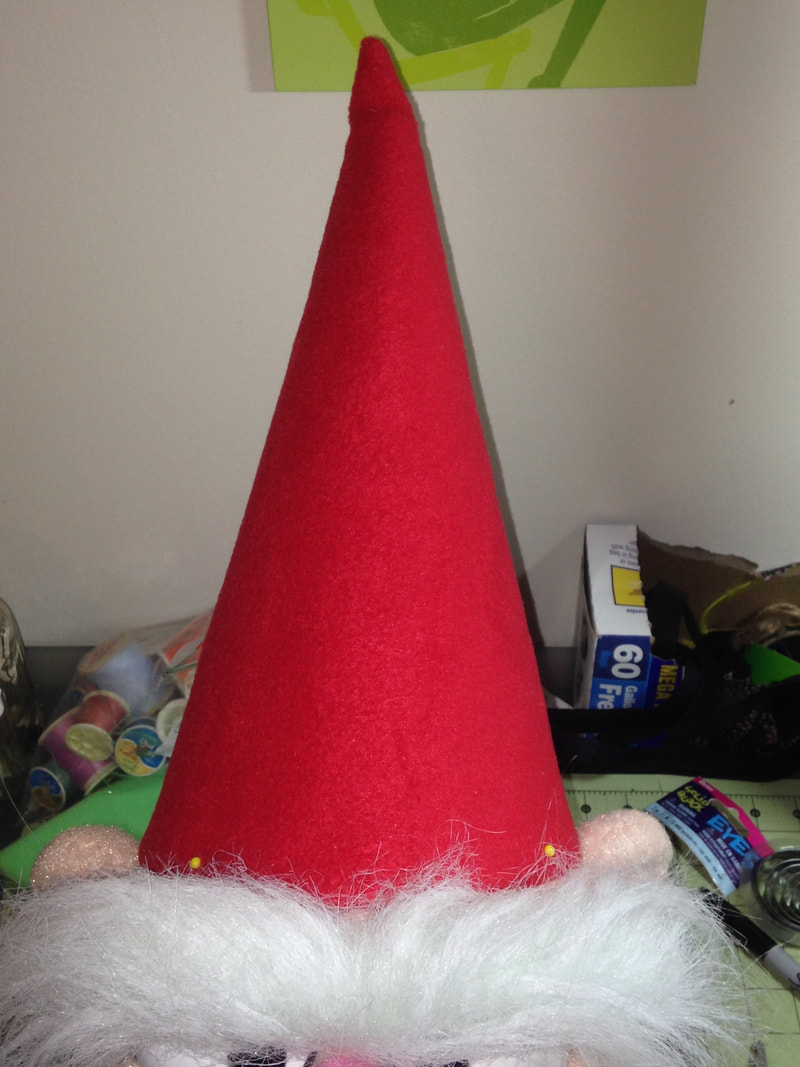
This gnome hat is, by far, the easiest accessory I've ever made for a puppet. It's genuinely just a large party hat. If you're wondering where the pointy tip of the rolled poster board is, I cut it off to allow for a droopy point on the final version. If I could go back, I would cut off a little bit more. I'm really just posting these pictures here in case someone ever needs to make one of their own.
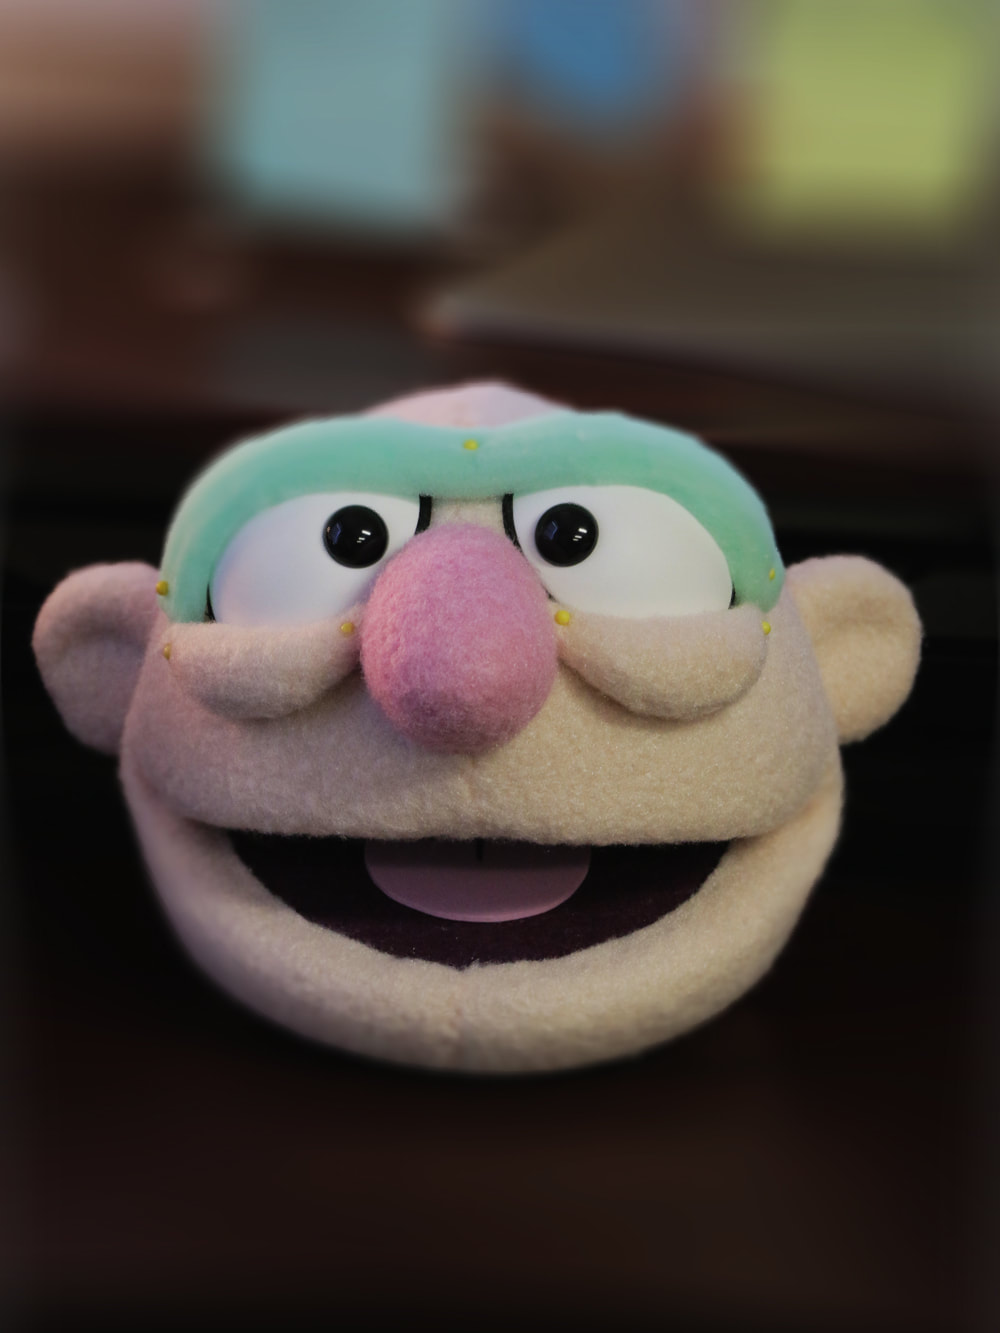
I'm making good progress on the gnome puppet! He is supposed to be a character that is a little on the grumpier side, so that's why he has somewhat of a perpetual frowning face. As I build puppets, I try not stay so rigid with what I started with in my concept drawings. I like to leave room for creative adaptation as I work. In this case the drawing shows a mustache. However, after playing around with different mustache styles, I decided I liked him better without one (actually a lot of gnomes aren't pictured with mustaches). Also, the yellow hat is not the actual hat, it is a placeholder for the red one.
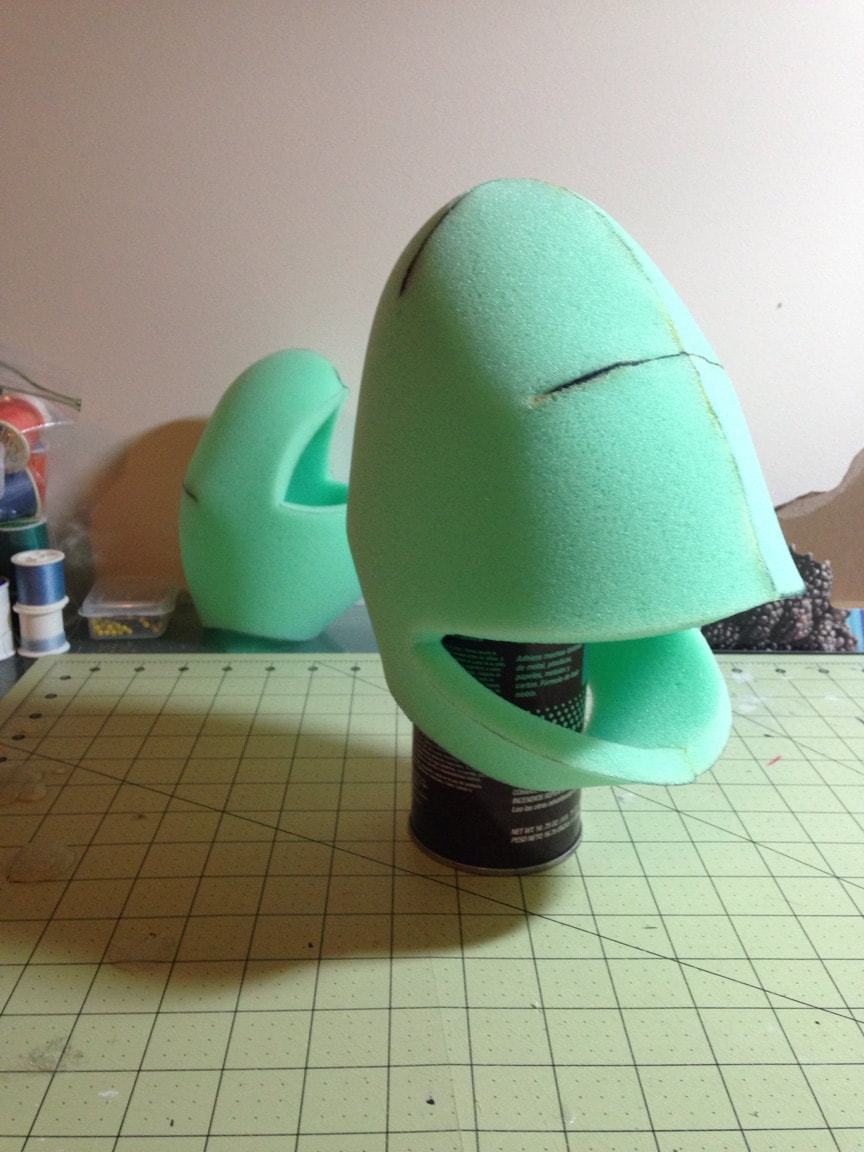
The build for the 2nd main character for my major project has begun! As always, I began with a quick sketch of the direction I want the character to go. For this particular character, I didn't need to create a crazy head design/pattern since he has a lot of facial hair. His head is just my simple, round head puppet pattern. This round head will help give him a squatty look as well. Next up is the neck, beard, and facial features!
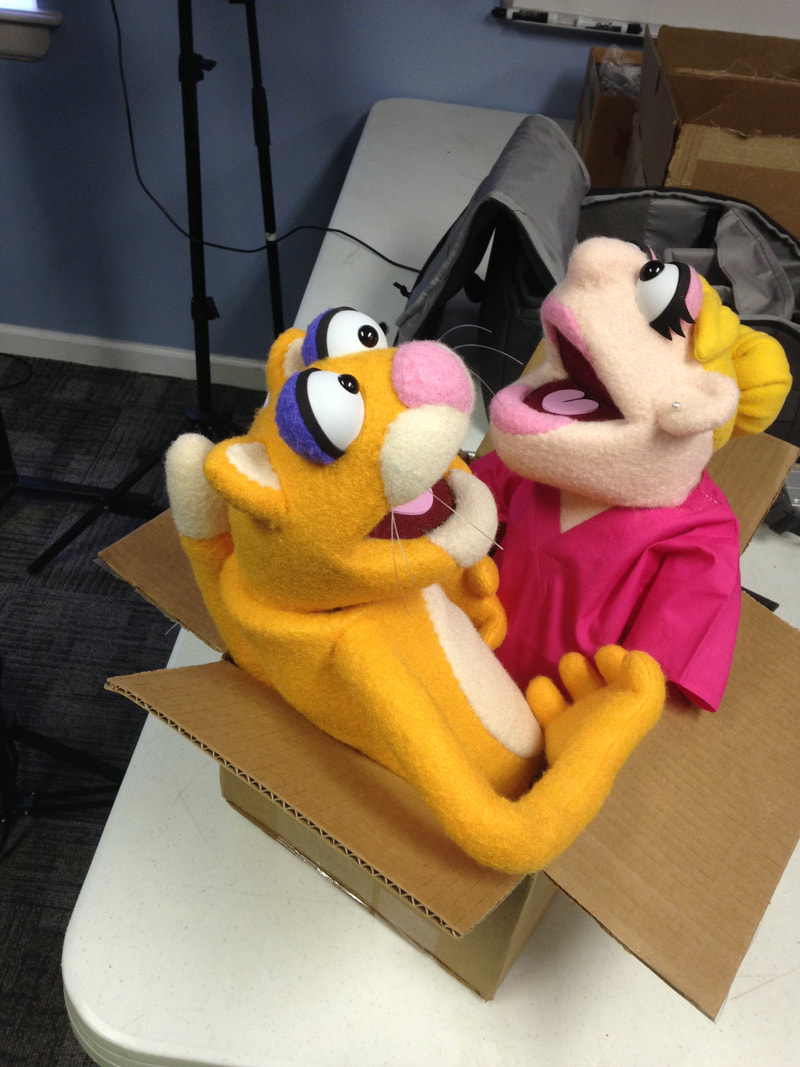
I'm not going to go into a lengthy explanation about the creation of these 2 client puppets. I just wanted to upload several different views for you to see certain design choices (sometimes it's hard to see different areas in the one photo for the puppet page).
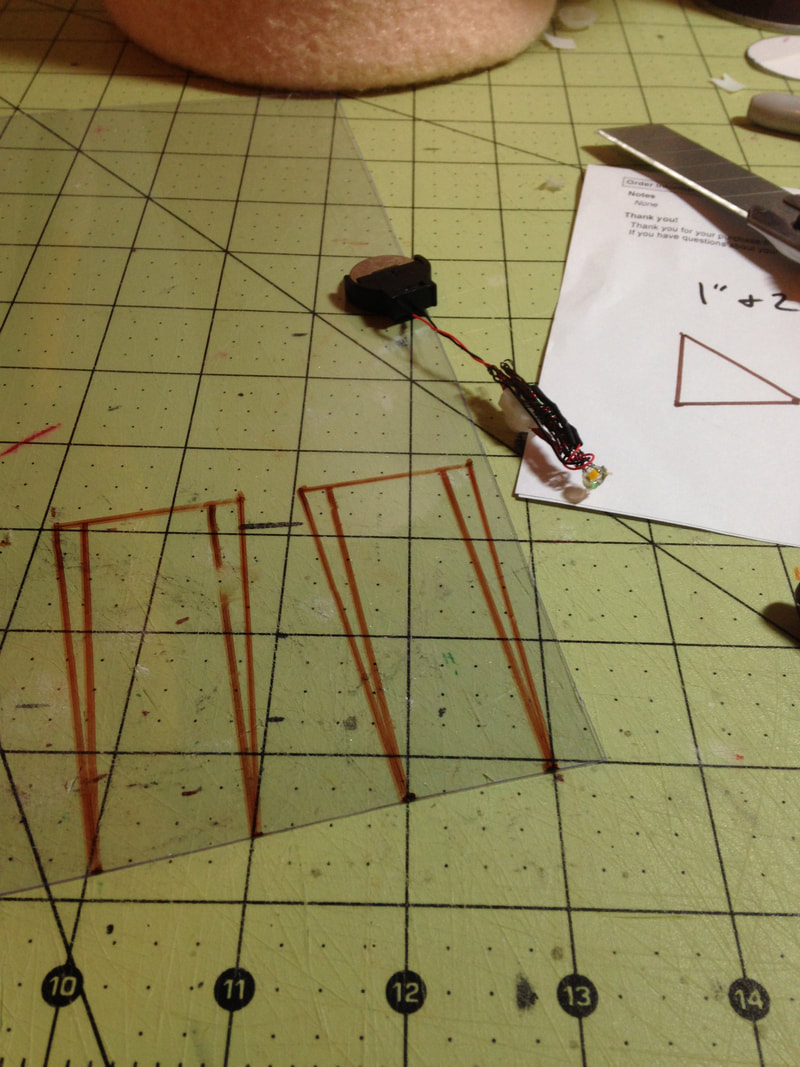
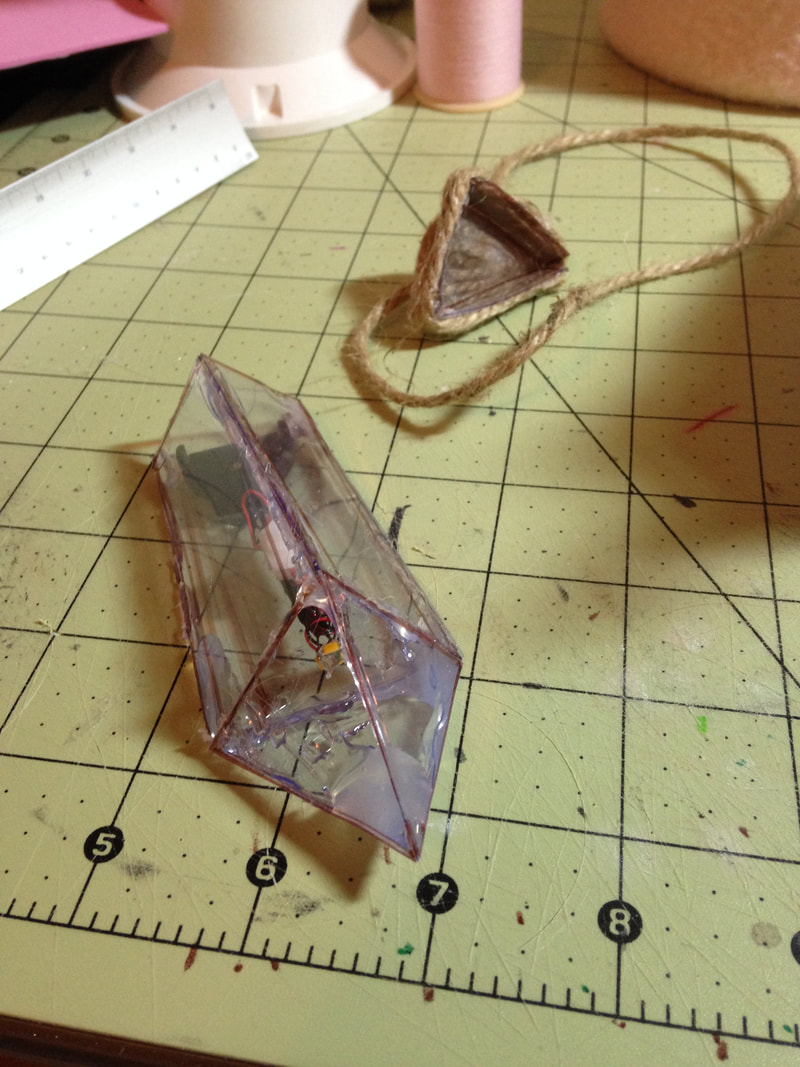
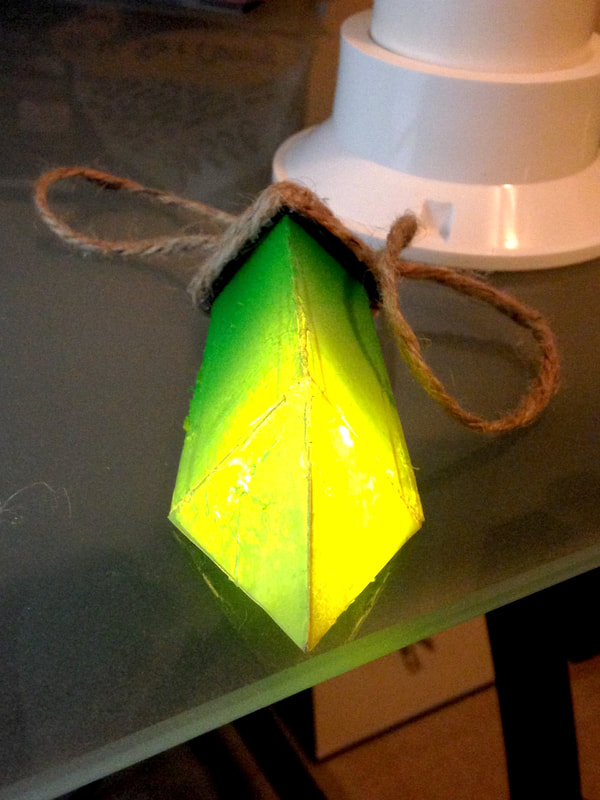
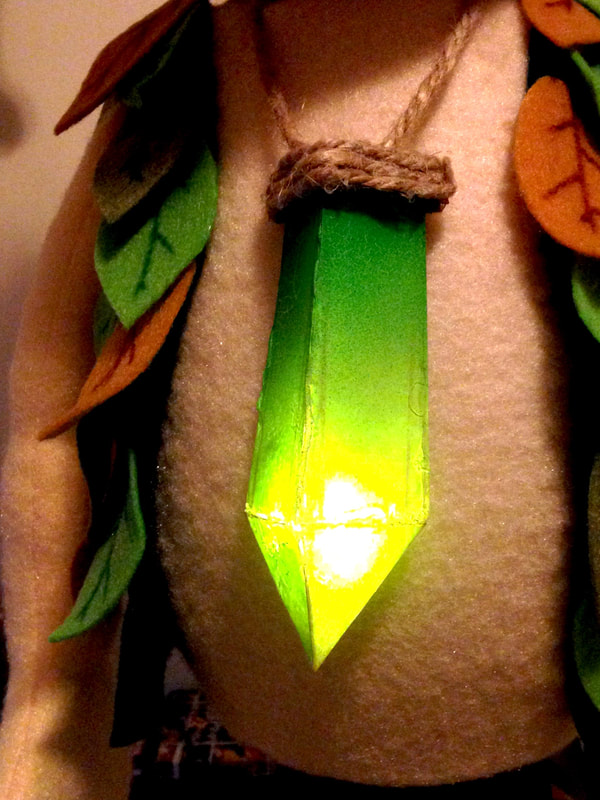
Does anyone get the title reference? Oh well. In any case, I wanted the Wood Elf character to have a little something extra, a prop, to help drive his importance a little. I used some spare plastic sheets, drew out pieces of a rudimentary crystal, then assembled them in 3D form. In order for the crystal to glow, I needed something that was small, but still rather bright. So I used 3 LED chip lights (each pointed at a separate crystal wall), wired them together, and attached them to the inside of the crystal. The Wood Elf is basically complete, but he is paired with another, upcoming, character. So this character's reveal will have to wait.
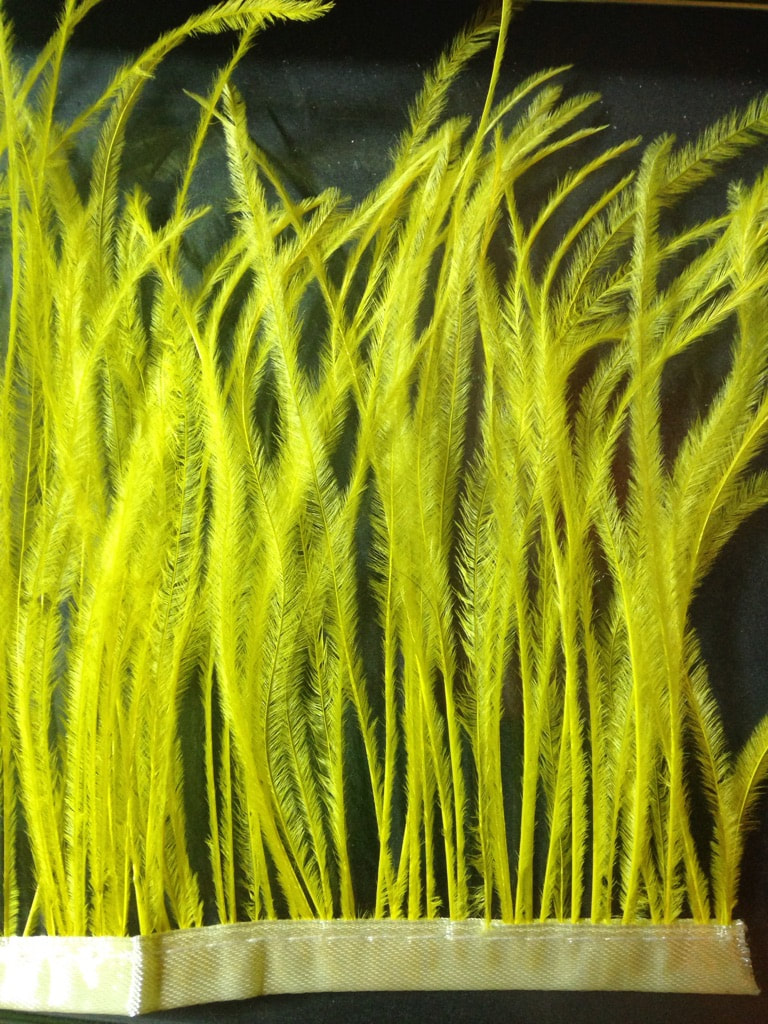
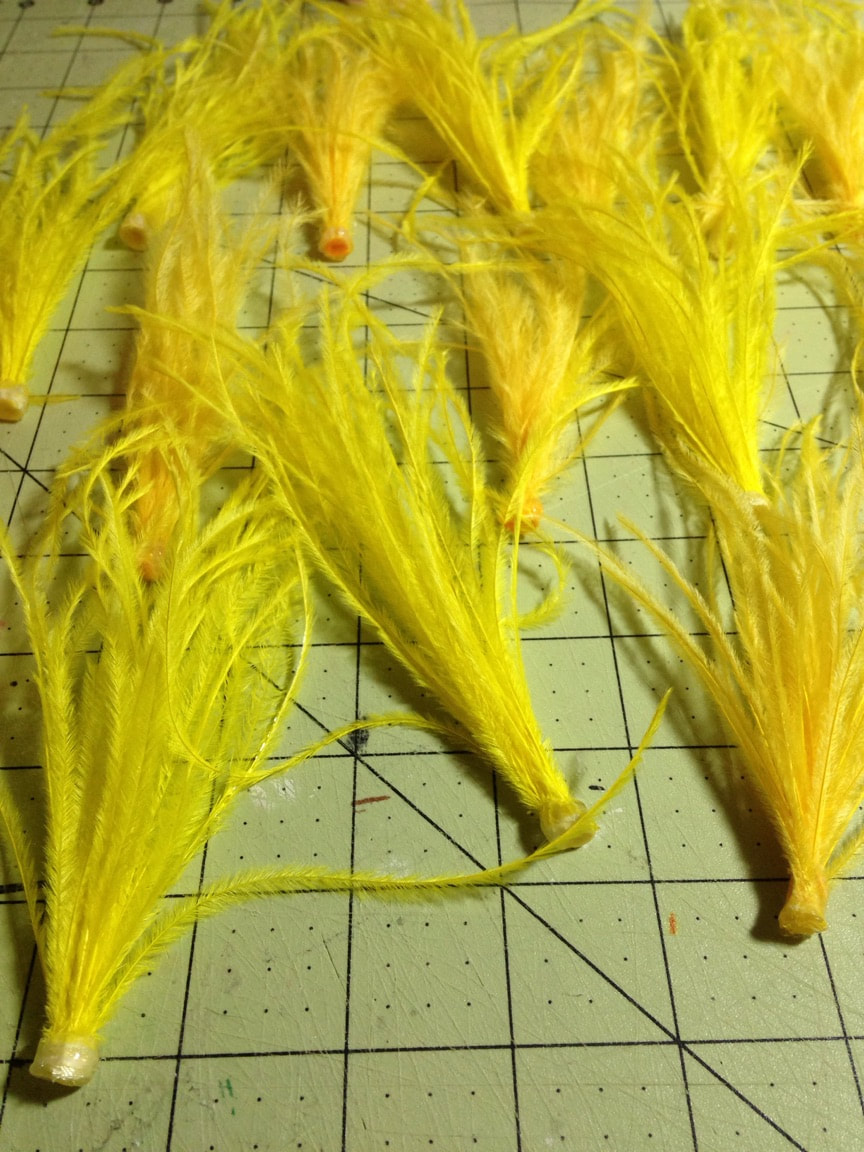
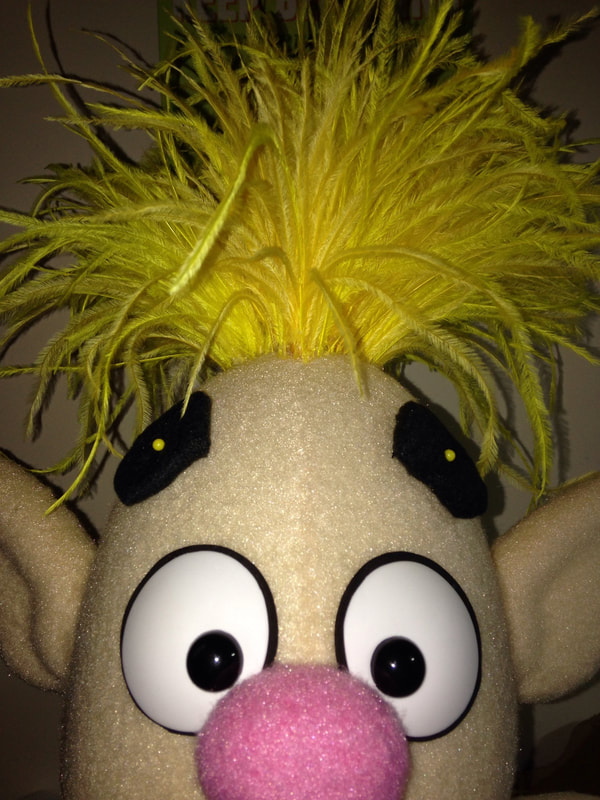
I am having to split my time between the Wood Elf and client puppets, but things are progressing well! I decided to try a new form of hair for this puppet: ostrich feathers. In the pictures above you can see my process for the hair. Essentially, I created small bunches of feathers, attached them to the head, and then hid the bunches by laying individual ostrich feathers in the front. Have any questions? Feel free to ask!
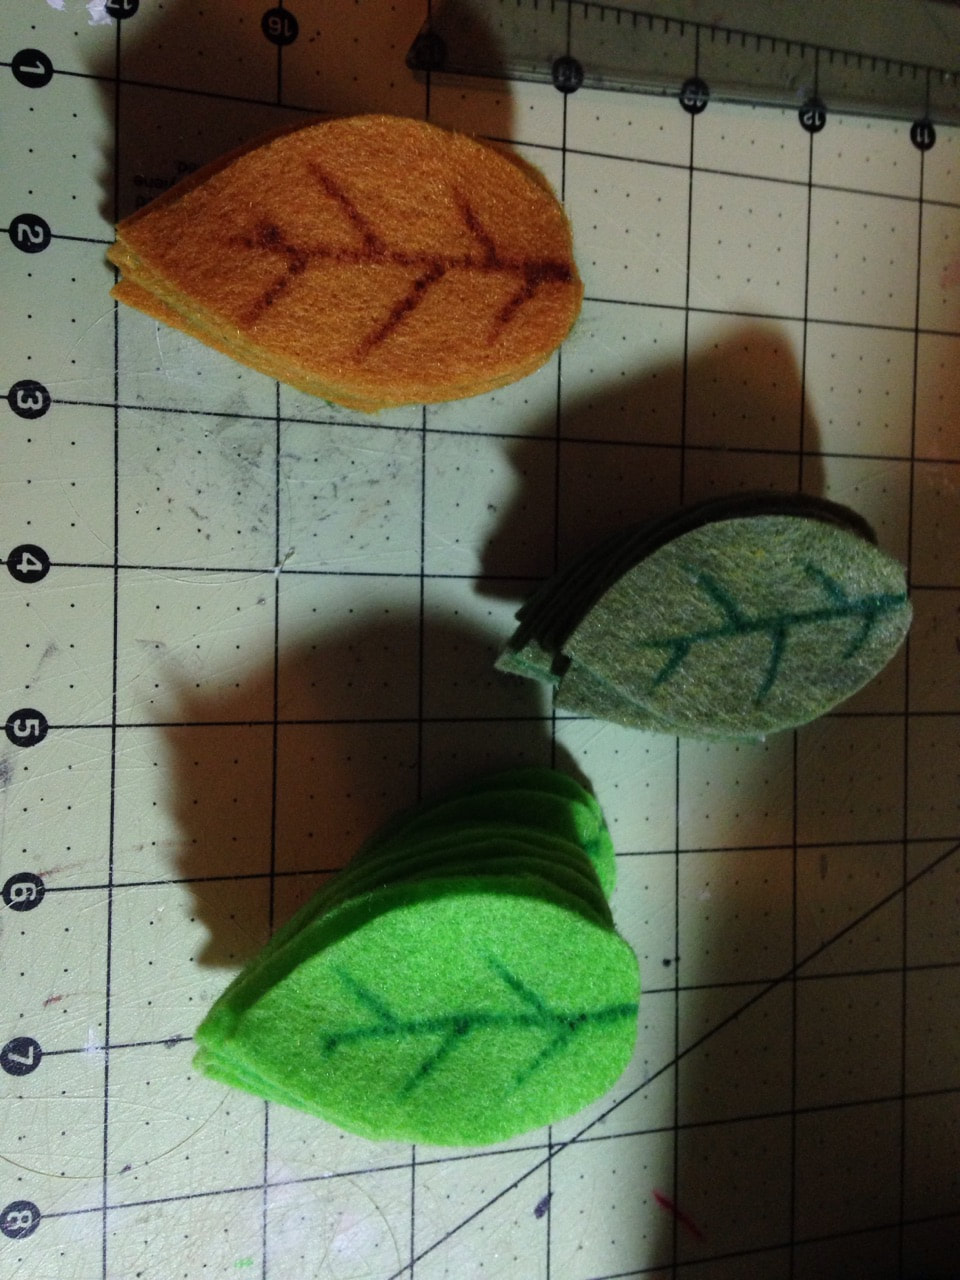
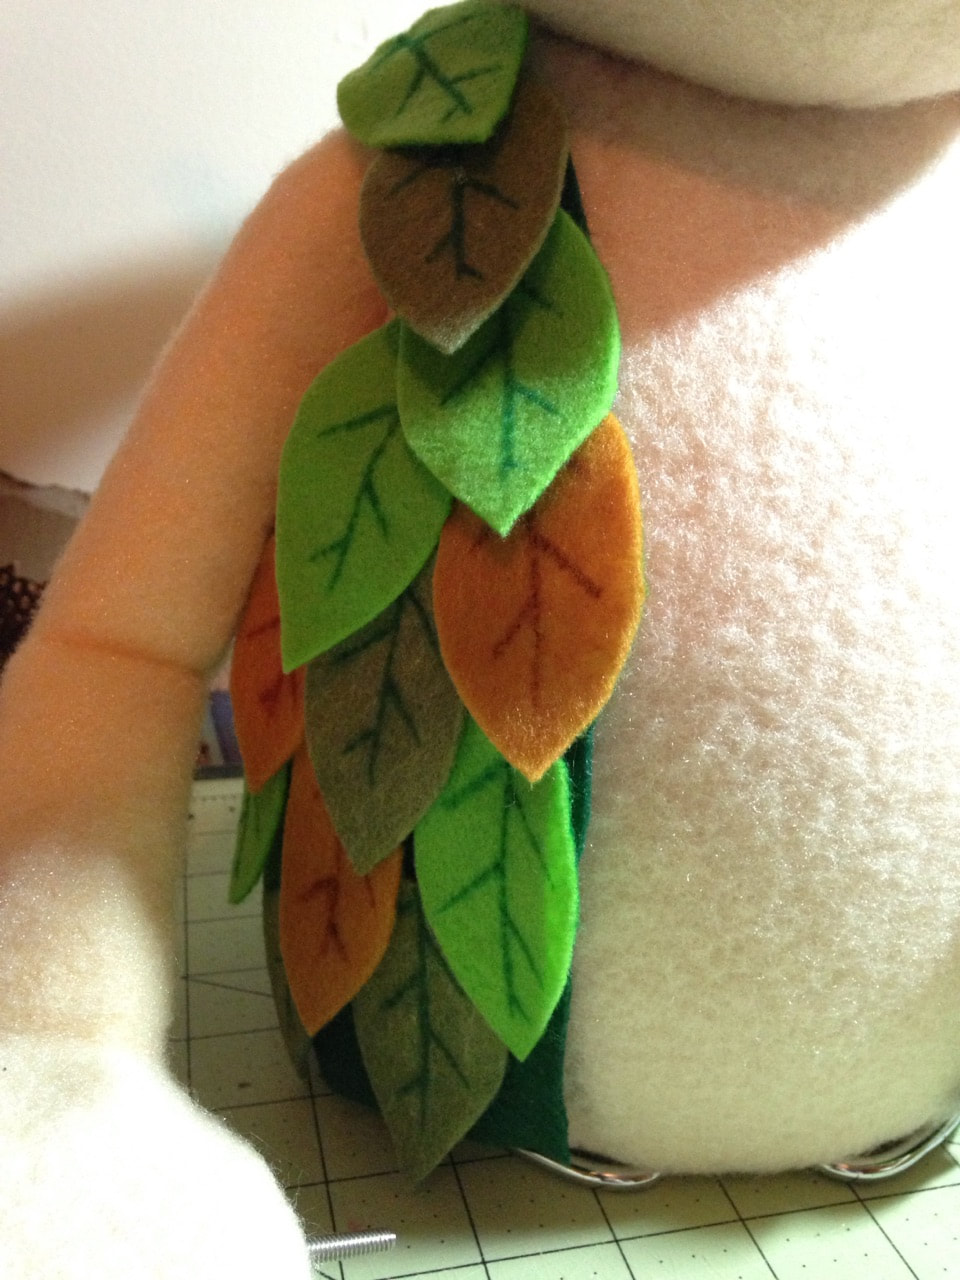
Another short post: After a few weeks of sickness in the house (I LOVE flu season...) I can now continue work on the Wood Elf puppet (and client puppets as well). I wanted the Wood Elf's wardrobe to scream "forest" so I came up with the idea to create vest that looked like it was made of leaves. I created an initial template for the vest itself, then made the vest base out of dark green felt. Afterwards I layered on a ton of different colored leaves that were also made out of felt.
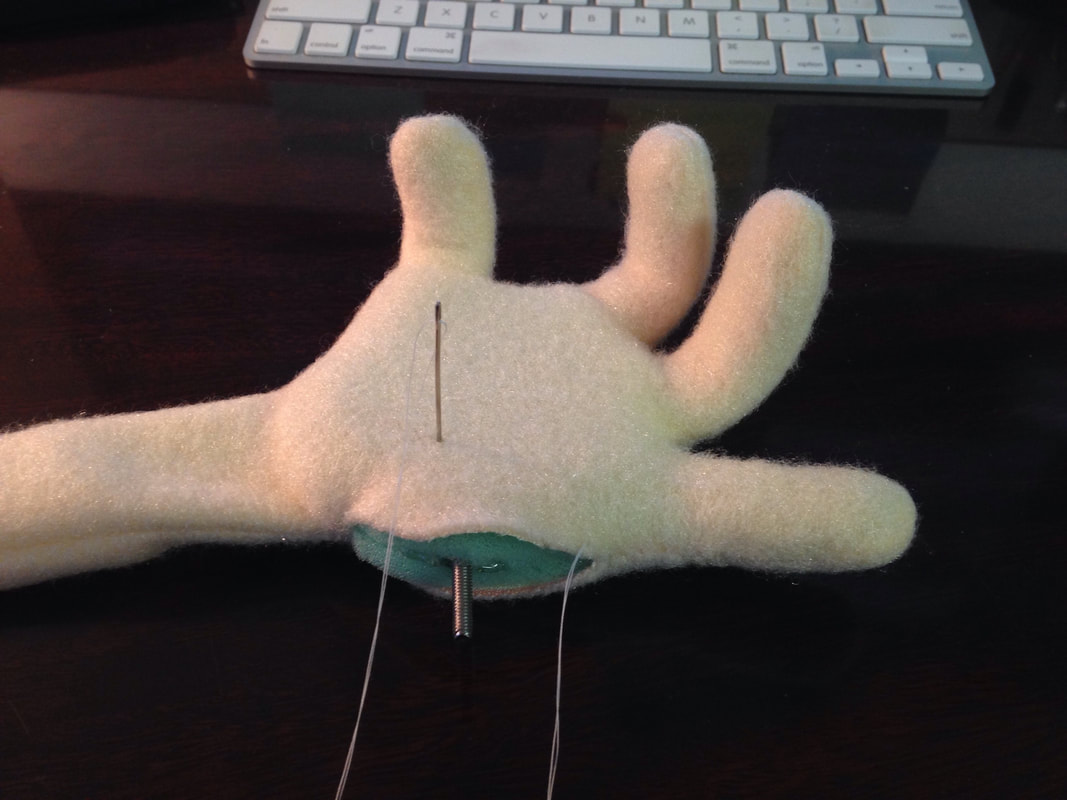
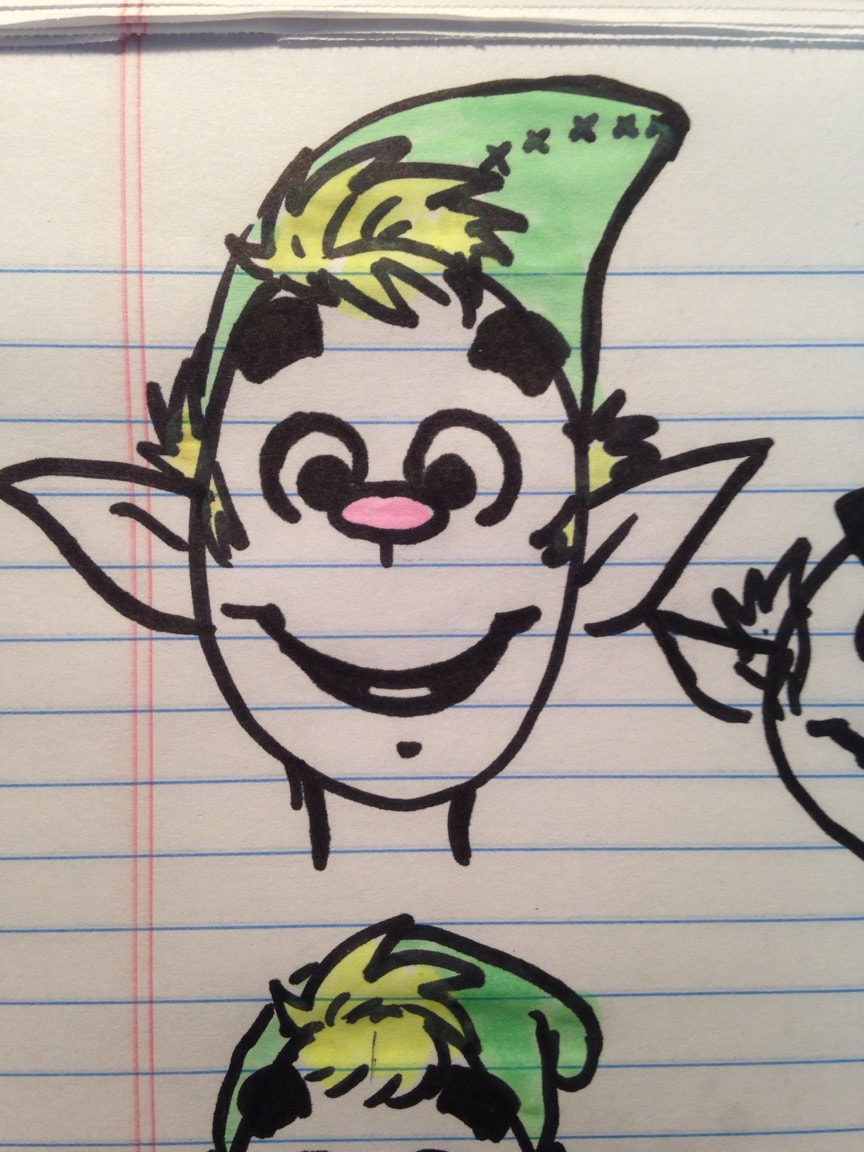
With the giveaway over, I can now focus on the elf character for "Beyond the Trees." I decided to machine sew his arms in order to give him a cleaner look (I'll still pick the seams). I left an opening in the hand so I could stuff the foam/wire hand inside. I also gave him very large, stylized elf ears. You can see in the second picture that I layered the ears (then smoothed out the shape using scissors) to give the ear an ridge. Hopefully things will start to move quickly!
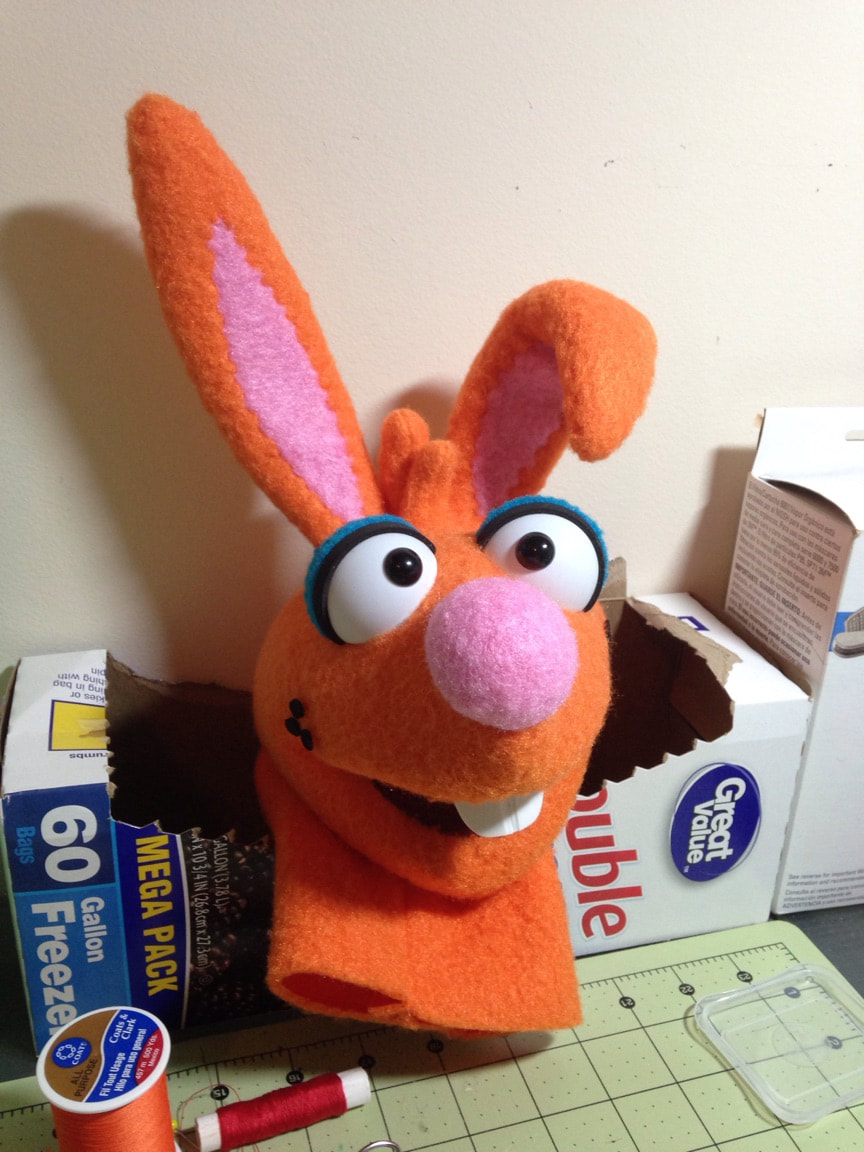
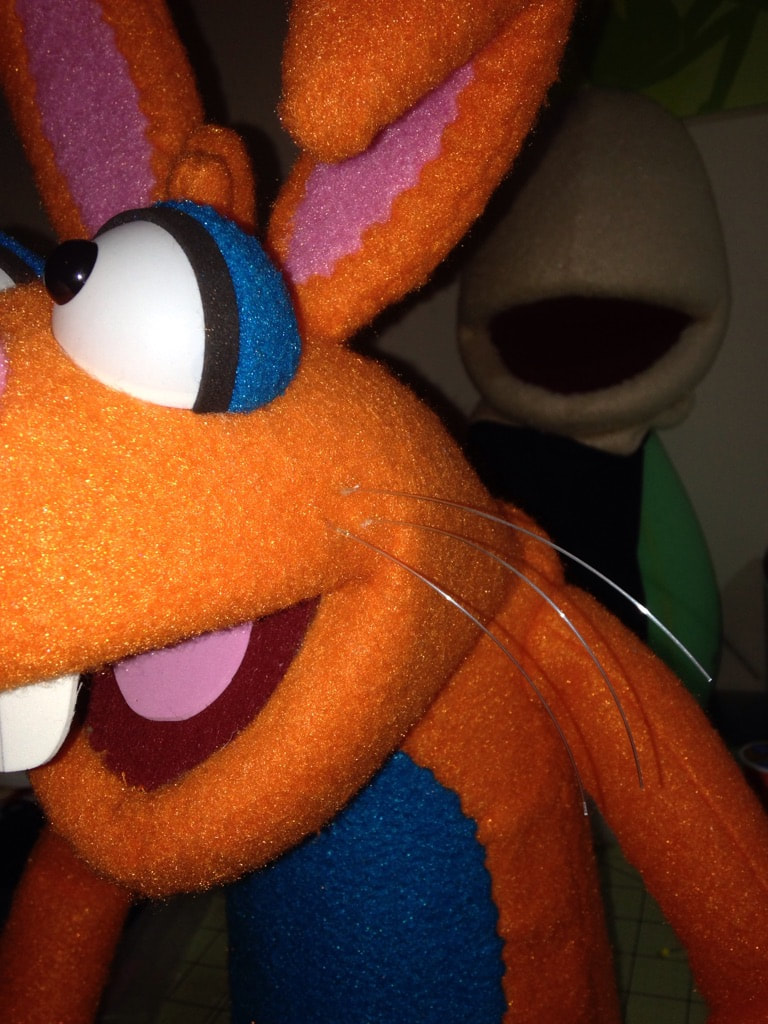
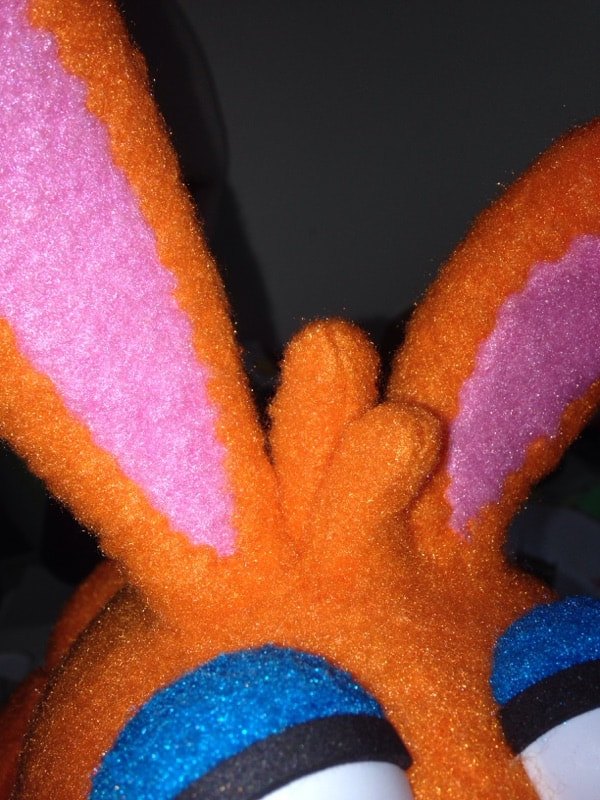
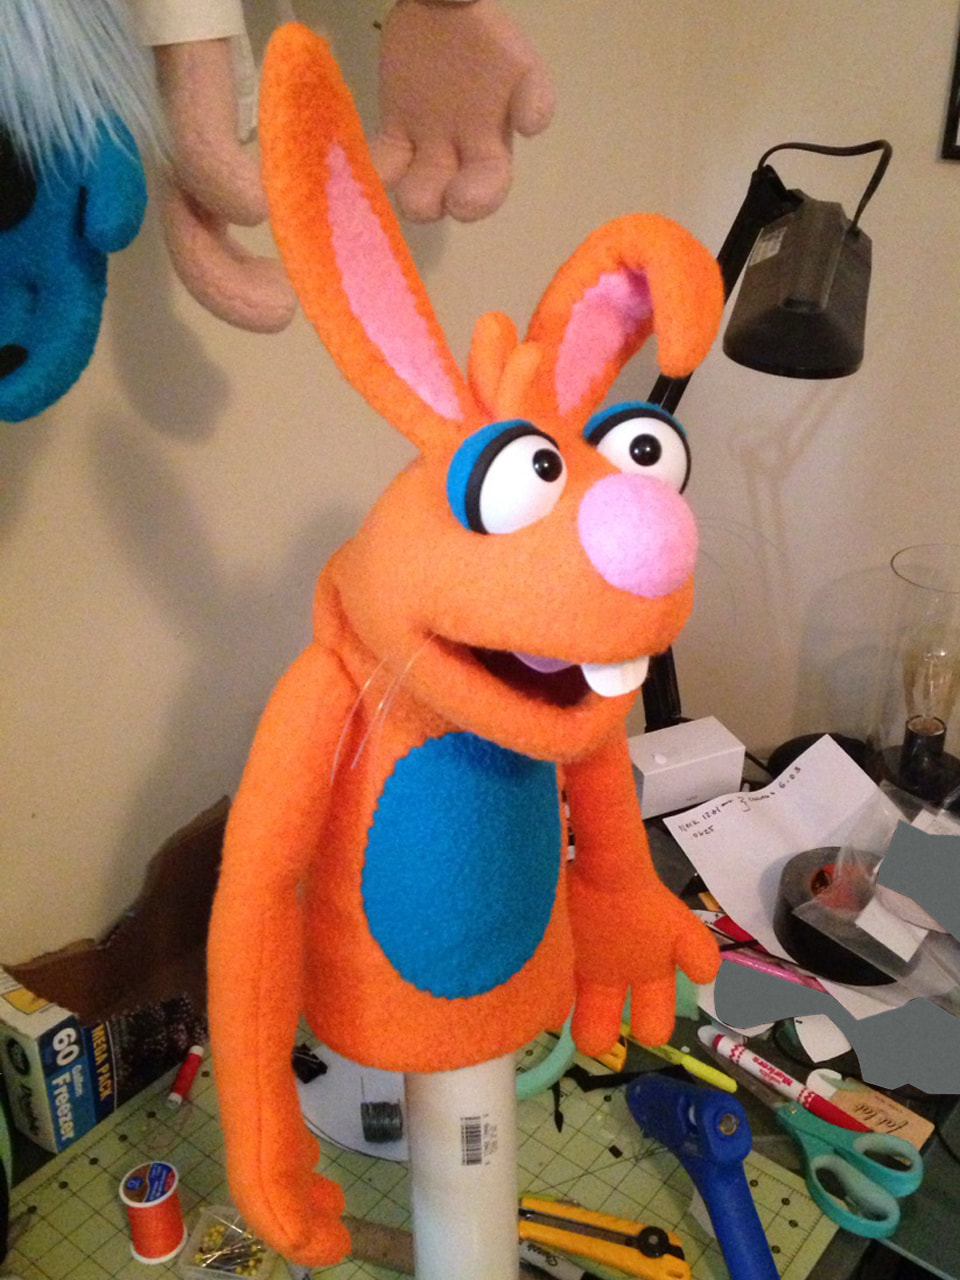
Just a quick, pictorial update on the giveaway puppet. It didn't originally start as a rabbit. Truthfully, I had no real plan for this puppet. But as I went, it began to lean more towards an animal, and then a rabbit. As with all my puppets, the head and neck are separate from the body to give the head more movement. This is a very simple, small puppet that will be good for beginners. I included some closeup shots (you can see that I swapped out his black dots for whiskers) to show that just by adding some design flourishes, it is easy to make a very simple design stand out; you don't always have to have a complex shape. Anyway, be on the lookout on my Facebook page for a chance to win this little guy!
So, by now, hopefully you know that I am working on 2 puppets at once. 1 special puppet and 1 puppet that will be a part of a free giveaway as soon as it is finished. So when I update this blog, there will pieces of both being documented, not just one at a time.
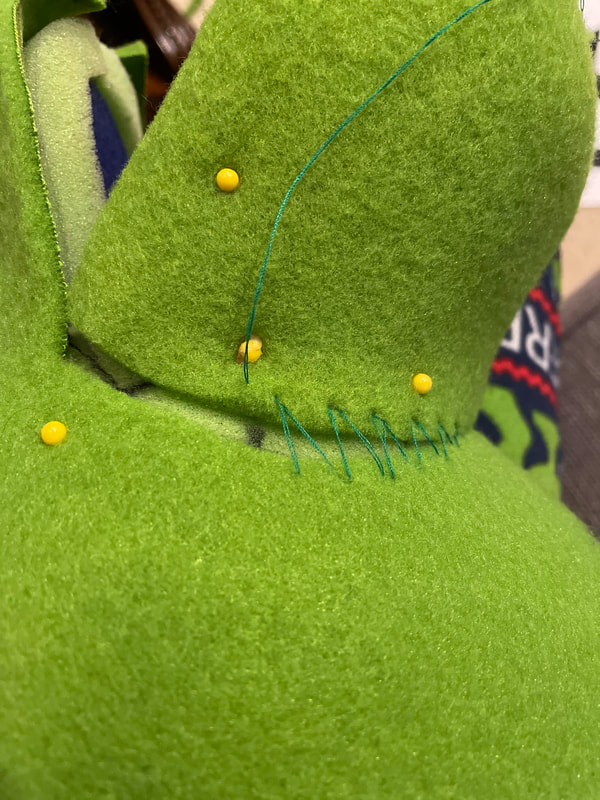
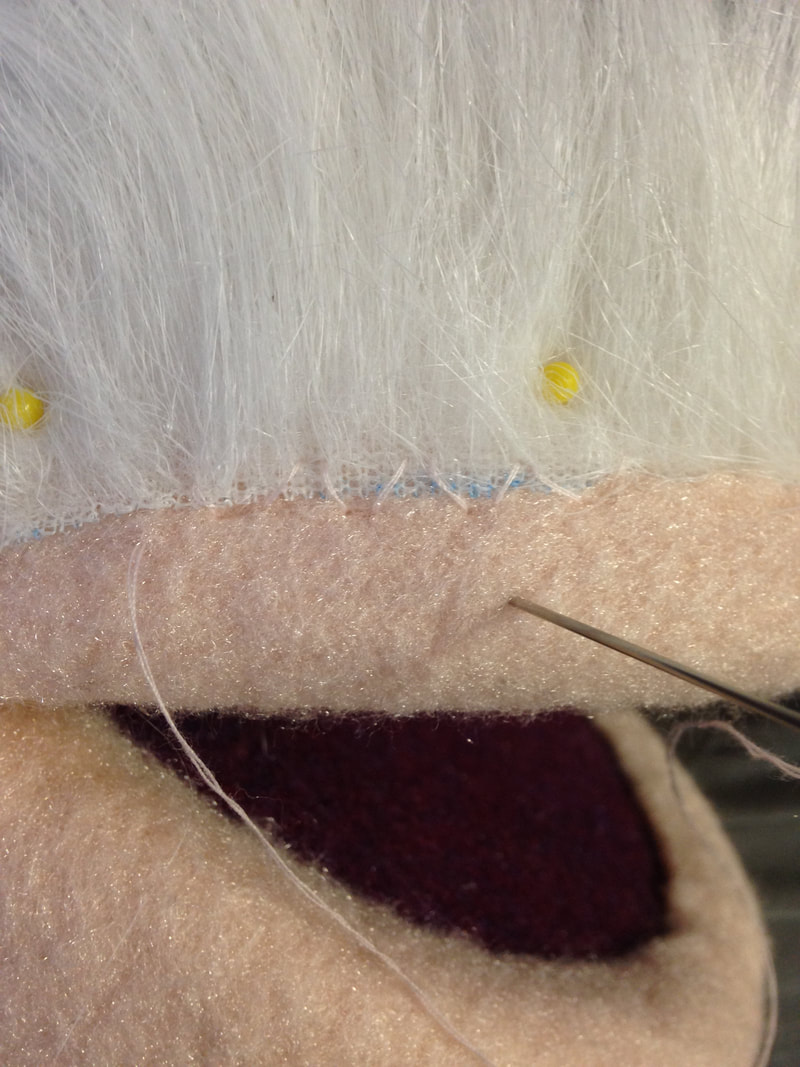
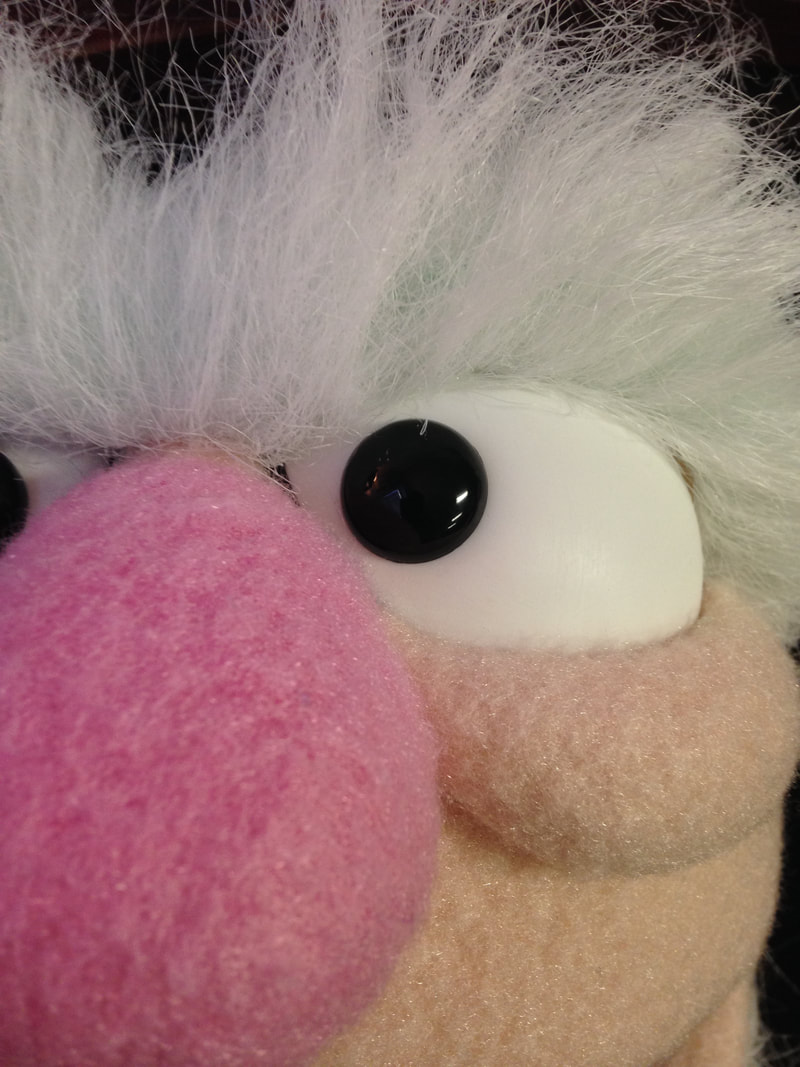
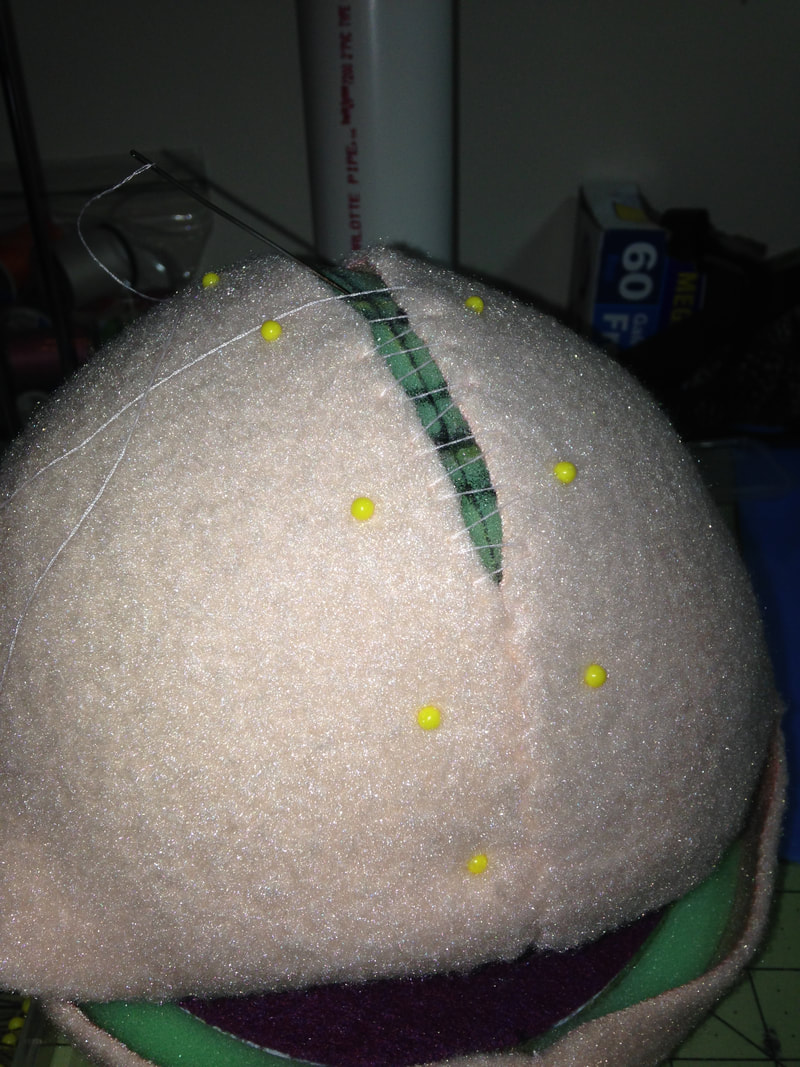
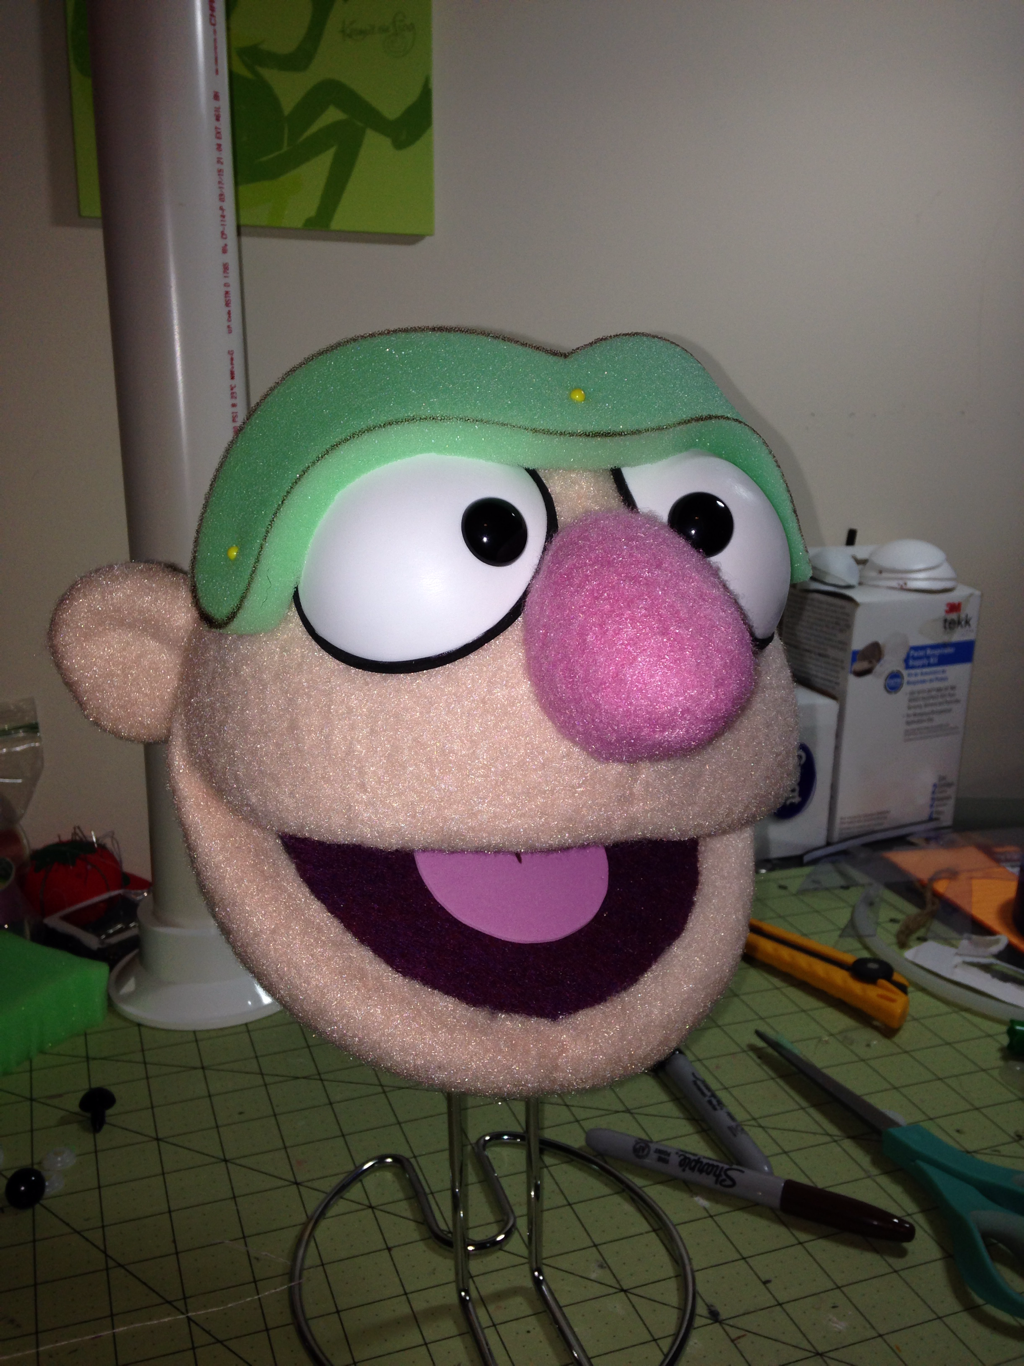
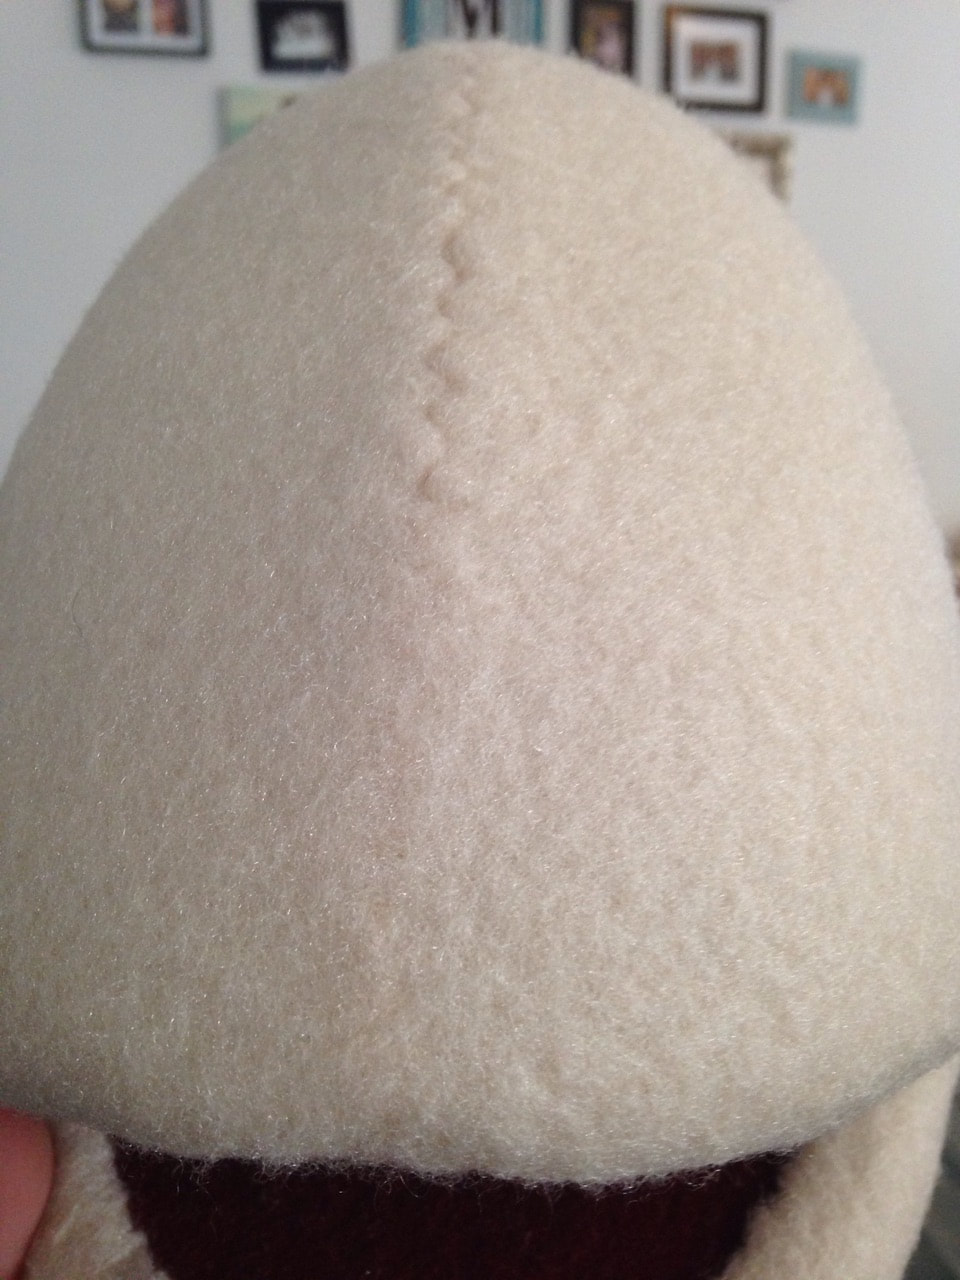
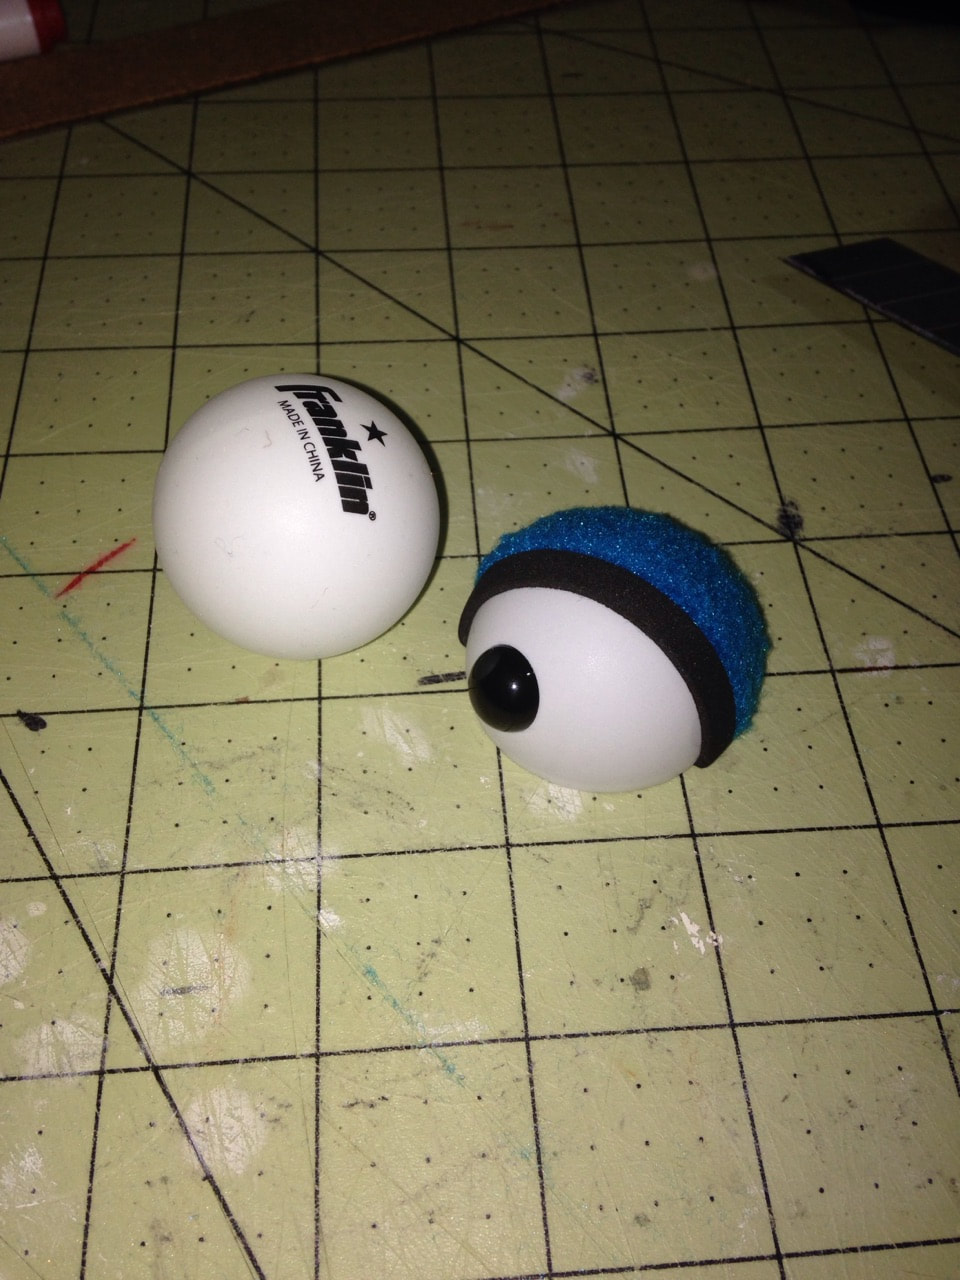
History lesson: Jim Henson figured out that if you stitch the puppet a certain way, using a certain material, then take a needle and pull the fibers away from the seam ("picking the seam"), the seam will almost disappear. In the first picture you can see the results: the bottom half of the face has been picked, and the top hasn't. The second picture is a concept for the logo of the "super secret project." That's all I can say about that haha! In the last picture I wanted to show you how simple it is to make really nice puppet eyes. These particular eyes are made of nothing more than a ping pong ball that has been cut in half. A lot of people use felt circles for the pupils, but I like using solid black doll eyes because it gives the eyes a little more dimension.
Okay... elephant in the room... No, the ghost character is not finished yet. I had some issues with his initial costuming, so I am going to have to wait for another one to come in. He should be finished right after the new year. With that bit of info out of the way, I am happy to say that there are hopefully BIG things coming in 2018. This new build marks the start of a BIG project that I am not going to be too specific about just yet.
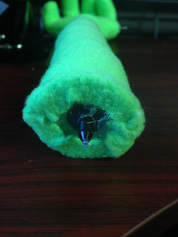
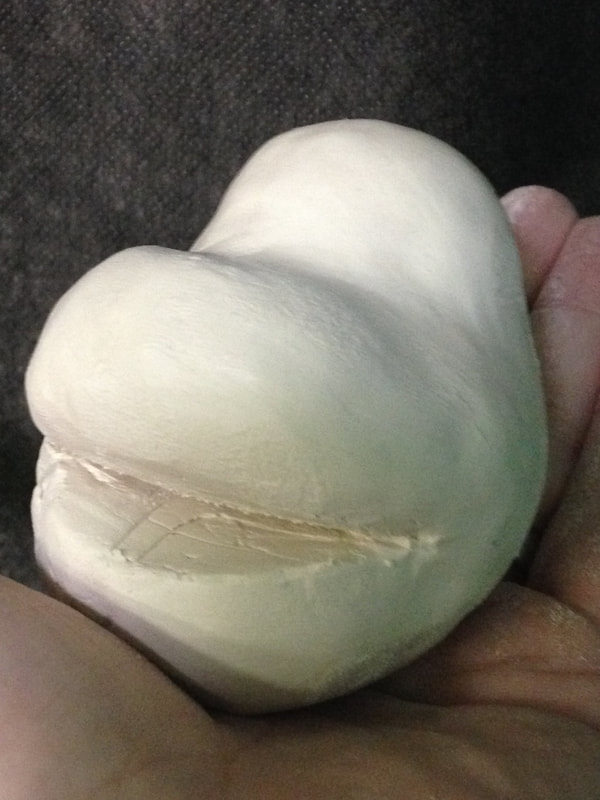
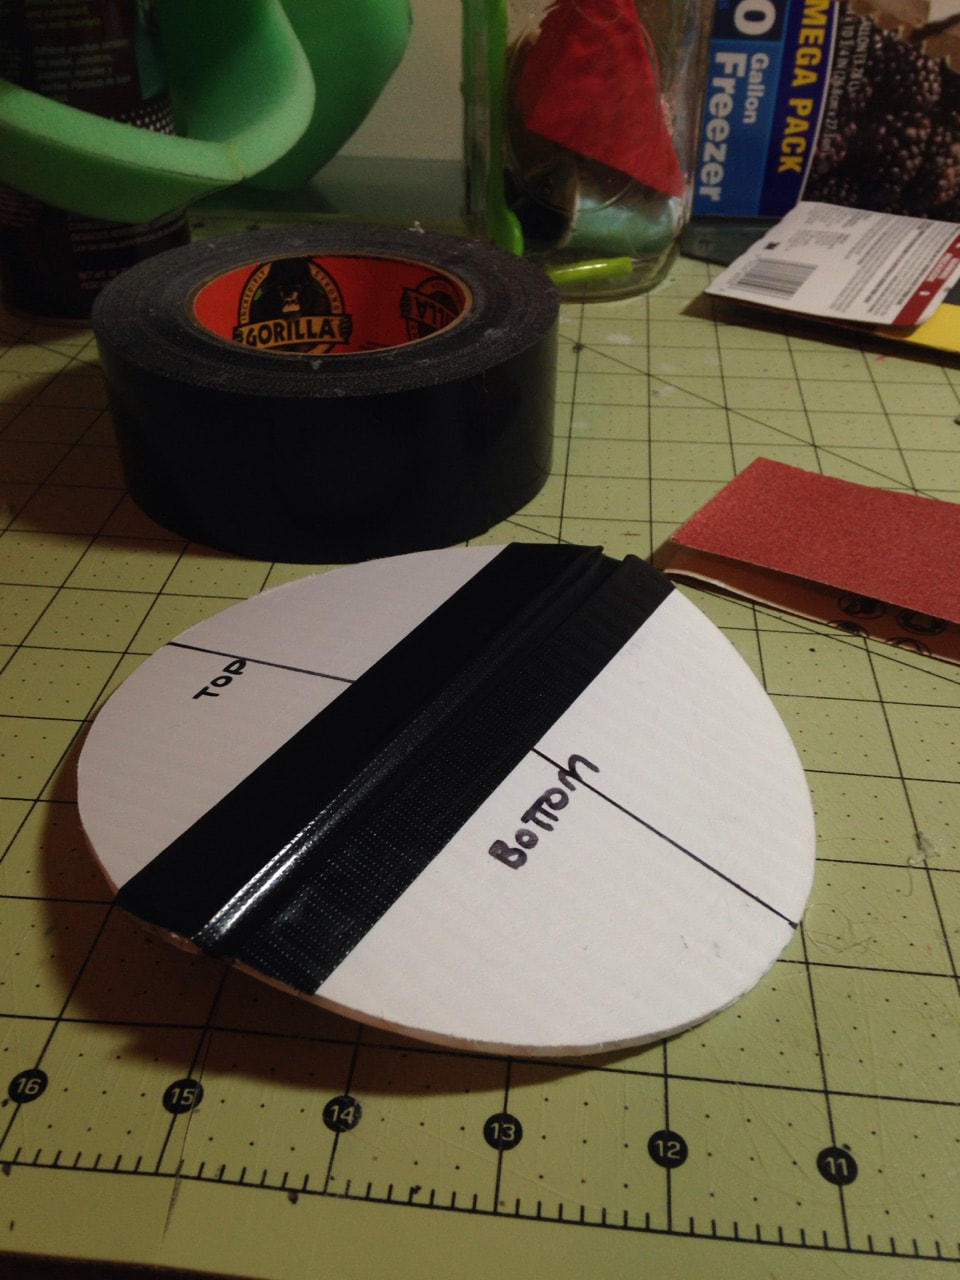
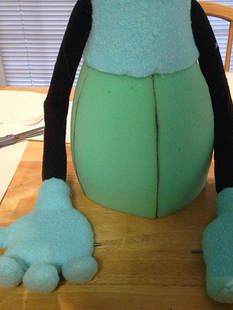
In any case, I also wanted to use this build to give a more in depth look at my building process. Building puppets, for me, is about using (cheap) materials in ways they were never intended to be used (Mythbusters anyone?). This also makes the puppet itself more affordable for customers! The puppet head is built out of .5 inch upholstery foam. Why is it green? I dunno, that just seems to be what Joann carries now! When I build my mouthplates (arguably the most important piece of the puppet) I generally use corrugated plastic signs (Yard Sale, For Sale, etc.) from Wal Mart. To make the mouth hinge I use Gorilla Tape, which, if I was stuck on a desert island, would be the one thing I would bring! For those of you who noticed, yes, there is another puppet head in the background of the 3rd picture. Keep that in the back of your mind because it will be making an appearance, for something special, on my Facebook page soon!
I know it's been a while, but when you create a Children's web-show from scratch and also have a newborn arrive, things tend to get a little crazy haha! In any case, I have been fortunate enough to start back with the ghost puppet. First things first: I will NOT be creating a custom hat. Hats, as it turns out, are really hard to create for cheap and look good at the same time haha. But no worries, I already have the situation covered.
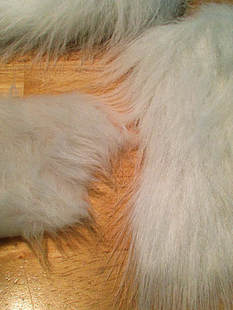
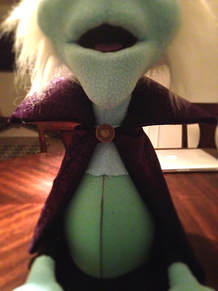
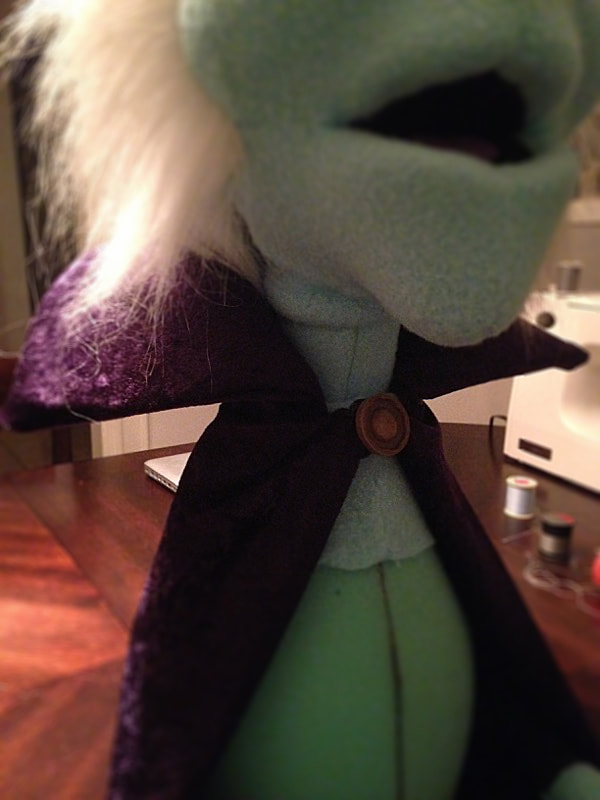
Moving along, I made a BIG change (well, to me it's big) to the head. If you look at the previous post, you will see that the hair is pretty short. I didn't like how that looked. So I decided to switch the short pile fur, for a much longer pile fur. As it turns out, switching to a longer pile makes a HUGE difference (small teaser in the last two images). In the second image you'll see that his body appears to be mostly uncovered and that his arms look like they have permanent black sleeves. Well, both are true haha! The reason for this is because he will be clothed in a grey suit (yet to be found), so I didn't want to waste any more of the blue fleece than I had to. Lastly, I was also able to create this character's Victorian style cloak from left-over purple material from the last build. When paired with the hat and suit, this cloak should help give him an old-world feel. |
Jesse Moorein this blog you'll get a small glimpse into what goes into the puppets I design and create. If you have any questions, please email me at [email protected]. Enjoy! Archives
May 2024
Categories |


 RSS Feed
