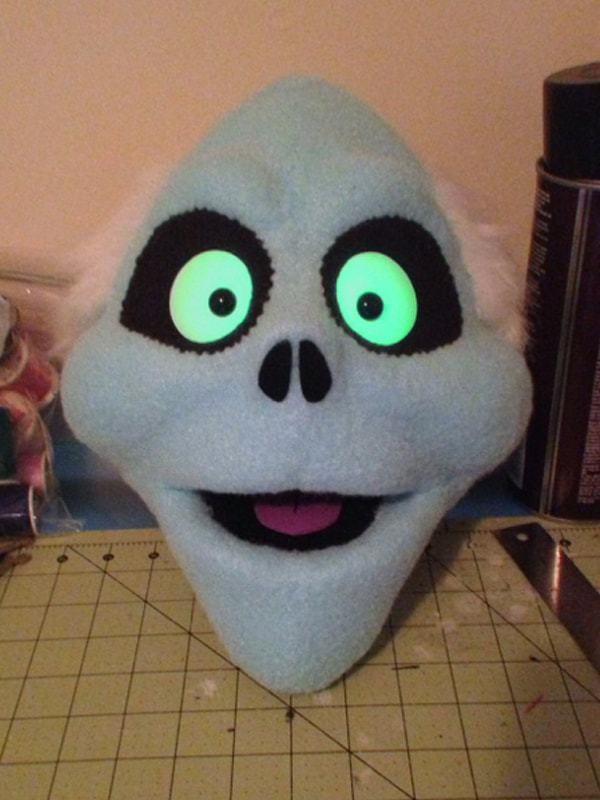
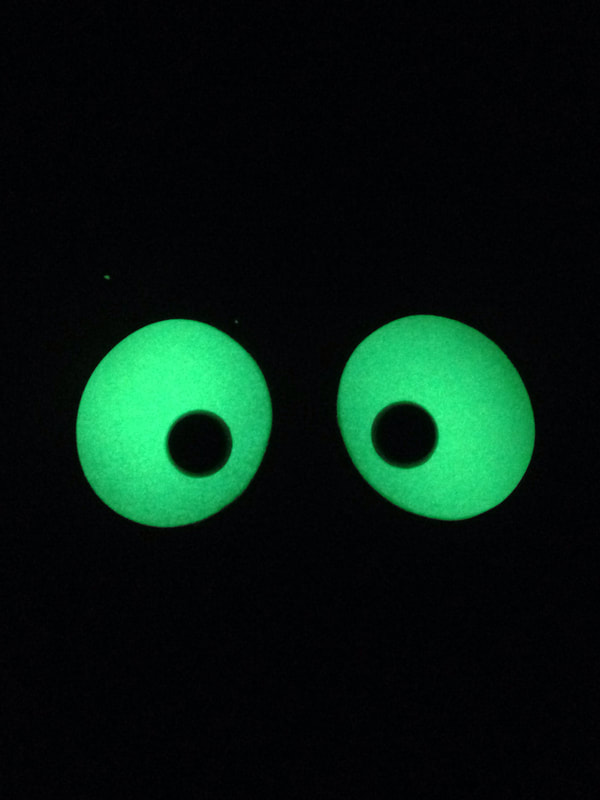
Well, the head is finished (this will be a quick update)! Part of what makes this character's eyes "pop" is that it is surrounded by black material, which is sort of simulating eye sockets. As you can see, I have also tested the glow-in-the-dark eyes. It works better than I expected! Next I will be working on one of the most integral parts of this character: his stovepipe hat!
0 Comments
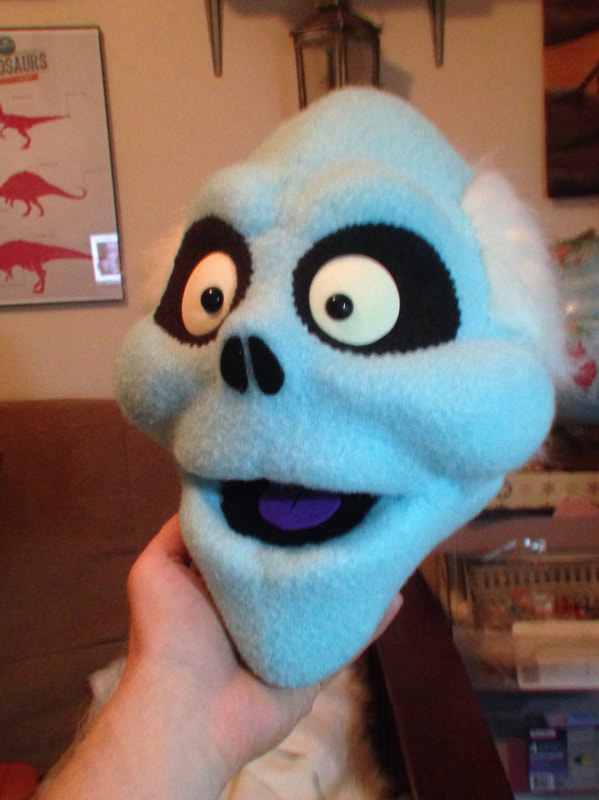
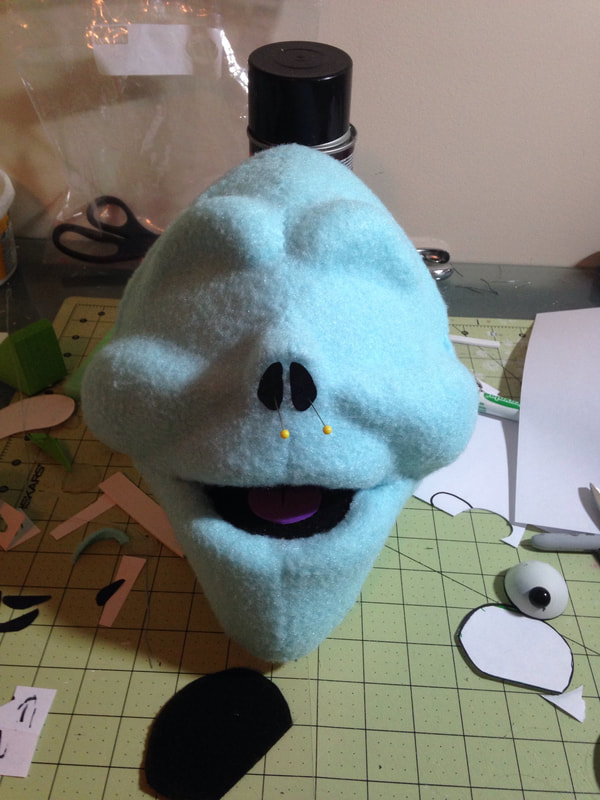
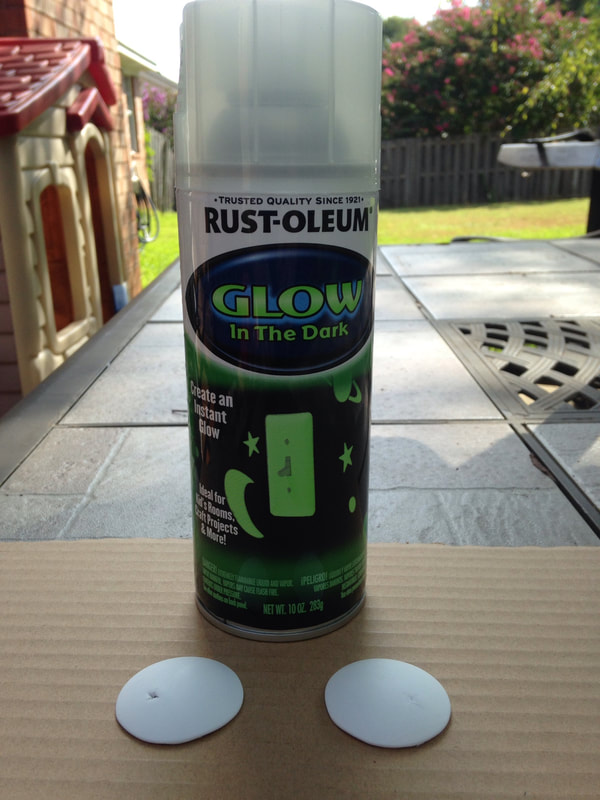
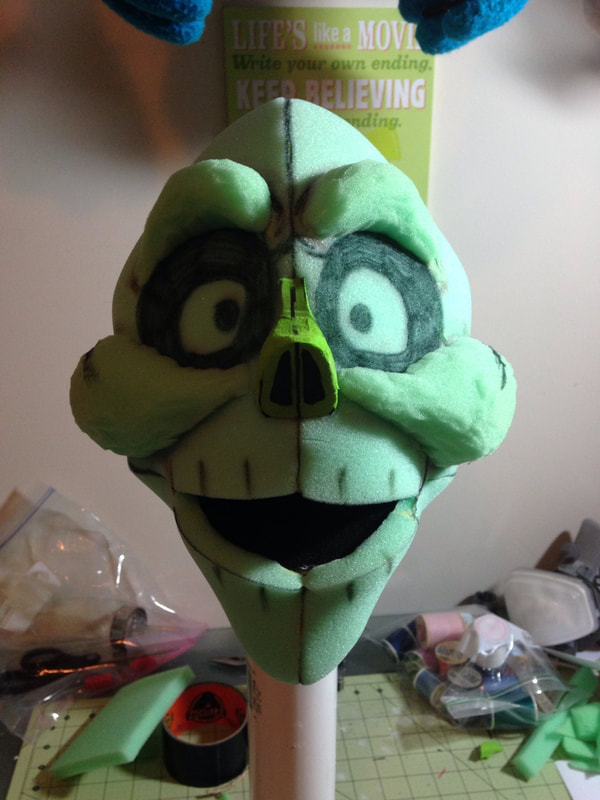
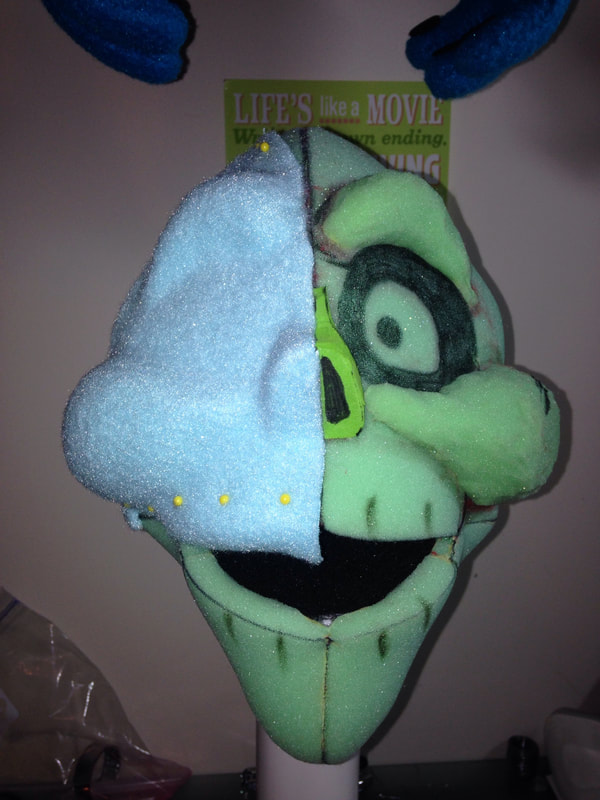
The fleece covering on the puppet (by the way, the color is PERFECT for this particular character) has smoothed out the details and have made them "pop" exactly as I imagined they would (whew!). Eventually, I'll pick the seams so they will be fairly hard to see. As you can see in the first image, I am starting to size and fit the facial features. One thing I really wanted to do with this puppet is have glow in the dark eyes. I consider myself a hoarder of spray paint, so it was only natural that I grabbed a glow-in-the-dark can to see how it would work on my eyes. Turns out it works pretty well! Things are moving along quickly, so keep an eye out for updates!
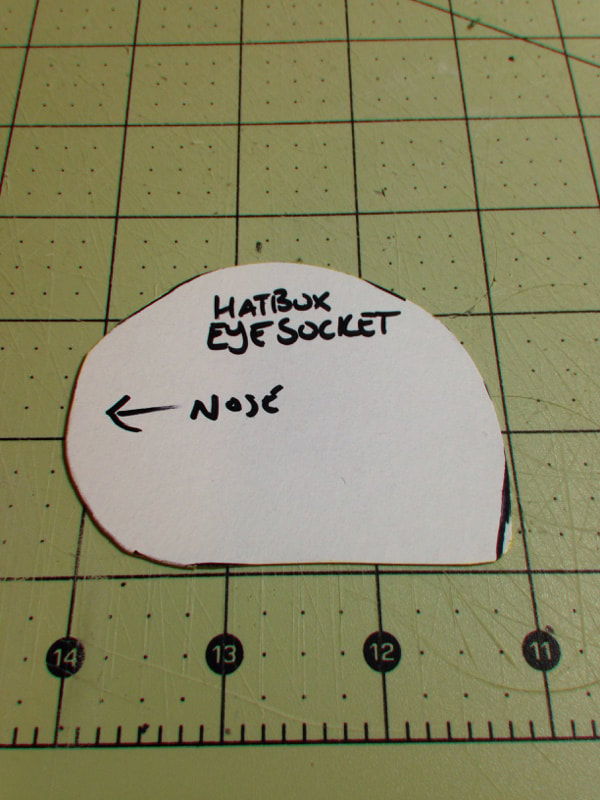
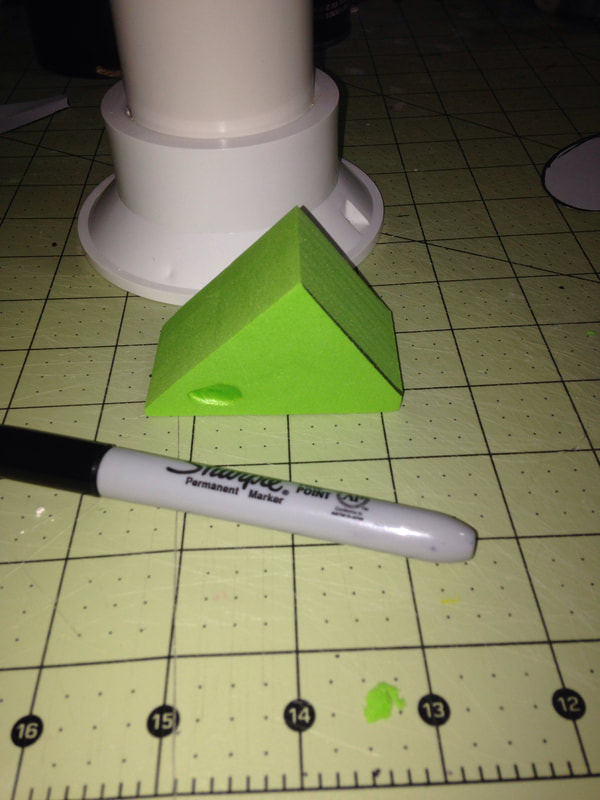
I recently started my next project, which is based off of one of my favorite things. However, I'm not going to reveal what that favorite thing is until the end (though there will be plenty of hints). For this project, I needed there to be some more complex shapes happening on the face of the puppet. All these shapes will eventually be covered by fleece. However, one of the shapes, the nose, needed to be a little more sturdy than the foam I usually use (I didn't want it to lose form when I covered the head with the fleece). So, my 15 month old daughter unknowingly sacrificed one of her foam building blocks! It was the perfect density for structure as well as flexible should it fall or things like that.
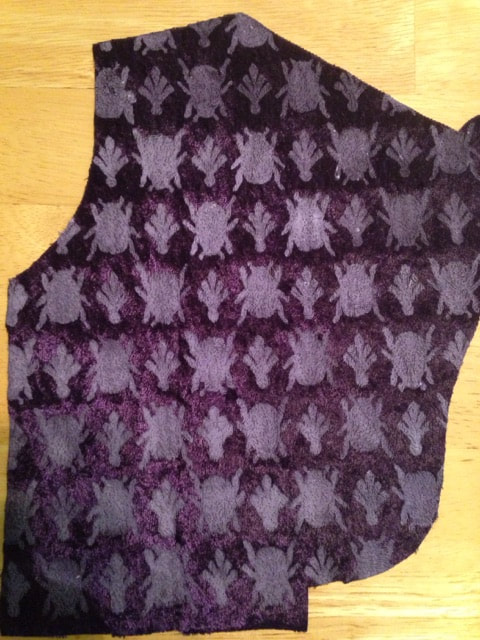
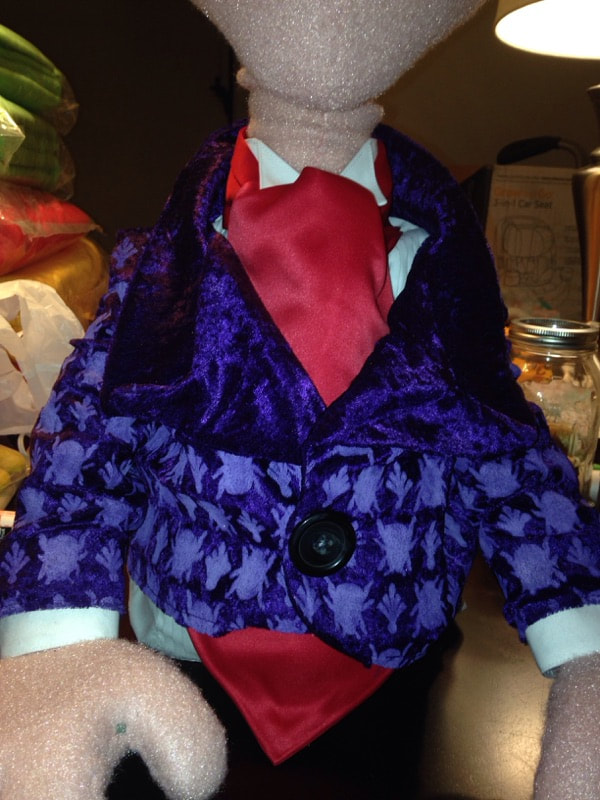
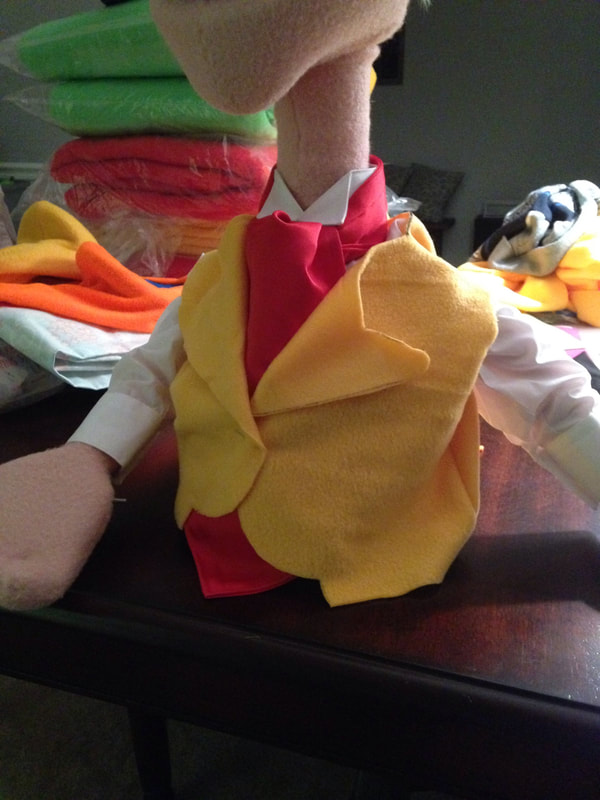
The coat is finally finished (look for full pictures of Professor Tinwhistle soon). It was an interesting process, learning how to make my own costume pieces (I should have done a step by step for creating the fez, sorry). After I had successfully created a test coat, I started on the real thing. I had bought some thin, purple velvet-like material for Tinwhistle, as I wanted him to seem higher class than what the other characters are used to. However, it was a bit plain-jane for me, so I created my own repeatable pattern to transfer to the material. The pattern includes a beetle since Tinwhistle appears to be from the golden age of Egyptian exploration. There are definitely some aspects of the coat that need improving; something I'm sure I will get better at with time. However, I am very pleased with the outcome, and the overall look it gives the character.
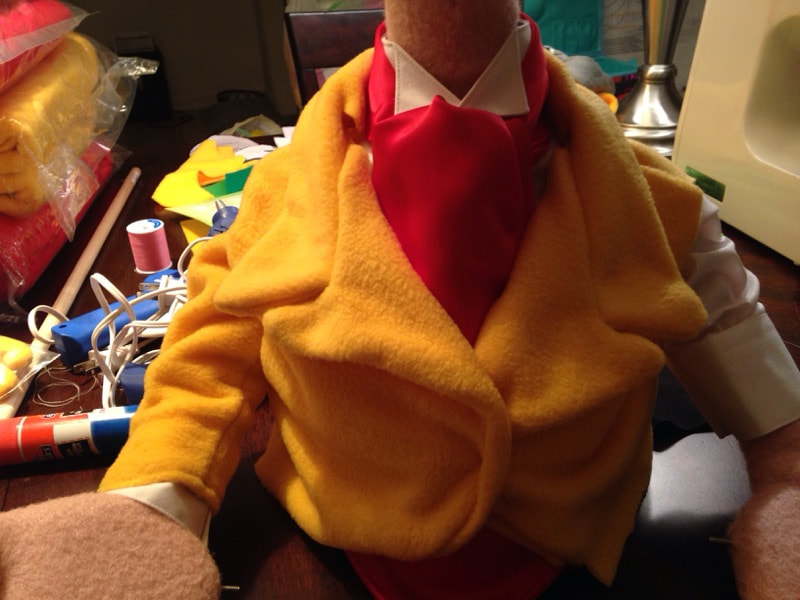
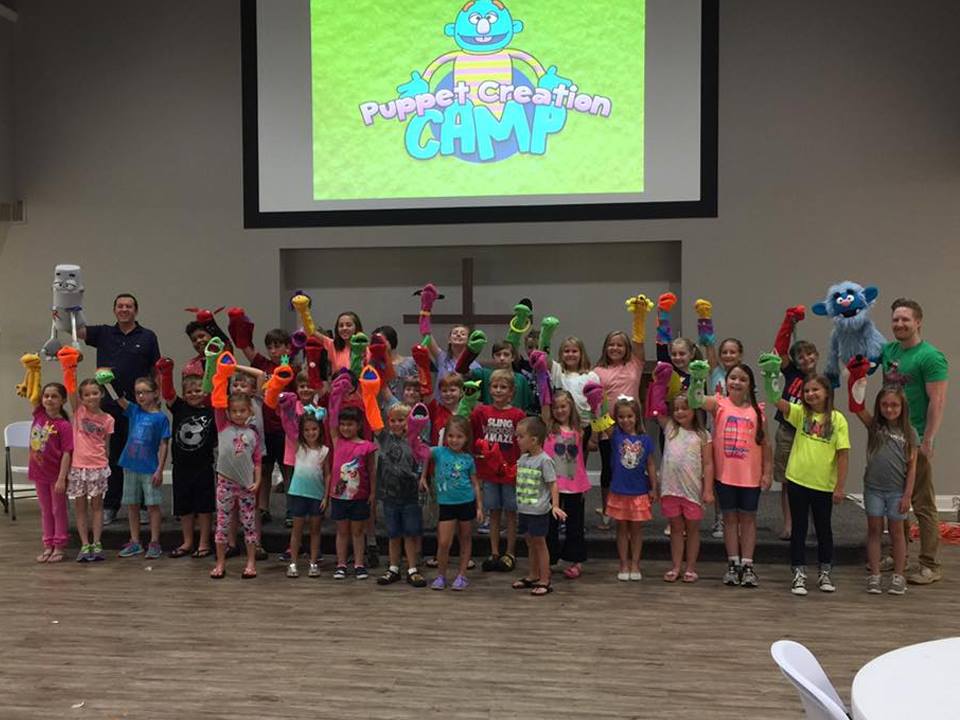
Summer used to be slow, lazy, and relaxing. Well not anymore! I have never felt so "go, go, go" in my life. In any case, a lot has been happening. Professor (Dr.) Tinwhistle is complete... if you don't count his costume. I am working on it (still working on the pattern with test material), but because I have never made any clothes before it is a little slow going. I also had to stop in the middle of making his costume because we put on a "Puppet Building Camp." My family and I made over 4o puppet bodies in 1 week! It was insane but turned out to be a really fun day!
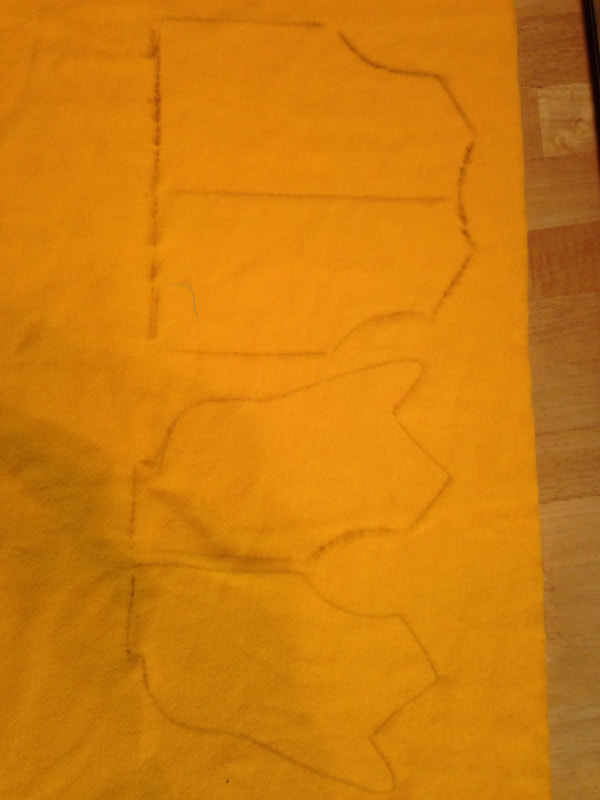
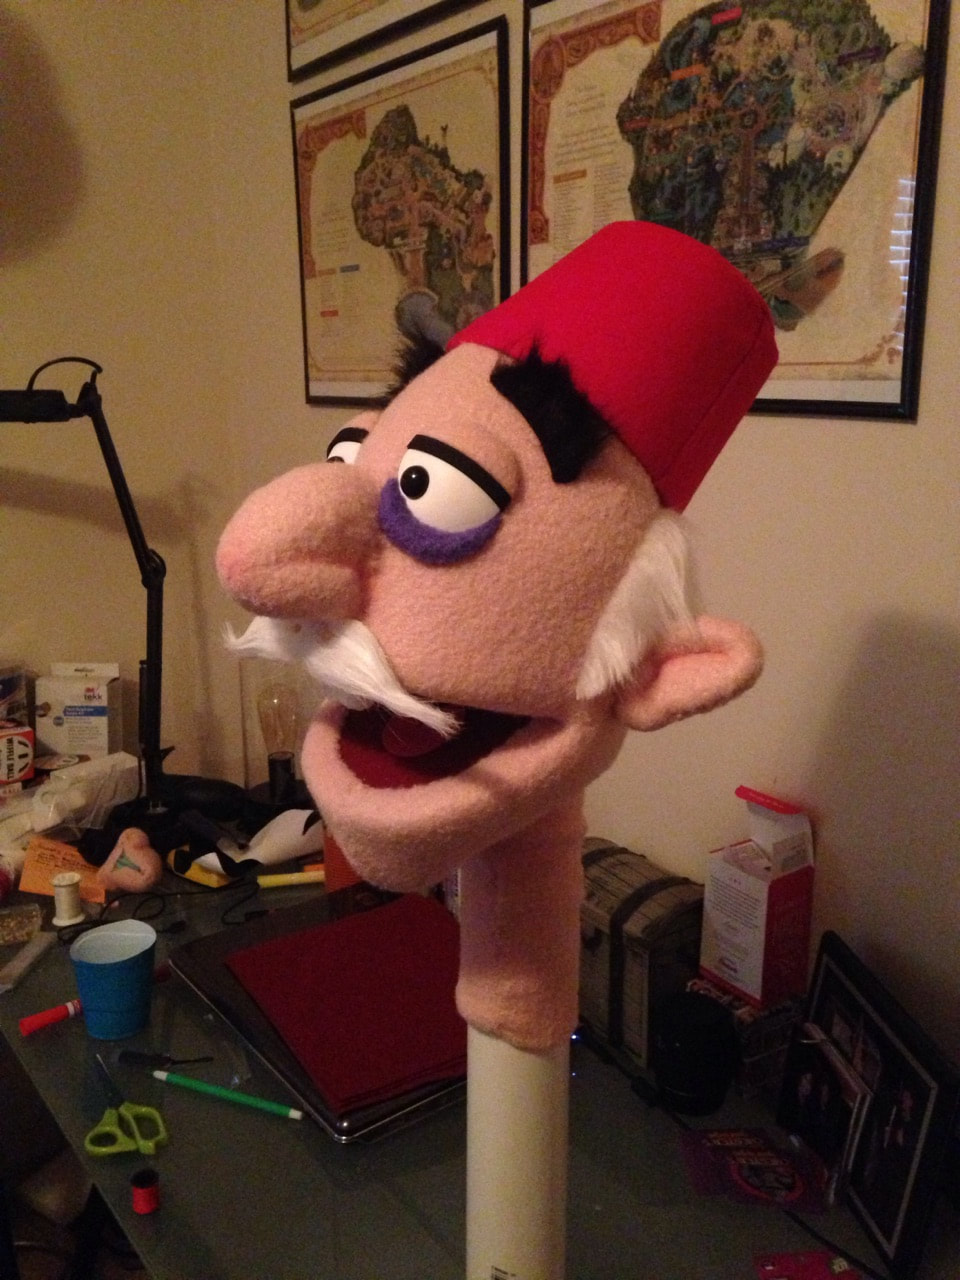
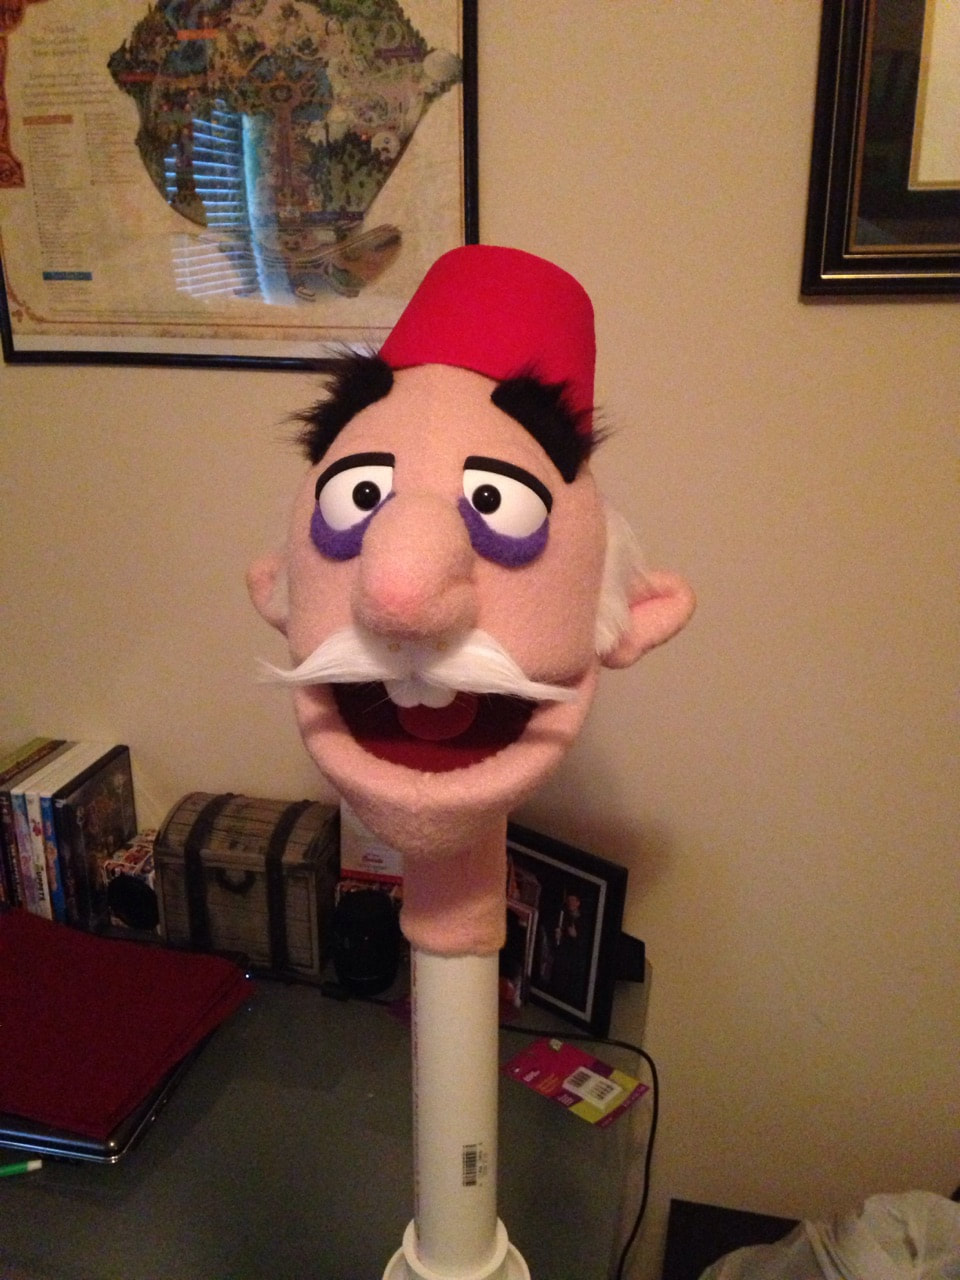
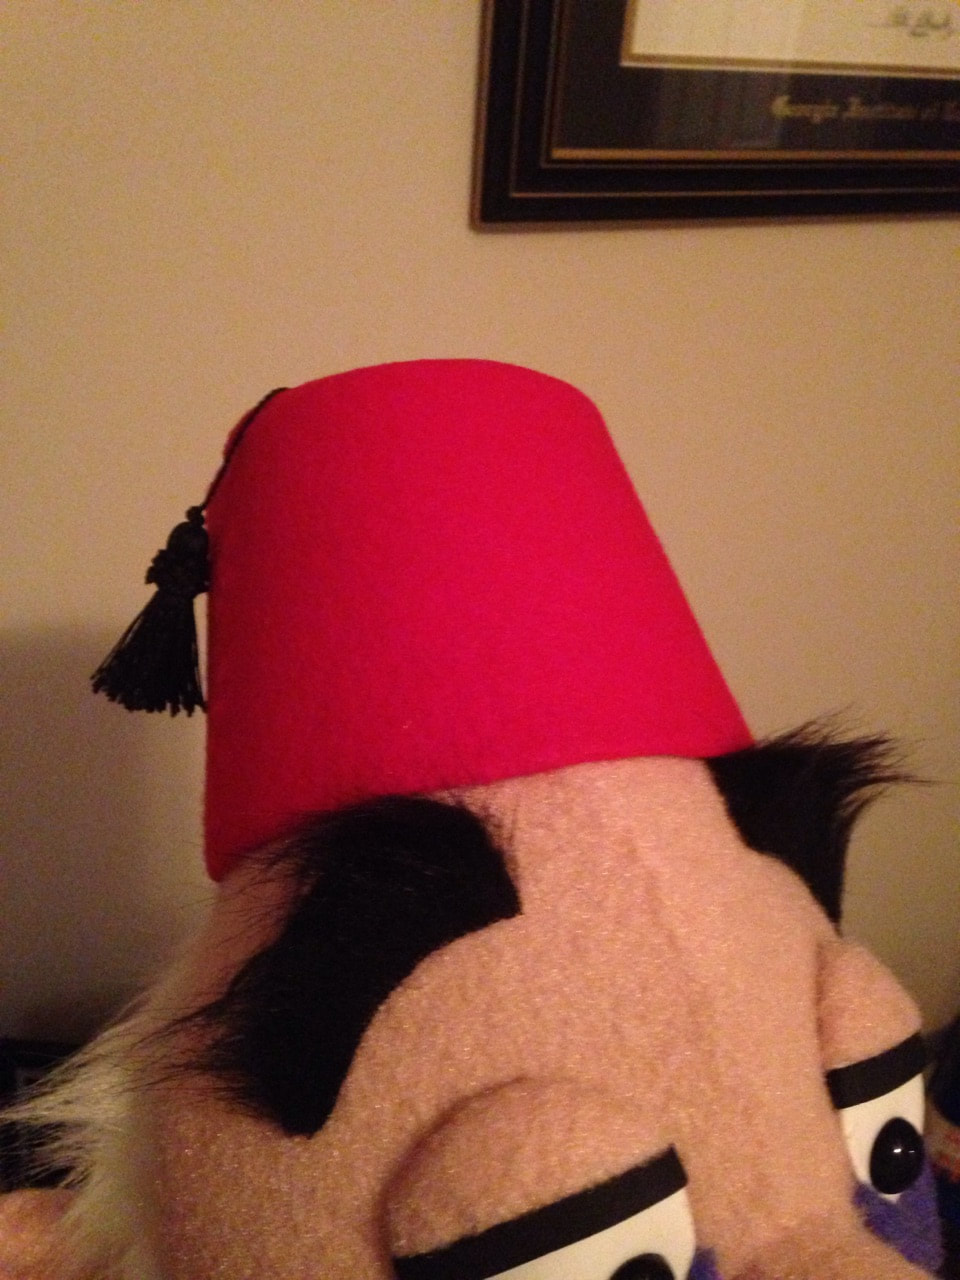
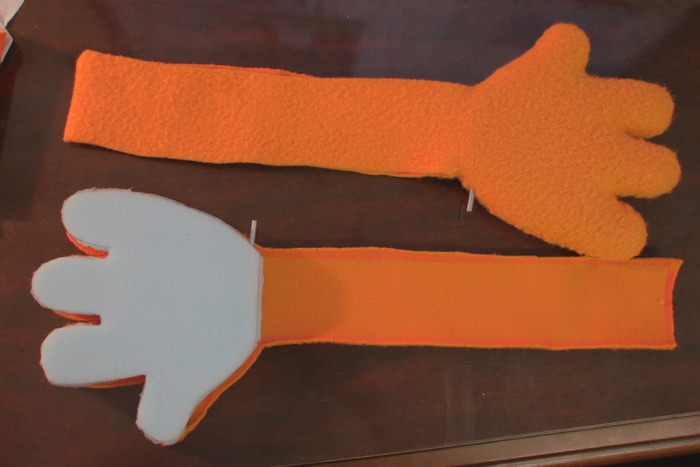
It has been an unbelievably busy summer, so I've had to step away from puppet building for a few months. But, I've finally been able to start back. With Dr. Tinwhistle the bulk of the creation process will now go towards his wardrobe. I have gone ahead and built his fez in order to round out the design of his head. It was pretty easy to create, but I wish I had one long sheet of red felt instead of having to piecemeal 2 separate sheets. You live and learn; it still looks cool! However, the rest of his costuming will have to wait until after I build his body and make his arms/hands. I suppose everyone has a part of the process they like least, mine happens to be the making of the hands. Because I insist on hand sewing, skinning the hands tends to be quite boring and tedious.
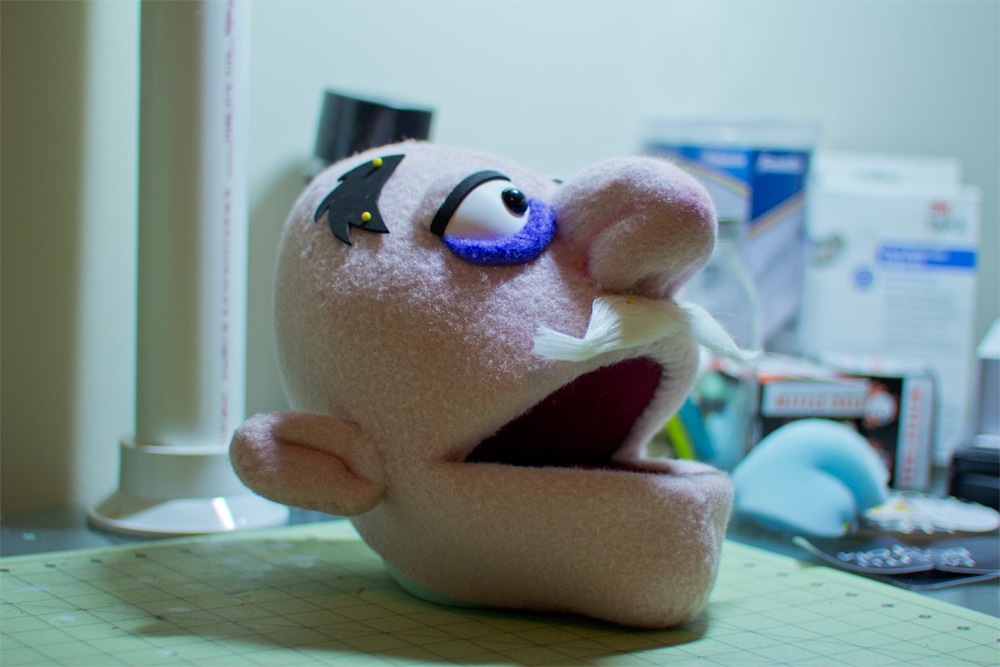
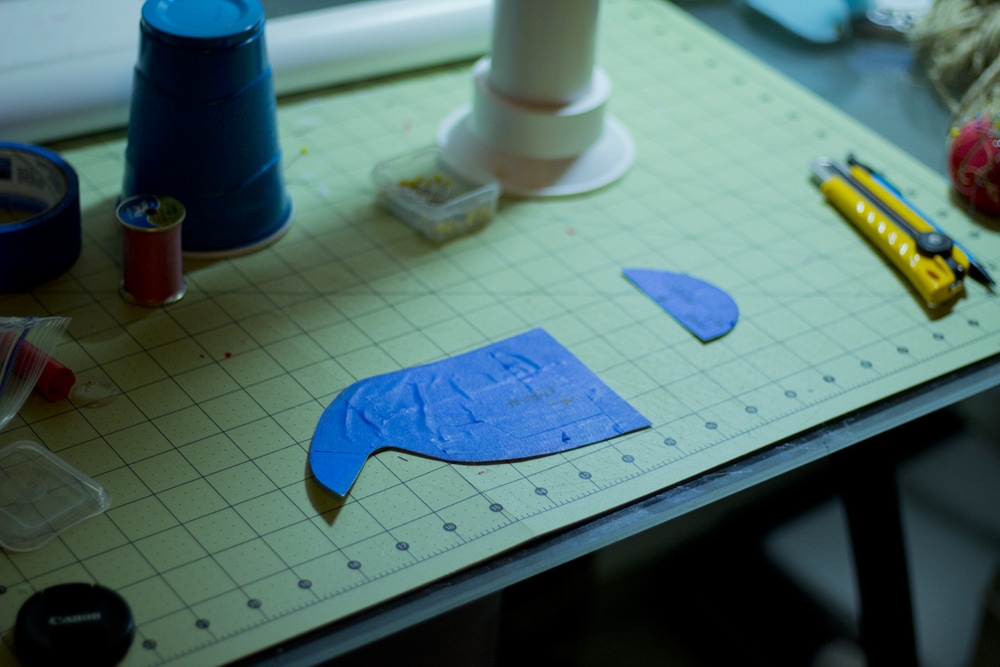
First, let me say that I'm sorry I have not updated this character in a while. It has gotten quite busy around here. It has finally sunk in that this build may be the toughest build with what I have planned (creating his costume myself). As you can see, I have gotten quite far on the progress of the head. The gigantic nose was sculpted from foam the usual way (box cutter and scissors). In order to get a pattern for the hair, I simply stuck painters tape on the back of the puppet head and drew out the shape I wanted. I basically did what I did to pull a pattern off of the clay form from the dinosaur build. Hopefully I will soon complete the head (and the body) and will be able to move on to the costume.
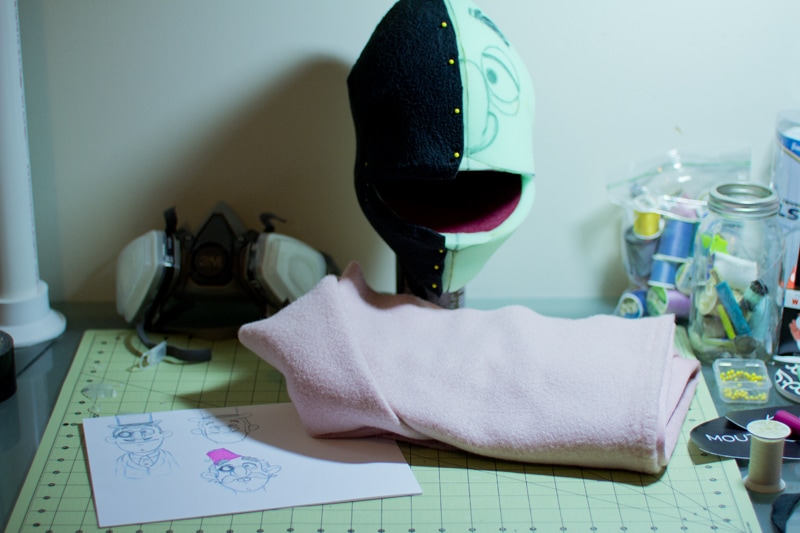
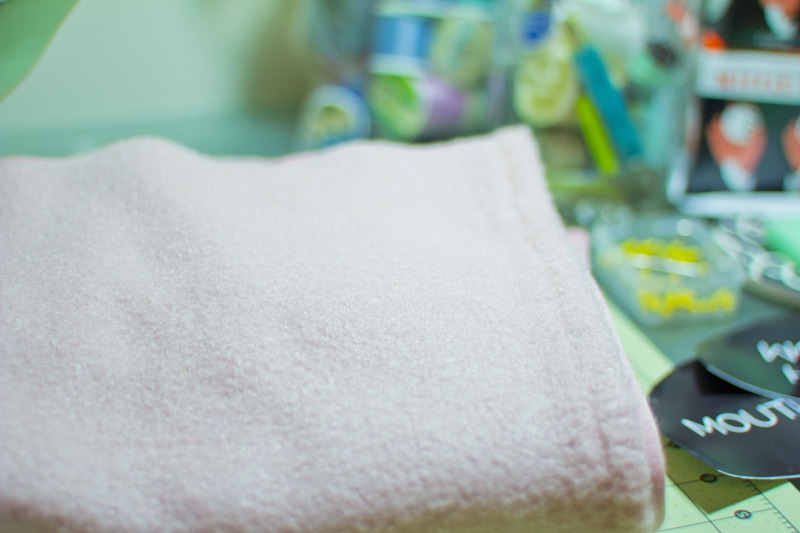
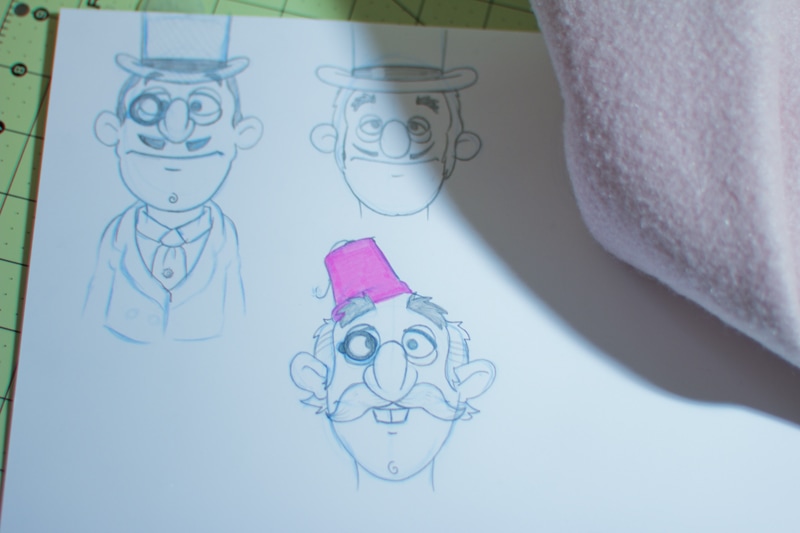
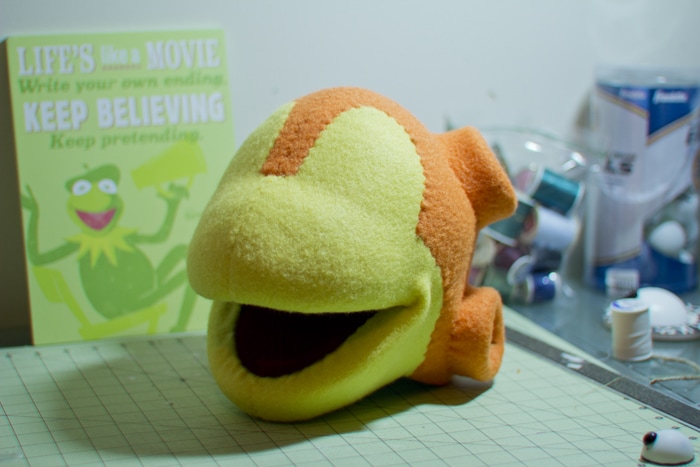
Work on the Professor character has started! This puppet is named Professor Tinwhistle, and is meant to be an old college Professor who is a little on the eccentric side. As you can see, I have already fabricated the head from my usual .5" foam. The black side of the head (1st pic) is where I am creating the fabric pattern for his skin. The material I use for puppet skin is called Antron Fleece, but is more commonly known as Muppet Fleece.
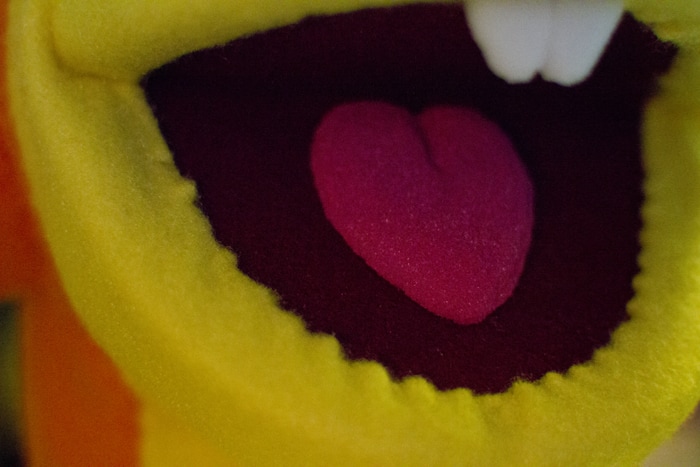
Well the dinosaur build has been fun, but it is coming to a close! I know I haven't posted in a while, but I didn't want to give too much away before the reveal. After the head was finished and skinned, I worked on the body. The body needed to have a flat belly (thanks Allison!) and bulbous back with bony protrusions in order to look more like an Ankylosaurus. The bony armor on the back was made from 1" white foam and then sculpted with scissors to make it appear like bone. The color was achieved by layering different colors of spray paint (same as the horns on the head). I also tried a new way of creating a tongue for this build. I wanted a 3D tongue, not a flat, craft-foam tongue, so I cut the tongue from 1" inch white foam and then sculpted it with scissors and a Dremel. I tried dying it, but it ended up just soaking up the colored water with no actual color adhesion. So, I went back to my old standby: spray paint. The spray paint ended up working perfectly and still allowed the tongue to be "squishy."
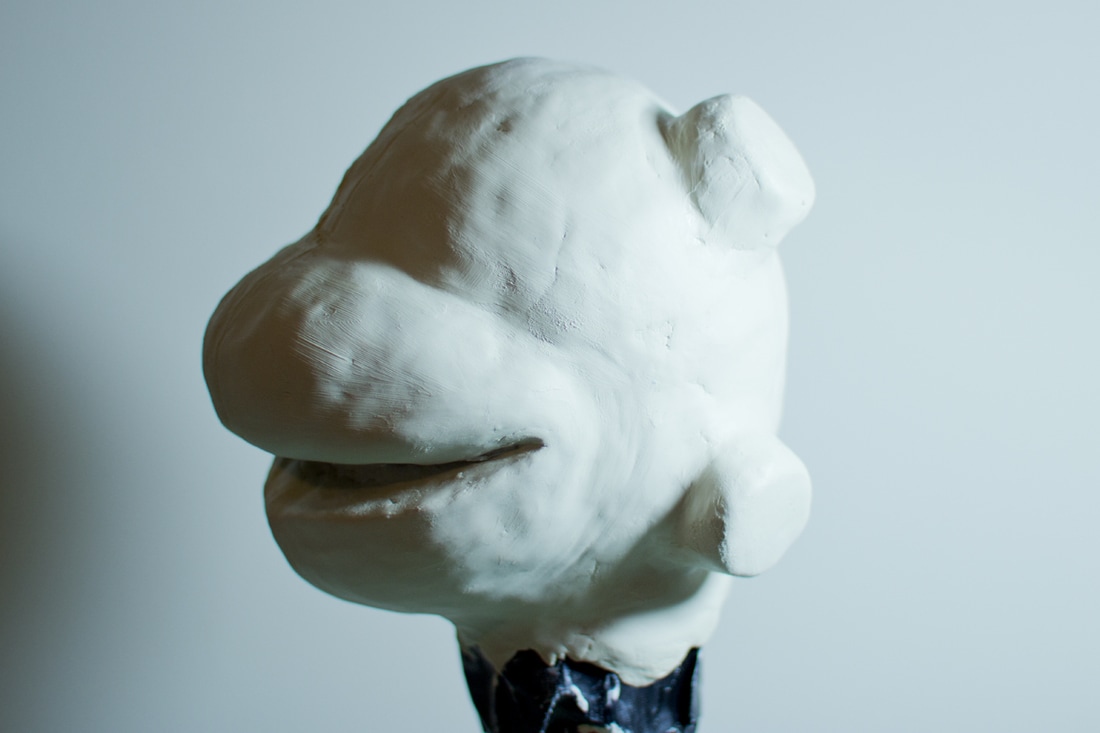
The head is the most important part of the puppet. It not only houses the mouth plate, but also will contain the base character of the puppet you are creating, Here you can see that I have traced the pattern I pulled from the clay model onto the foam. I have also decided to try a two-tone design for the ankylosaurus.
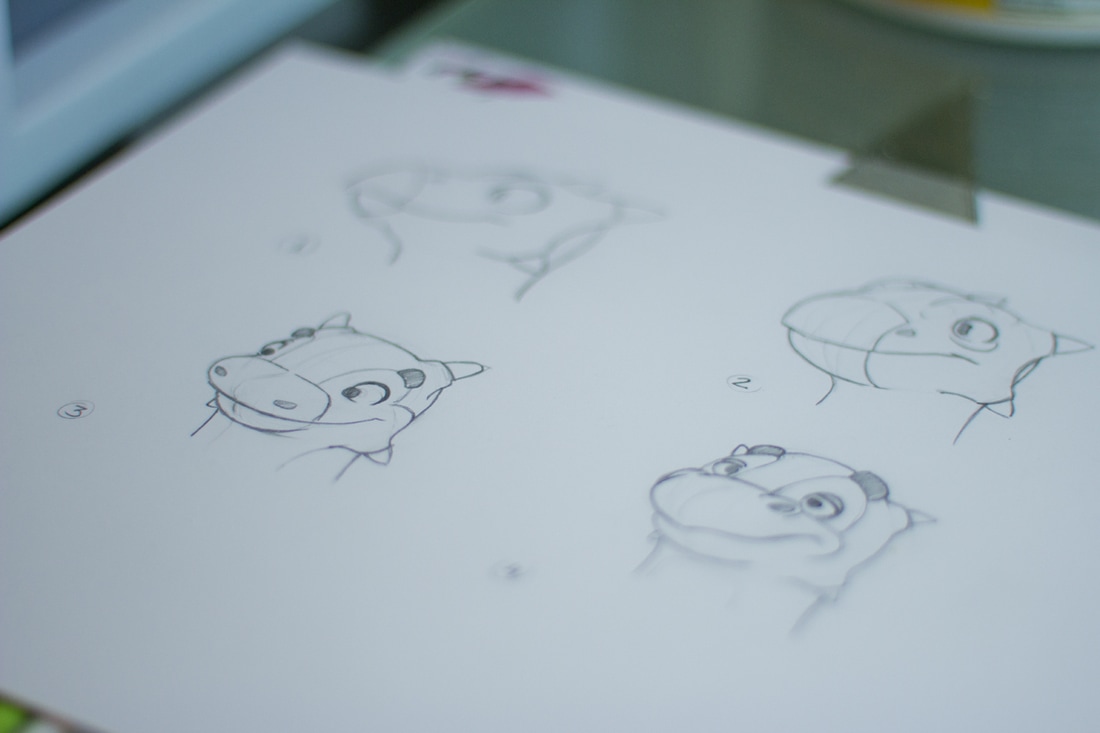
I am excited to announce that the ankylosaurus puppet build has officially begun. I have drawn up some concepts for the character and I like a few features from different concepts, so chances are the end product will look like a combo. I have also sculpted the basic head shape for puppet, which I will then pull a pattern from for the foam. Fun times ahead! Enjoy the photos and keep a sharp eye for more updates! If you have any questions, do not hesitate to ask!
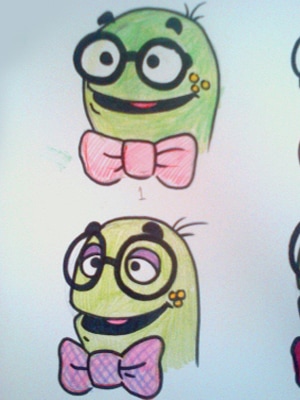
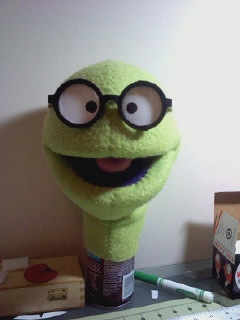
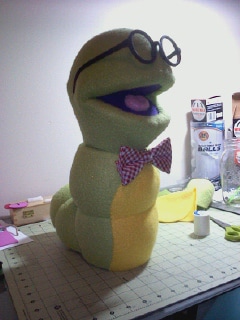
 Whenever I begin working on a puppet, I always start with a sketch. It doesn't matter if I have what I believe is a fully formed concept in my mind; I always start with a sketch. This way I can see multiple character options without spending too much time messing with a physical model. With the Bookworm, I already had an idea in mind: I have always wanted to try Scooter eyes. After sketching a few concepts (and picking the 2 I liked best) I came to the conclusion that I would try and make the Scooter style eyes. I started by mocking up the eyes with paper to see what size pupils I would need, glasses placement, etc. The Bookworm's eyes were the last thing I created because I always save the most fun part for last (plus the eyes are what really sell a character). I think the eye style turned out well and ended up giving the Bookworm a lot of personality.
 Some people have inquired about seeing the process in which I design and create my puppets, so this blog is in response to that. In this blog I will try and document (as much as I can) the process from ideation to finished puppet. If you see something and have a question, do not be afraid to ask! And always, if you would like a custom puppet, please contact me at [email protected]. |
Jesse Moorein this blog you'll get a small glimpse into what goes into the puppets I design and create. If you have any questions, please email me at [email protected]. Enjoy! Archives
May 2024
Categories |


 RSS Feed
